Loading ...
Loading ...
Loading ...
EN
21
Installation
www.bora.com
XX
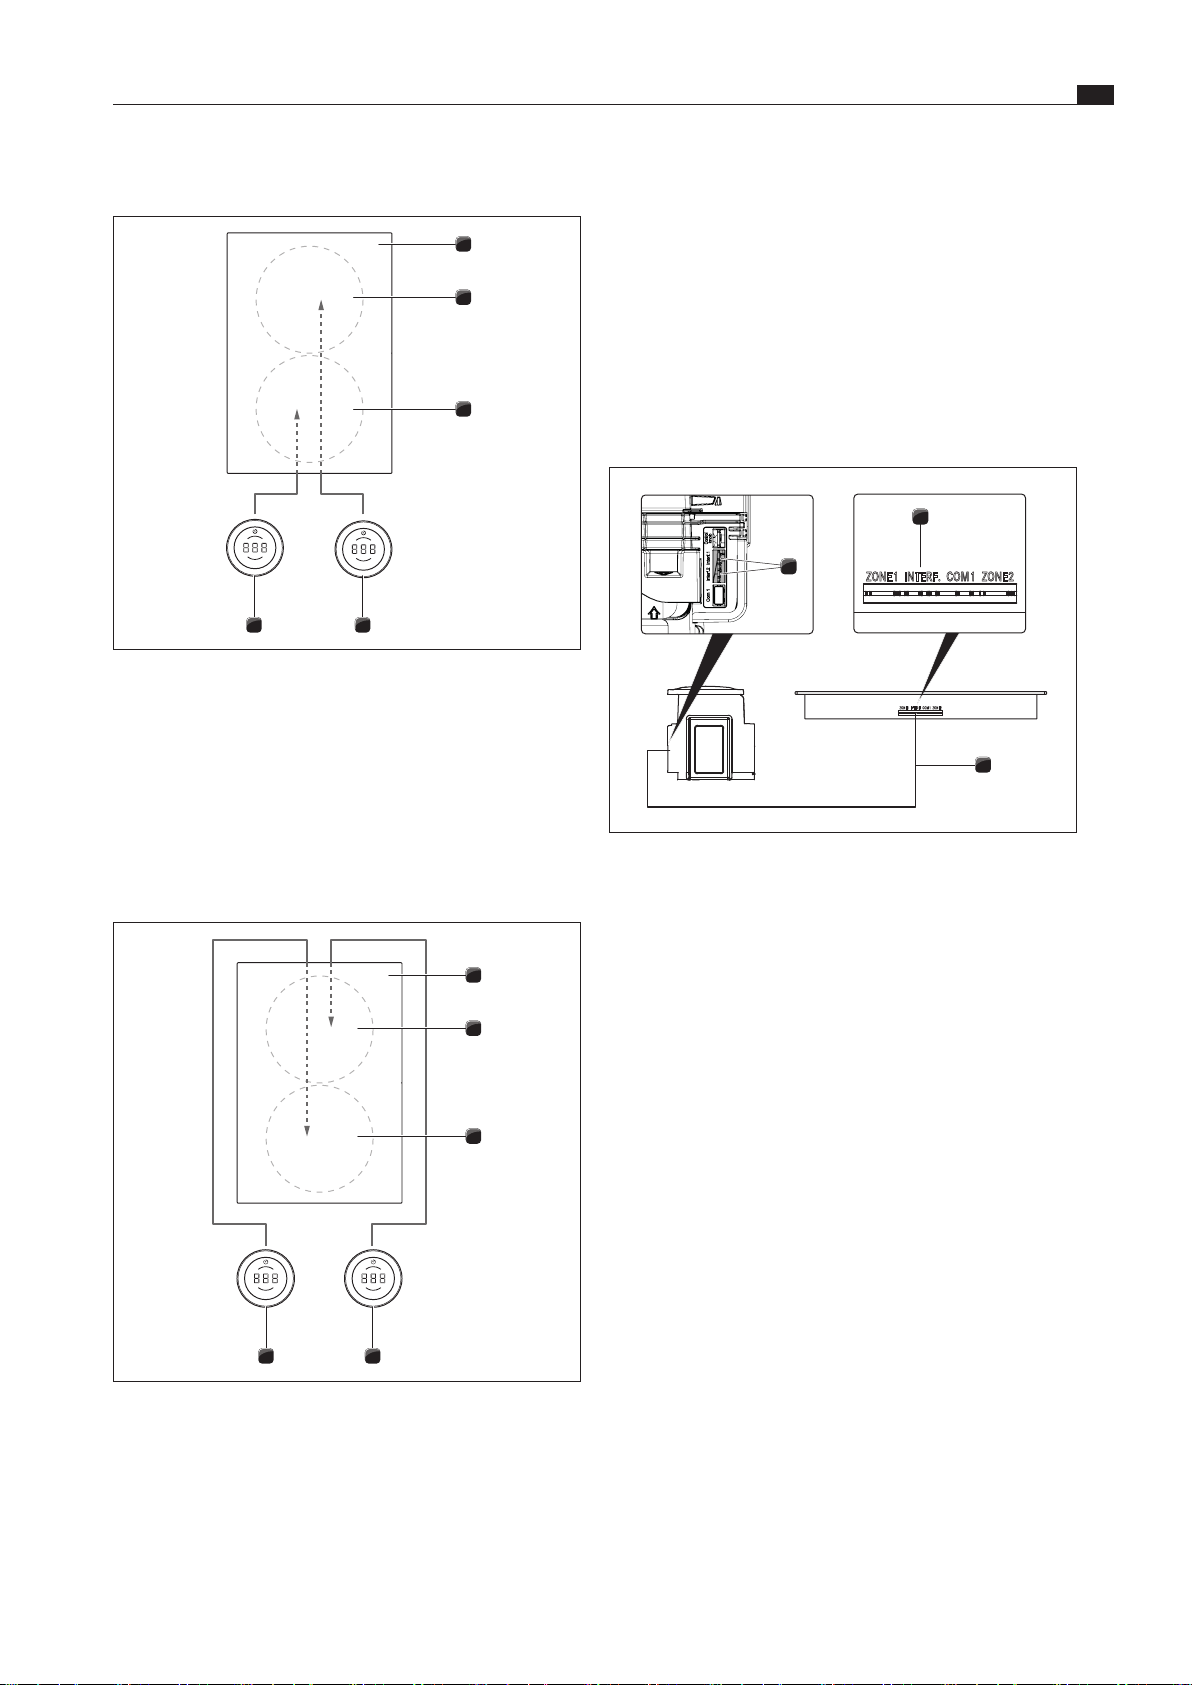
Connect the port on the back of the left control knob [5] to
the “zone 2” port on the cooktop [1].
XX
Connect the port on the back of the right control knob [4] to
the “zone 1” port on the cooktop [1].
XX
Using the configuration menu, set the correct allocation of the
cooking zones in the control knob display (see configuration
menu – 0° or 180° installation).
5.8.2 Establishing contact between the
cooktop extractor and cooktops
2
ZONE1 INTERF. COM1 ZONE2
1
ZONE1 INTERF. COM1 ZONE2
3
Fig. 5.23 Establishing contact between the cooktop extractor
and cooktops
[1] Cooktop extractor communication cable ports (x 2)
[2] Cooktop communication cable port
[3] Ribbon cable
XX
Using the communication ports provided, connect the
cooktop extractor [1] to the cooktop or cooktops [2].
XX
Only use the cables supplied in the scope of delivery.
i
The full range of functions on the appliances will only
be available if the cooktop extractor and cooktops are
connected correctly.
5.8.3 Connecting the power supply
XX
Observe all national and regional laws and regulations as
well as the supplementary regulations of the local utility
companies.
i
The appliances may only be connected to the mains
power supply by certified specialists. The specialist also
assumes responsibility for the proper installation and
commissioning.
Connecting the cooktop to the power supply
The power supply cable to be used (already pre-installed) must
comply with certain, appliance-specific requirements (see table
“Fuse protection and minimum cross-section”).
Standard cooking zone connection
5 4
3
2
1
Fig. 5.21 Standard connection of appliances that connect at
the front
[1] Cooktop
[2] Rear cooking zone (zone 2)
[3] Front cooking zone (zone 1)
[4] Rear cooking zone control knob (zone 2)
[5] Front cooking zone control knob (zone 1)
Connecting the cooking zones when the cooktop is
installed rotated by 180°
5 4
3
2
1
Fig. 5.22 Connecting the cooking zones when the cooktop is
installed rotated by 180° and the ports are on the
front of the appliance
[1] Cooktop
[2] Rear cooking zone (zone 1)
[3] Front cooking zone (zone 2)
[4] Rear cooking zone control knob (zone 1)
[5] Front cooking zone control knob (zone 2)
Loading ...
Loading ...
Loading ...