Loading ...
Loading ...
Loading ...
EN
19
Installation
www.bora.com
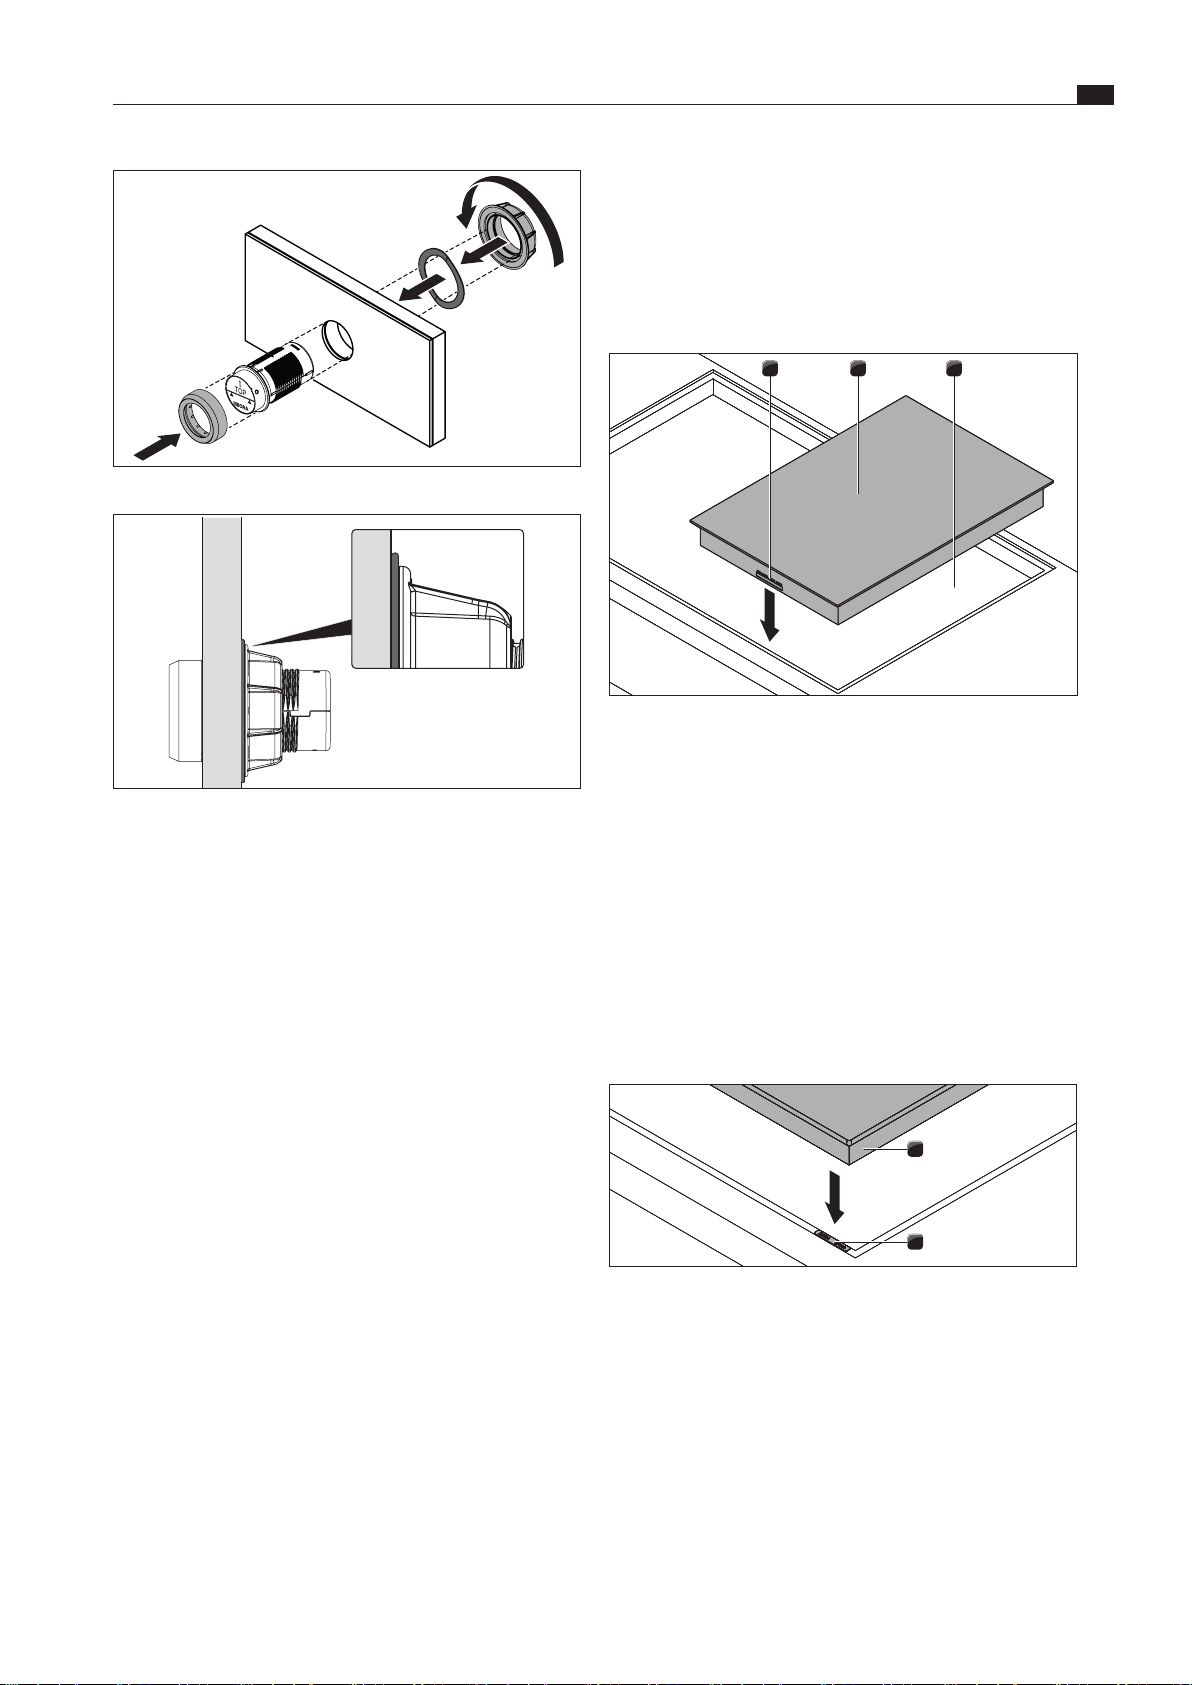
5.7.1 Installing the cooktop
Inserting the cooktop (ports on the front)
i
When installing cooktops PKFI3 and PKI3, pay attention
to the position of the cooktop display (alternatively, the
cooktop can be installed rotated by 180°).
321
Fig. 5.16 Inserting the cooktop
[1] Control knob and automatic extractor function ports (front)
[2] Cooktop
[3] Worktop cut-out
XX
Insert the cooktop [2] into the worktop cut-out [3].
XX
Align the cooktop [2] exactly.
XX
For a normal installation, please note that the ports for the
control knobs and the automatic extractor function [1] are at
the front.
i
The connection cables should be guided to the rear. Use
the cable holders provided.
Levelling the cooktop (if necessary)
1
2
Fig. 5.17 Cooktop and height adjustment plates
[1] Cooktop
[2] Height adjustment plates
XX
If applicable, insert the height adjustment plates [1].
Fig. 5.14 Fitting the control knob
Fig. 5.15 Wave spring when installation is complete
XX
Remove the knob ring [4].
XX
Unscrew the universal nut [2].
XX
Remove the wave spring [5].
XX
Insert the knob housing [1] from the front through the hole in
the panel.
XX
Attach the wave spring [5] to the knob housing [1] from the
rear (not in the case of steel fronts).
XX
Screw the universal nut [2] onto the knob housing [1] from the
rear and tighten a little.
XX
Align the knob housing [1] so it is level.
XX
Tighten the universal nut [2].
XO
The wave spring (if used) must be pressed flat.
XX
Remove the sticker [3].
XX
Place the knob ring [4] on the knob housing [1].
5.7 Installing the cooktops
i
Clearance of one millimetre should be planned between
the built-in appliances.
i
A clearance of two millimetres should be planned around
the built-in appliances.
i
It is recommended to install a mounting rail between
adjacent cooktops (mounting rail PZMS available as an
accessory).
i
The cooktop can also be installed rotated by 180°.
Loading ...
Loading ...
Loading ...