Loading ...
Loading ...
Loading ...
FINAL INSTALLATION
14
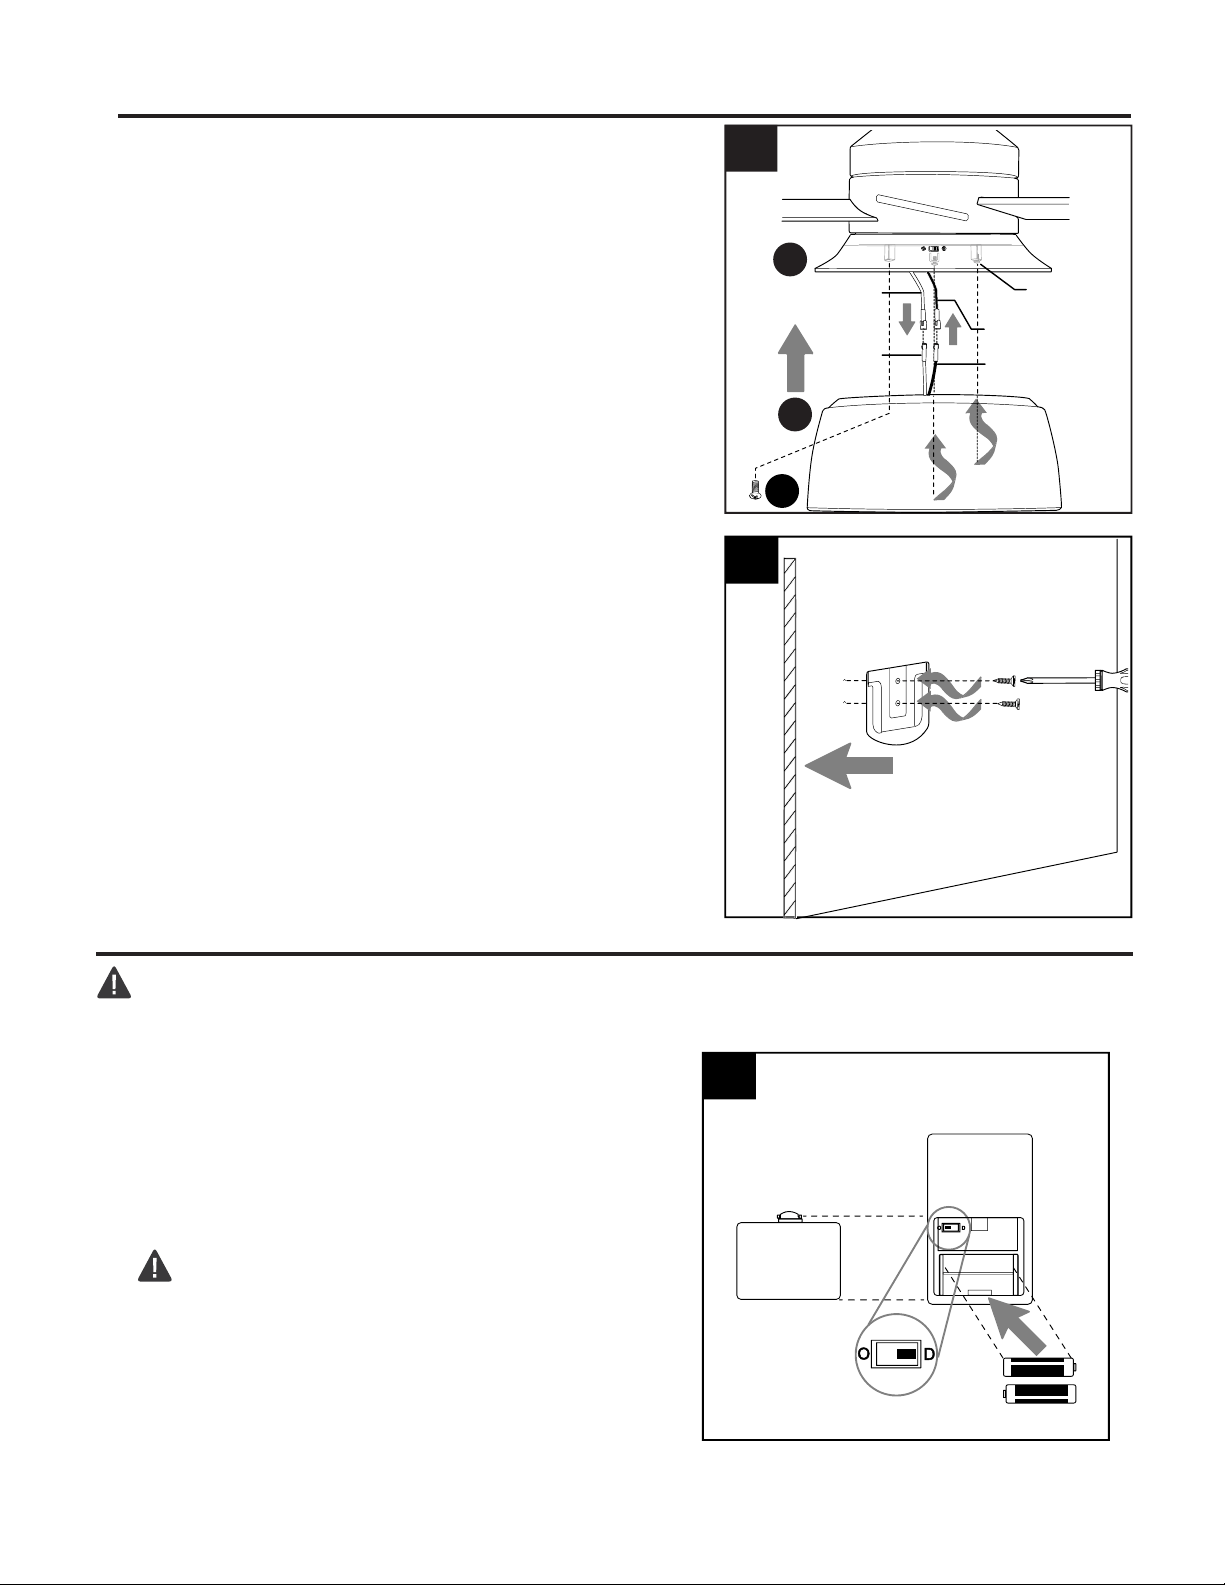
6.
OPERATING INSTRUCTIONS
Locate BLUE and WHITE wires in light kit fitter
(H). Connect WHITE wire from LED light kit (F) to
WHITE wire from light kit fitter (H). Connect
BLACK wire from LED light kit (F) to BLUE wire
from light kit fitter (H). Make sure molex
connections are secure.
Carefully arrange wires inside light kit fitter (H).
Align holes in LED light kit (F) with posts in light
kit fitter (H). Re-insert light kit fitter screws (K)
previously removed (step 4, page 13). Tighten all
three light kit fitter screws (K) securely.
5.
6
Remote Control
Bracket
Wall
If you wish to use the remote control bracket
from remote pack (O), install screws from remote
pack (O) through bracket and into the desired
installation site. The remote control transmitter
from remote pack (O) rests inside the bracket.
Bracket
Screws
CAUTION: The remote control transmitter can be programmed to multiple receivers or fans. If this is
not desired, turn wall switch off to any other programmable receiver or fan.
Remove protective covering from batteries in
remote pack (O) and discard protective covering.
Remove battery cover from back of remote control
transmitter in remote pack (O). Install two AAA
batteries (included).
Replace battery cover on remote control transmitter.
WARNING: Choking Hazard - Small parts.
Keep battery away from children.
NOTE: The dimmer switch located on the backside
of the transmitter (labeled O and D) has been
pre-set to the “ON” position (D). If you do not wish
to have dimming capability, please move the switch
to the “OFF” position (O).
1.
1
Battery
Cover
Battery
NOTE: Battery is NOT rechargeable. Remove battery with low or no charge and dispose of properly.
(back)
Remote Control
Transmitter
3
5
BLUE
WHITE
WHITE
BLACK
Loosened
Screws
F
H
K
Loading ...
Loading ...
Loading ...