Loading ...
Loading ...
Loading ...
E-19
Timer and sleep operation (Remote
control only) (continued)
■ To use timer and sleep operation together
Sleep and timer playback:
For example, you can fall asleep listening to the radio and
wake up to CD in the next morning.
1 Set the sleep time (see above, steps 1 - 5).
2 While the sleep timer is set, set the timer playback
(steps 2 - 10, page 18).
Sleep timer
setting
Timer playback
setting
End time
Timer playback
start time
Sleep operation will
automatically stop
Desired time10 - 90 minutes
Enhancing your system
The connection cord is not included. Purchase a
commercially available cord as shown below.
1
2
3
4
5
4
5
3
2
1
OPEN / CLOSE
TUNING
PRESET
USB
AUDIO IN
AUDIO IN
USB
PHONES
TAPE
TUNER
CD
TIMER
ON/ STANDBY
(BAND)
VOL.
VOL.
REMOTE
SENSOR
AUDIO IN
PHONES
Portable audio
player, etc.
Audio cable (not supplied)
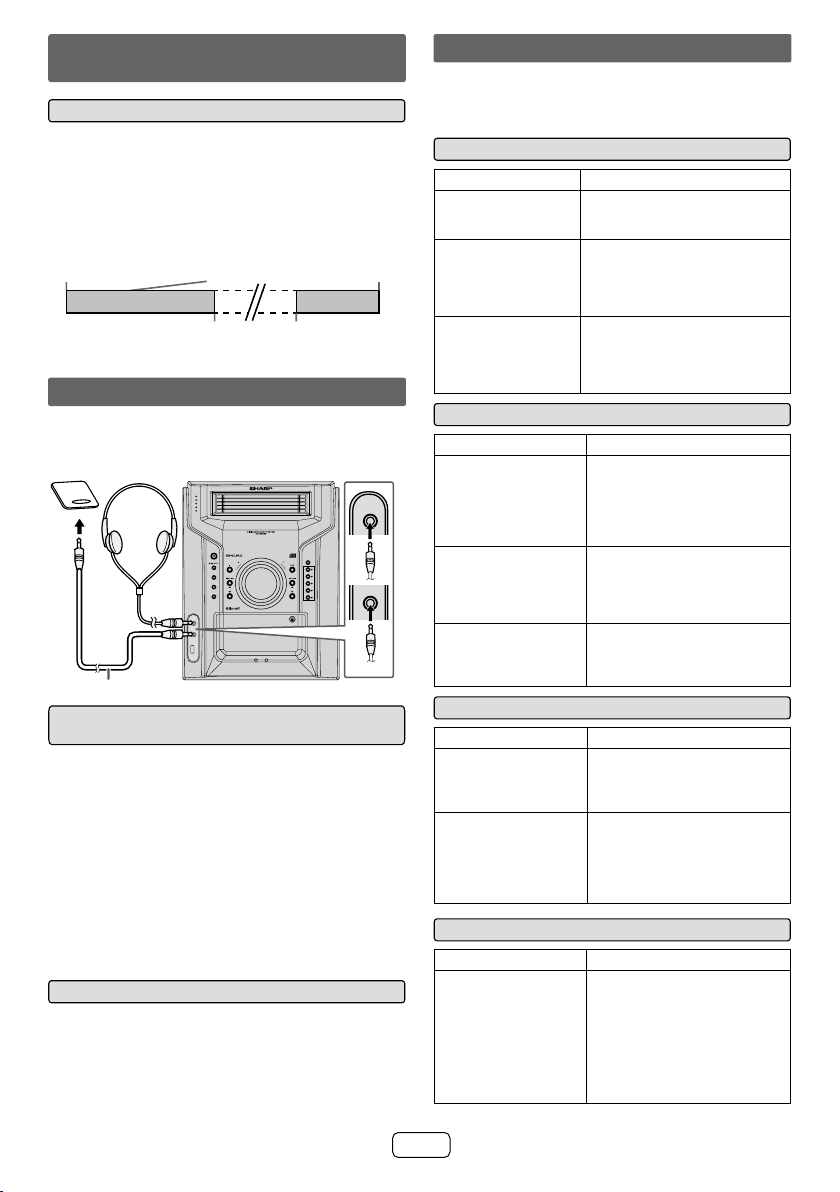
■ Listening to the playback sounds of
portable audio player, etc.
1 Connect a portable audio player etc. to the front
AUDIO IN jack.
2 Press the ON/STANDBY button to turn the power on.
3 Press the AUDIO IN/USB button repeatedly to select
AUDIO IN.
4 Play the connected equipment.
If volume level of the connected device is too high,
sound distortion may occur. Should this happen, lower
the volume of the connected device.
If volume level is too low, increase the volume of the
connected device.
Note:
To prevent noise interference, place the unit away from
the television.
■ Headphones
● Before plugging in or unplugging the headphones,
reduce the volume.
● Be sure your headphones have a 1/8" (3.5 mm)
diameter plug and impedance between 16 and 50
ohms. The recommended impedance is 32 ohms.
● Plugging in the headphones disconnects the speakers
automatically. Adjust the volume using the VOLUME
control.
Troubleshooting chart
Many potential problems can be resolved by the owner
without calling a service technician. If something is wrong
with this product, check the following before calling your
authorized SHARP dealer or service center.
■ General
Symptom Possible cause
● The clock is not set
to the correct time.
● Did a power failure occur?
Reset the clock. (Refer page
17)
● When a button is
pressed, the unit
does not respond.
● Set the unit to the power
standby mode and then turn
it back on.
● If the unit still malfunctions,
reset it. (Refer page 20)
● No sound is heard. ● Is the volume level set to “0”?
● Are the headphones
connected?
● Are the speaker wires
disconnected?
■ CD player
Symptom Possible cause
● Playback does not
start.
● Playback stops in
the middle or is not
performed properly.
● Is the disc loaded upside
down?
● Does the disc satisfy the
standards?
● Is the disc distorted or
scratched?
● Playback sounds
are skipped, or
stopped in the
middle of a track.
● Is the unit located near
excessive vibrations?
● Is the disc very dirty?
● Has condensation formed
inside the unit?
● “ER-CD21”
appears on the
display.
● Is the disc tray stopped with
force? Set the unit to the
power standby mode and
then turn it back on.
■ Cassette deck
Symptom Possible cause
● Sound skipping.
● Cannot hear treble.
● Sound uctuation.
● Is there any slack?
● Is the tape stretched?
● Are the capstans, pinch
rollers, or heads dirty?
● Cannot remove the
tape.
● If a power failure occurs
during playback, the heads
remain engaged with the
tape. Do not open the
compartment with great
force.
■ Remote control
Symptom Possible cause
● The remote control
does not operate.
● Is the AC power cord of the
unit plugged in?
● Is the battery polarity
correct?
● Is the battery dead?
● Is the distance or angle
incorrect?
● Does the remote control
sensor receive strong light?
Loading ...
Loading ...