Loading ...
Loading ...
Loading ...
ASSEMBLY
• Move guide bar forward by turning the adjusting screw
clockwise until chain is snug in guide bar grooves.
o Now, install bar clamp making sure the adjusting pin is
positioned inthe lower hole in the guide bar,
Install two (2) bar clamp nuts finger tight
,_Now proceed to the "Chain Adjustment section.
Guide Bar
t
Adjusting
Pin
"__ -Bar Clamp
Figure 11
Bar Clamp
Nuts
Figure 12
CHAIN ADJUSTMENT (Fig, 13, 14 8= 15)
Roll chainaround guide bar toensure kinks do not exist,
(rotates freely).
Assure bar clamp nuts are loosened (fingertight).
Turn adjusting screw clockwise until chain just barely
touches the bottom ot guide bar.
= Roll chainaround guide bar to ensureall links are in bar
groove..
• Lift up tip of guide bar to check for sag.,Release tip of
guide bar, then turn adjustingscrew 1/4 turn clockwise.
Repeat thisstep untilsag does not exist..
• While lifting tip of guide bar, tighten bar clamp nuts with
the bar tool(provided). Torque 10-15 ft-lbs.
Figure 13
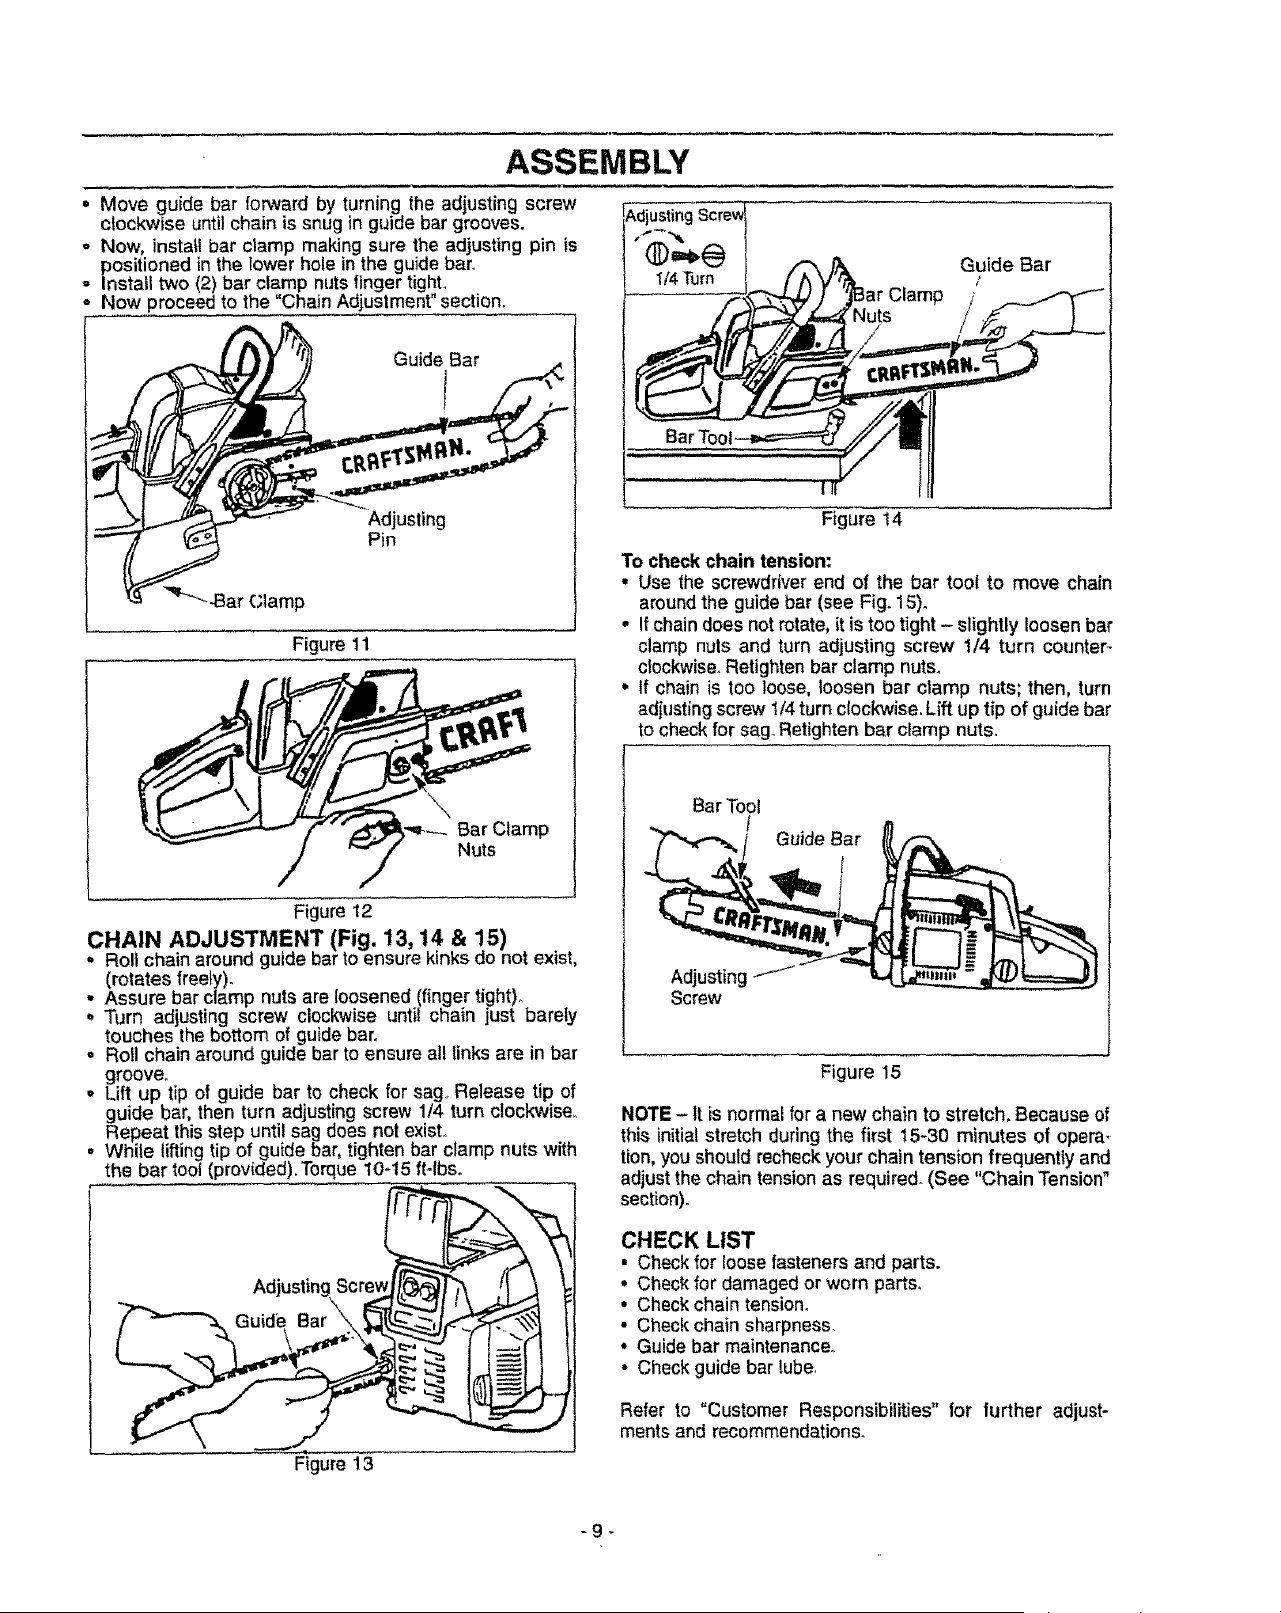
Figure t4
Guide Bar
/
To check chain tension:
• Use the screwdriver end of the bar tool to move chain
around the g[,tidebar (see Fig. 15)_
• Ifchain does not rotate, it is too tight - slightly loosen bar
clamp nuts and turn adjusting screw 1/4 turn counter-
clockwise. Retighten bar clamp nuts.
• If chain is too loose, loosen bar clamp nuts; then, turn
adjusting screw 1/4turn clockwise, Lift up tip of guide bar
to check for sag Retighten bar clamp nuts,
Bar Tool
/
Guide Bar
t
Figure 15
Adjusting
Screw
NOTE- It is normal for a new chain to stretch, Because of
this initial stretch during the first 15-30 minutes of opera.
lion,you should recheck your chain tension frequently and
adjust the chain tension as required. (See "Chain Tension"
section).
CHECK LIST
• Check for loosefasteners and parts.
• Check for damaged or worn parts°
• Check chain tension,
• Check chain sharpness_
• Guide bar maintenance.
• Check guide bar lube,
Refer to "Customer Responsibilities" for further adjust-
ments and recommendations_
-9_
Loading ...
Loading ...
Loading ...