Loading ...
Loading ...
Loading ...
SERVICE AND ADJUSTMENTS
CHAIN Now proceed to the "Chain Adjustment"section,
REPLACEMENT (Fig. 46, 47, 48 & 49)
CAUTION: Wear protective gloves when han-
dling chain.The chain issharp and cancut you
even when it is not moving.
It is normal for a new chain to stretch.Because
of this initial stretch during the first 15-30
minutes of operation you should recheckyour
chain tension frequently and adjust the chain
tension as required. See chaintension section.
o Move on/stop switch to the "Stop" position,
- Replace the old chain when it becomes worn or dam-
aged.
• Use only the Low-Kickback replacement chain specified
in the repair parts list or as specified on the replacement
bar and chain decal located on the chain saw,
• See your Sears Service Center to replace and sharpen
individual cutters for matching your chain.
. Loosen and remove the 2 bar clamp nuts,,
= Remove bar clamp.
• Remove the old chain.
i urn adjusting screw by hand counterclockwiseuntil
adjusting pinjust touches the stop.
Carefutly remove new chain from package,,Hold chain
with the drive links as shown in Figure 47,
Place chain over and behind the clutch.
Fit bottom of drive linksbetween teeth in sprocketnose.
Fit chain drive linksinto top of guide bar. Figure47.
Bar Clamp
Figure 46
I ,_" Cutters __" Depth Gauge l
Figure 47
• Move guide bar fonNard by turning the adjusting screw
clockwise untit chain issnug in guide bar grooves°
° Now instaltbar clamp,
Guide Bar
Guide Bar
,_ _ Mounting Botts
Lower Hole
Figure 48
• Install bar clamp nuts and finger tighten only. Do not
tighten any further at this point.
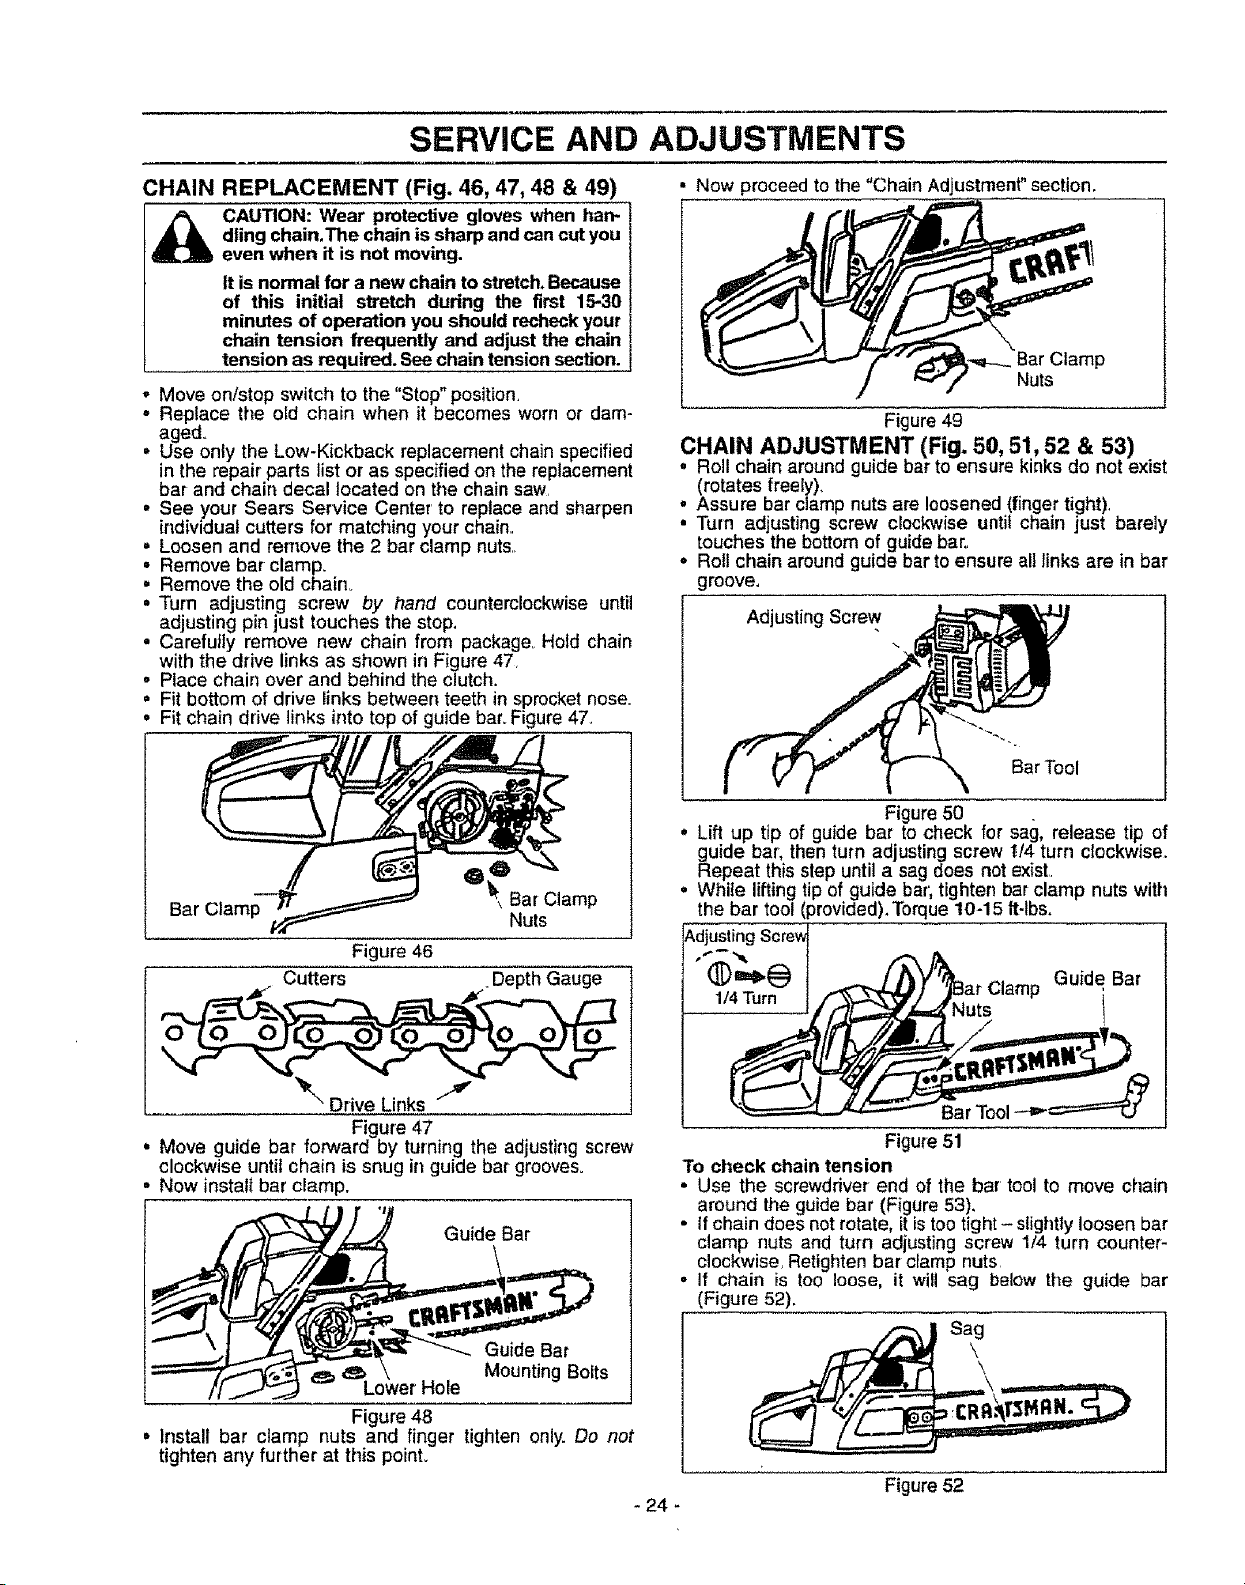
Bar Clamp
Nuts
Figure 49
CHAIN ADJUSTMENT (Fig. 50, 51, 52 & 53)
Roll chain aroundguide bar to ensurekinks do not exist
(rotates freely),
° Assure bar clamp nuts are loosened(fingertight),
• Turn adjusting screw clockwise untitchain just barely
touches the bottom of guide bar,,
o Roll chain aroundguide bartoensure all linksare in bar
groove,
AdjustingScrew
Bar Tool
Figure 50
• Lift up tip of guide bar to check for sag, release tip of
guide bar',then turn adjusting screw t/4 turn clockwise..
Repeat this step untila sag does not exist.
° While liftingtip of guide bar;tighten bar clamp nuts with
the bar tool (provided).Torque 10-15 lt-tbs.
_,djustingScrew
.'_-- _ .,'_ t_
® JhY' Gu,d Bar
,,,To,°j j.. 1
Figure 51
To check chain tension
° Use the screwdriver end of the bar toolto move chain
around the guide bar (Figure 53),
° if chain does not rotate, itistoo tight - slightly loosen bar
clamp nuts and turn adjusting screw 1/4 turn counter-
clockwise, Retighten bar clamp nuts,
• If chain is too loose, it will sag below the guide bar
(Figure 52).
Sag
Figure 52
- 24 -
Loading ...
Loading ...
Loading ...