Loading ...
Loading ...
Loading ...
24
• Clean the outside edges of the trim rings while the
knobs are removed. Wipe them with a soft damp rag.
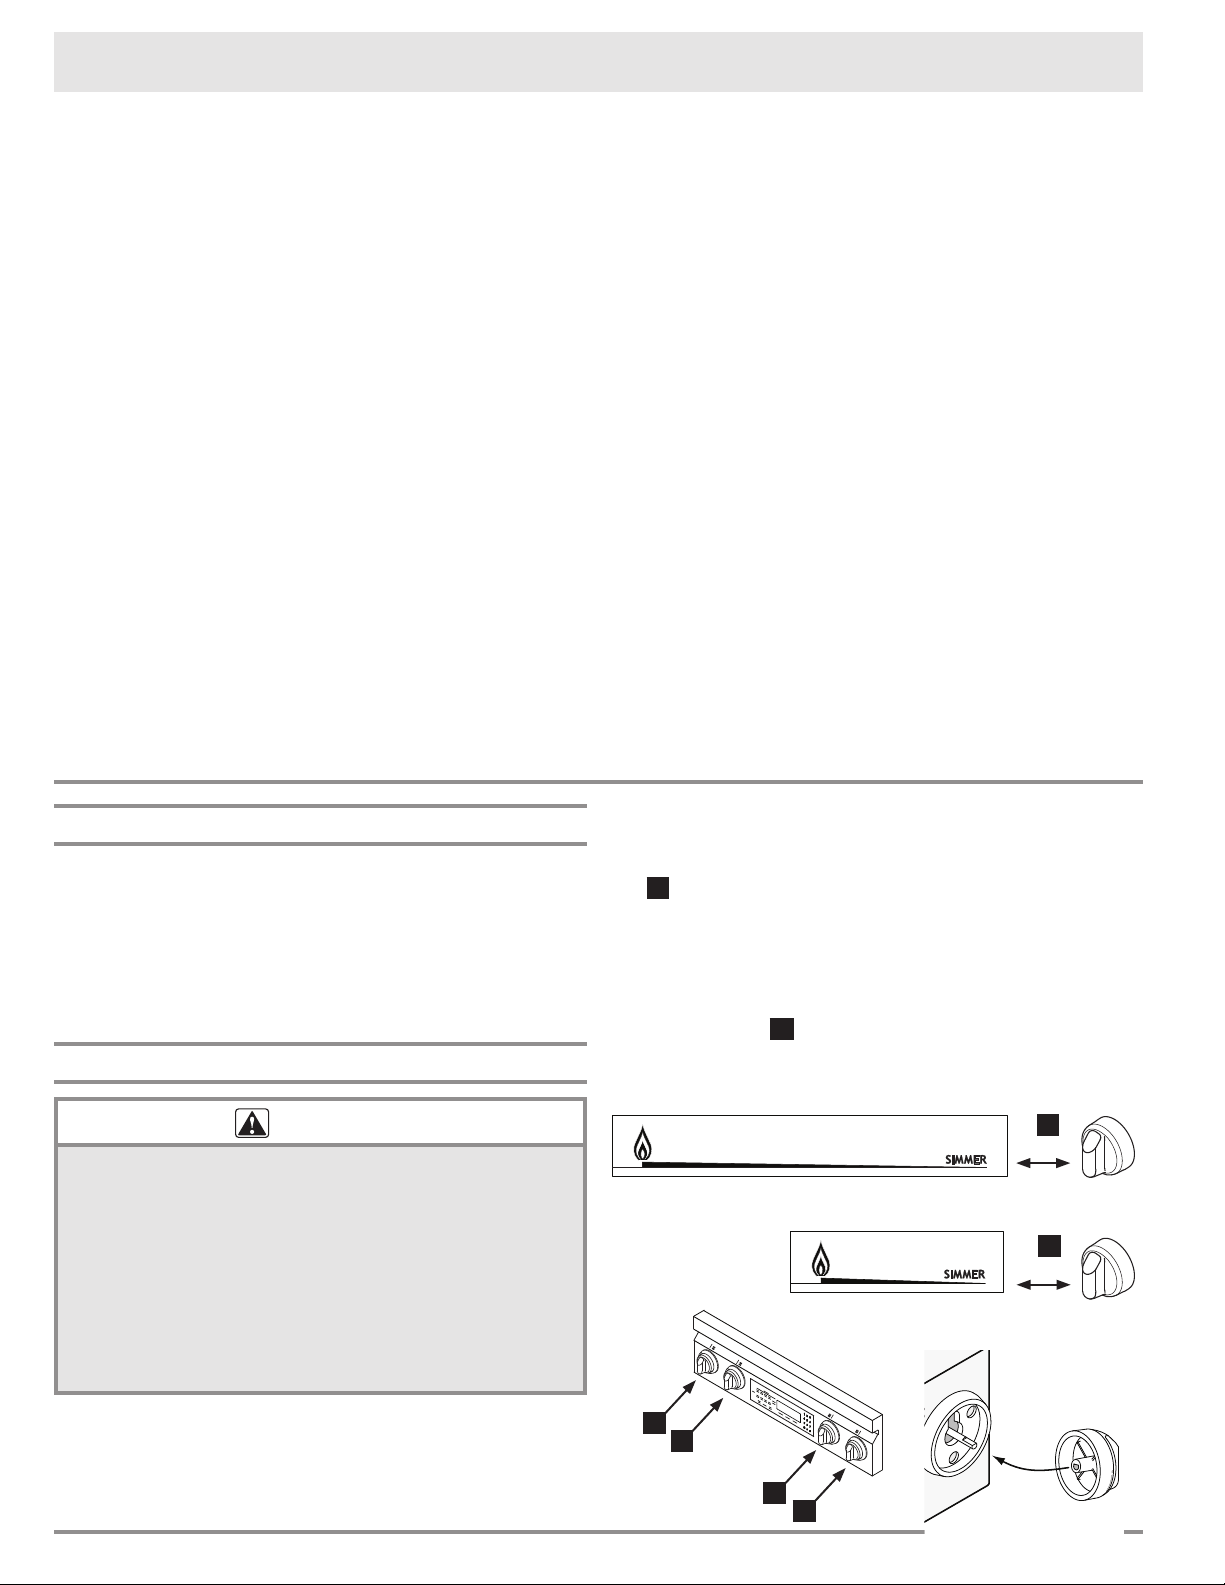
• After cleaning, attach the SimmerSear burner knob
A as shown below. The SimmerSear knob has a
wider space between the large flame icon and the
simmer icon than the standard burner knobs. Align
the “D-shaped” opening on the back with the end of
the valve shaft. Carefully push it on until it stops.
• Attach the remaining knobs which operate the stan-
dard burners
B . If you have the optional Dacor
grill or griddle, the two knobs with the words “MAX
GRIDDLE” go on the right burner valve stems.
General Cleaning Information
The cooktop is exposed to extremely high temperatures.
The grates are put under a lot of stress when hot uten-
sils are placed on them. In addition, the cooktop parts
are occasionally exposed to acidy food spill-overs. These
severe operating conditions, cause the porcelain enamel
parts on your cooktop to undergo a change in appearance
over time. If you care for and clean these parts carefully,
you will slow down, but not eliminate, the aging process.
Cleaning the Knobs and Trim Rings
WARNING
• Do not soak the knobs in water or put them in a
dishwasher.
• Do not remove the trim rings from the range. Clean
only the outside edges of the trim rings. If you get
moisture inside the range, damage can occur.
• To prevent damage, do not use abrasive or
corrosive cleaners or applicators.
• If you have the optional Dacor grill or griddle,
installing the range knobs in the wrong position may
result in damage to it.
• Wash the knobs with a solution of warm soapy water.
Dacor recommends hand dishwashing liquid.
• Turn the knobs to the OFF position to remove them
for cleaning or replacement. Grasp each knob and pull
straight back, off of the valve shaft.
Care and Cleaning
SimmerSear Knobs
Standard Knobs
A
B
B
B
A
B
After the self clean cycle is complete:
• The door latch will release when the inside has cooled
down. The clean icon, lock icon and “ON” will disap-
pear from the display. Exercise caution because the
oven will still be hot (about 400°F) at the time the
door lock is released.
• Reinstall the convection filter and oven racks before
using your oven.
• You may notice a powder ash residue in the bottom
of the oven after self cleaning. This is normal. Use a
damp cloth or sponge to wipe up the residue after the
oven cools down.
Self Cleaning Tips
• If any soil remains in the oven after the self clean
cycle is done, you may repeat the cycle if you want.
• Self clean the oven regularly to prevent excessive soil
build-up. Doing so will make the self clean cycle work
better and reduce smoke and odors.
Setting the Oven to Self Clean at a Later Time
7. Prepare the oven for self cleaning as instructed on
page 23. Observe all safety precautions and remove
all items listed from inside the oven. Clean the door
gasket and around the door as instructed.
8. Close the oven door.
9. Press the SELF CLEAN key.
10. Press the START TIME key.
11. Enter the desired start time. For example, press 1-2-
3-0 for 12:30. You may enter a time up to 22 hours
and 59 minutes ahead of the present time.
12. Press START.
13. When you press START, “Delay” will appear on the
display and the oven door will lock. The oven will start
to self clean at the time you have selected.
While the oven is set to clean at a later time:
• If you want the display to return to the clock, you
may push the CLOCK key.
• If the clock is displayed, you may push the START
TIME key to check the self clean start time.
• When self clean starts, “Delay” will disappear and
“ON” will appear on the display.
To cancel the time delayed self clean cycle:
• Press CANCEL · SECURE.
• If the self clean process has not started, allow about
a minute for the door to unlock before attempting to
use the oven.
• If the oven is in the middle of the self clean process,
the door will unlock when the oven has cooled down
enough to open safely. The oven will still be hot
(about 400 °F).
Loading ...
Loading ...
Loading ...