Loading ...
Loading ...
Loading ...
17
LIGHT TUBE REPLACEMENT - 24” W. Dual Zone Models
NOTE: Please contact your Viking Range Corporation parts distributor or dealer to order new light tubes. Use only
approved replacement light tubes from your dealer or manufacturer.
This product uses two light tubes to illuminate the interior of the wine cellar. There is one light tube located behind the
control housing in the the upper compartment and one light tube attached to the underside of the cabinet divider in
the lower compartment.
Use replacement instructions and drawing from the 15”W. Models for this Dual Zone product.
DANGER
ELECTRICAL SHOCK HAZARD
Failure to to disconnect the power cord when changing the light tube,
could result in fire or electrical shock.
LIGHT TUBE REPLACEMENT - 24” W. Single Zone Models
N
OTE: Please contact your Viking Range Corporation parts distributor or dealer to order new light tubes. Use only
a
pproved replacement light tubes from your dealer or manufacturer.
This product uses two 6-watt light tubes to illuminate the interior
of the wine cellar. The light tubes are very reliable electrical
components, but should either or both light tubes not function
properly, please call your local dealer for replacement light tubes.
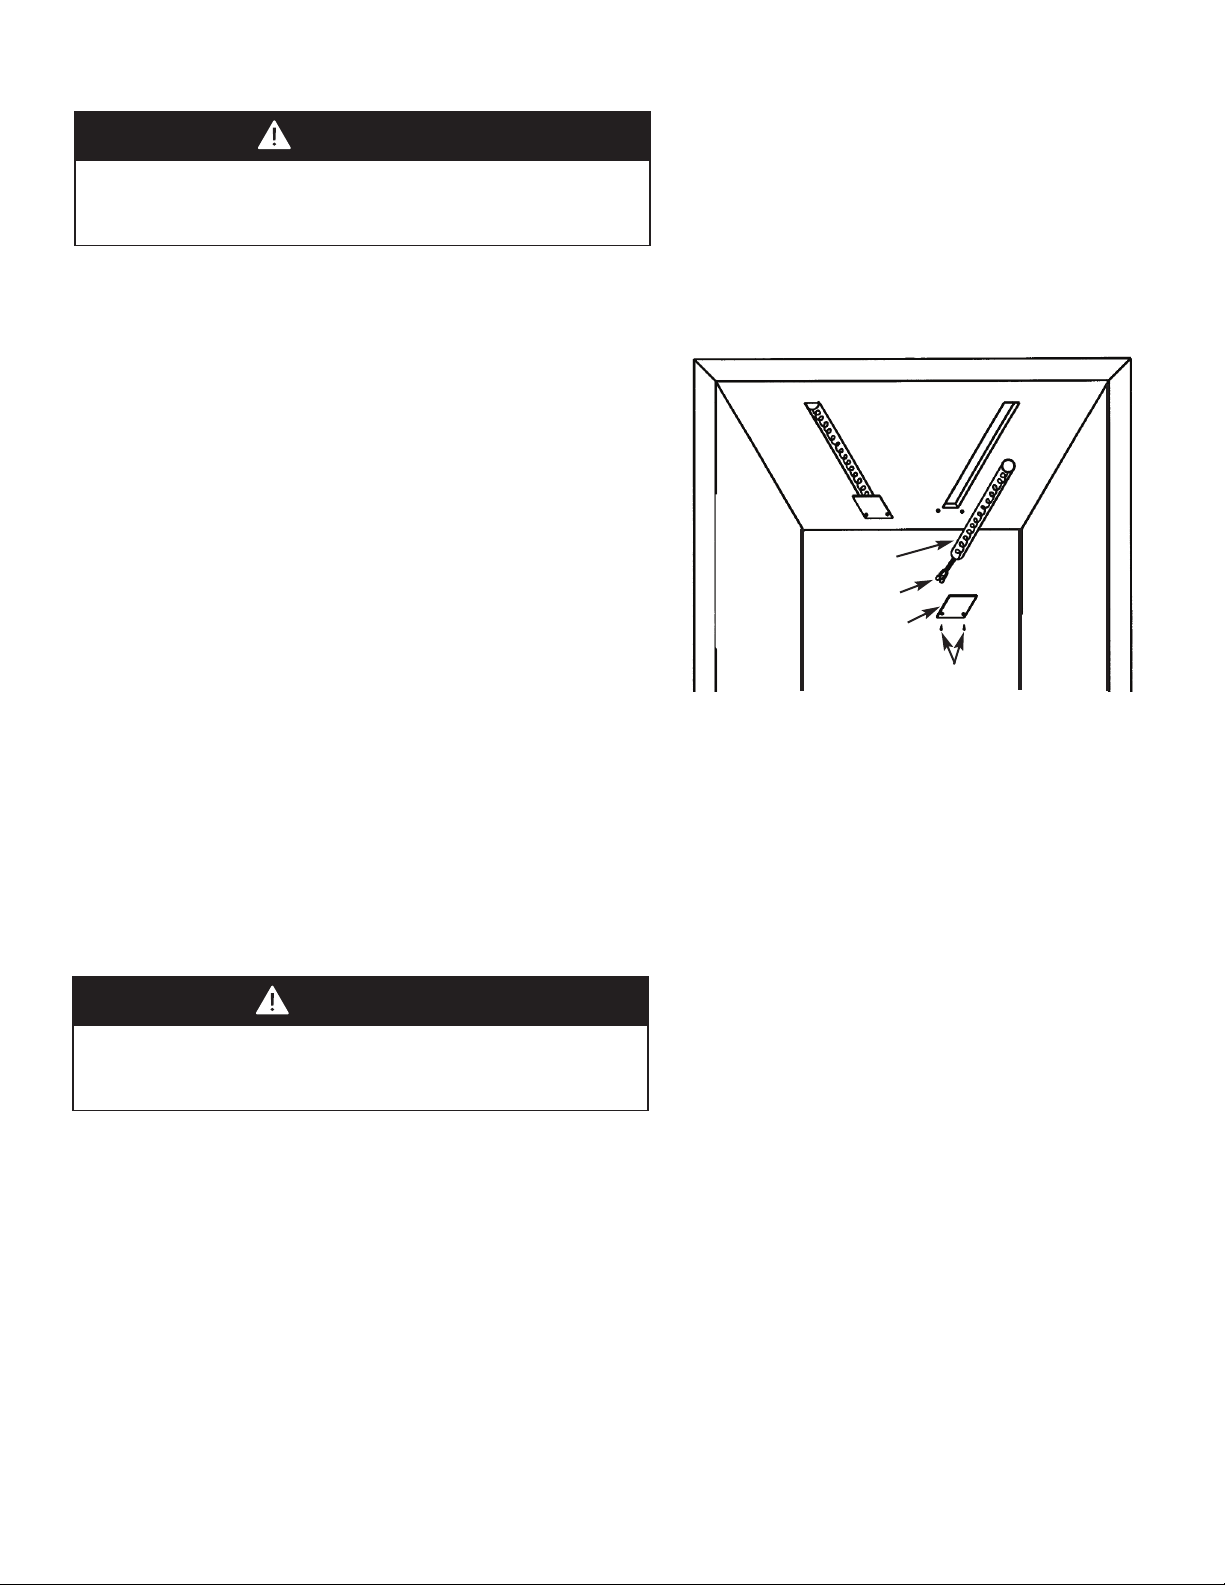
To replace the light tube:
•Use a small Phillips head screwdriver to remove the two screws
holding the cover plate over the back section of the light tube.
Set the screws and cover plate aside for re-assembly later.
•Using a small flat-blade screwdriver, gently lever the front section
of the light tube down to allow it to be pulled clear of the light
housing. Disconnect the two insulated electrical connectors from
the cabinet's electrical cable and discard the old light tube.
•Reconnect the insulated electrical connector of the new light tube
to the cabinet's electrical cable connectors. Make sure they are
secure and fully inserted.
•Carefully realign the light tube's electrical terminals back into the rear of the light enclosure channel making sure not
to crimp them. Gently insert the light tube along the length of the light enclosure channel. Press the light tube gently
into the light enclosure channel. Only a small part of the light tube should project below the ceiling of the unit. DO
NOT USE A HAMMER TO FIT THE LIGHT TUBE.
•Place the light tube terminal cover plate back in its original position on the light enclosure's flange. Re-use the original
two screws to secure the cover in place. Plug the unit into the electrical socket. Check to see if the light tubes operate
properly.
Light tube
Connectors
Cover plate
Screws
DANGER
ELECTRICAL SHOCK HAZARD
Failure to to disconnect the power cord when changing the light tube,
could result in fire or electrical shock.
Loading ...
Loading ...
Loading ...