Loading ...
Loading ...
Loading ...
32
SERVICE AND MAINTENANCE
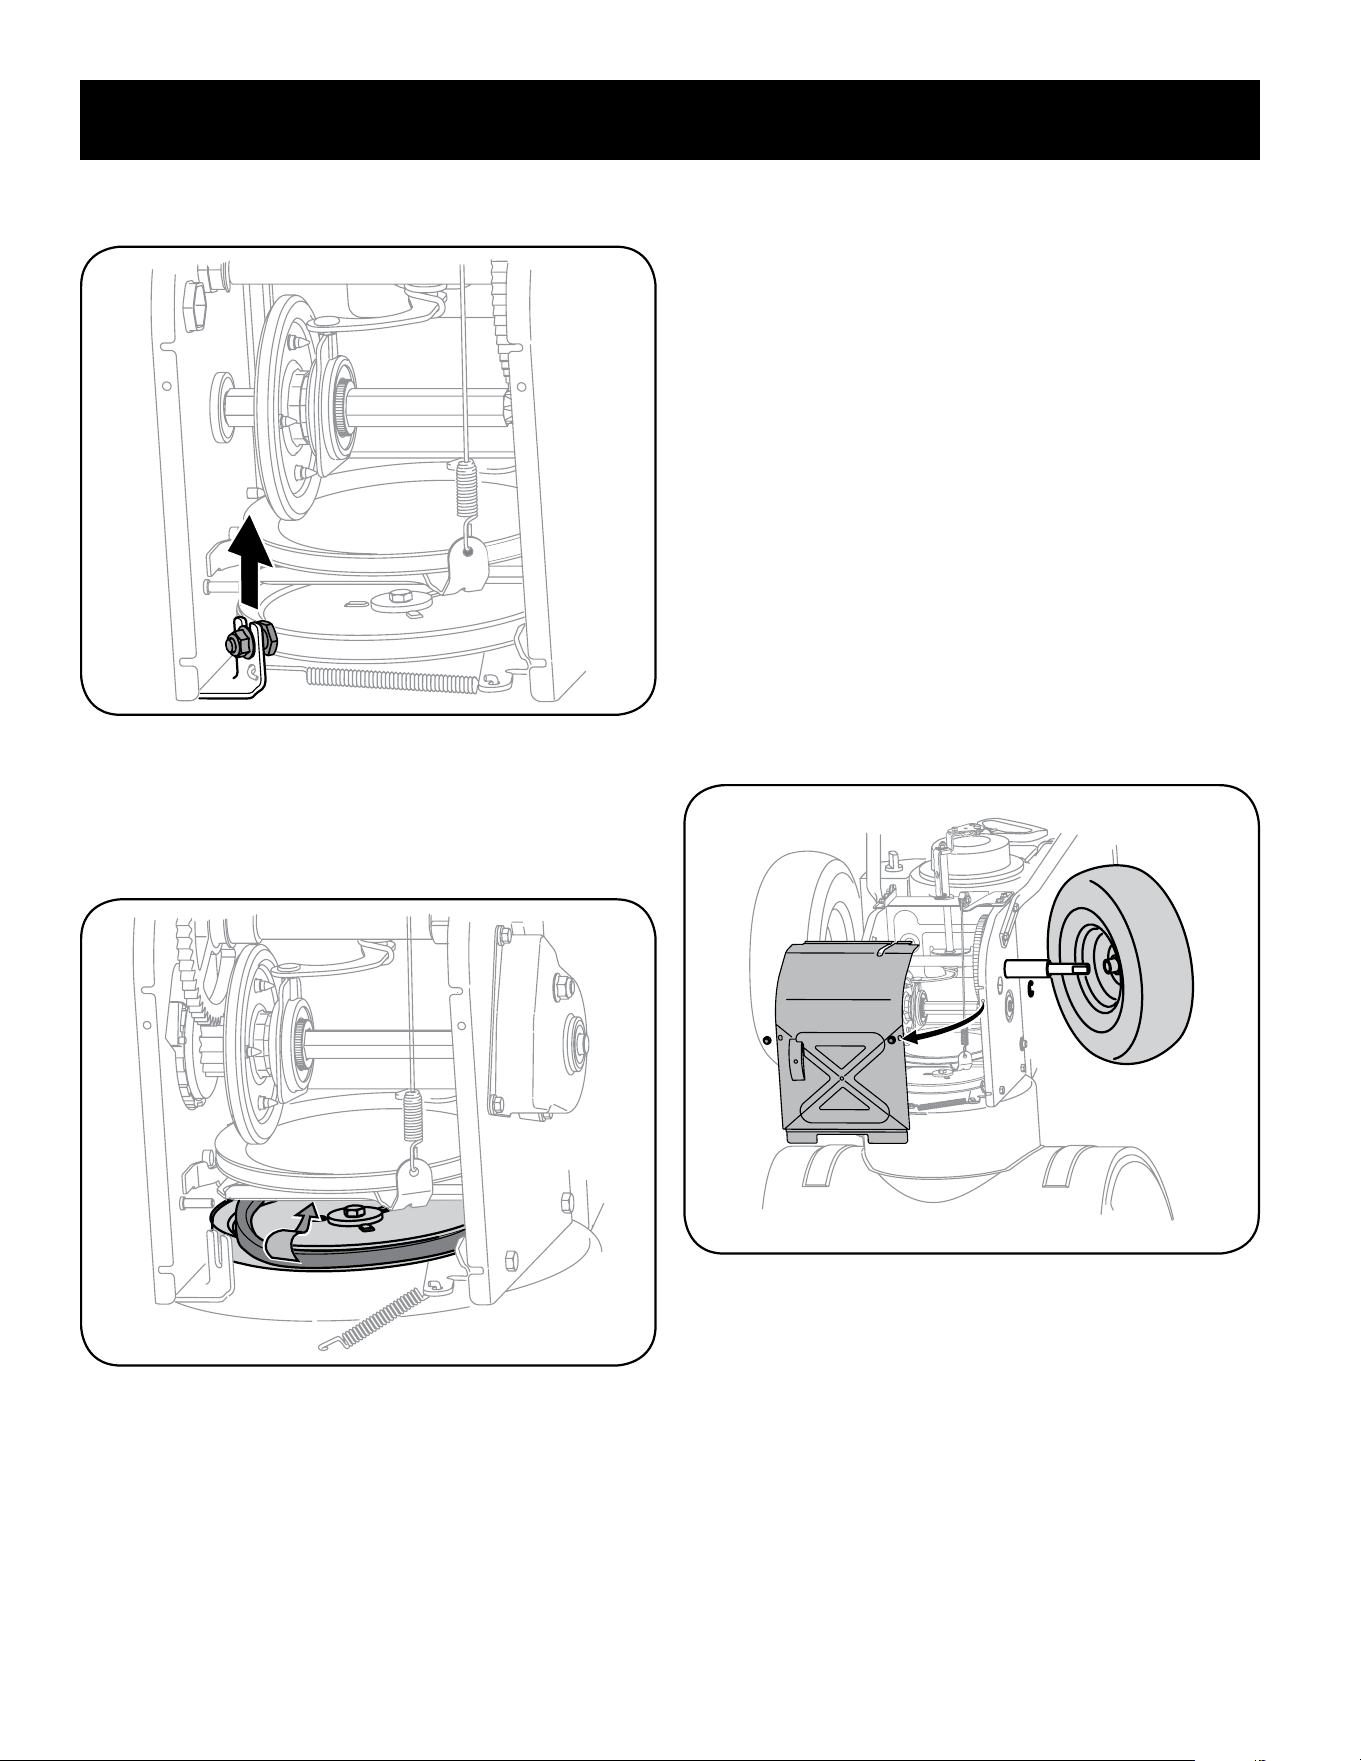
6. Loosen and remove the shoulder screw which acts as a belt keeper. Refer to
Figure 57.
Figure 57
7. Remove the belt from around the auger pulley, and slip the belt between the
support bracket and the auger pulley. See Figure 58.
NOTE: Engaging the auger control will ease removal and reinstallation of the
belt.
Figure 58
8. Reassemble auger belt by following instructions in reverse order.
NOTE: Do NOT forget to reinstall the shoulder screw and reconnect the spring
to the frame after installing a replacement auger belt.
9. Perform the Auger Control test outlined in the Assembly section of this
manual.
Drive Belt
NOTE: Several components must be removed and special tools are required in order
to replace the snow blower’s drive belt. Contact the nearest Parts & Repair Center to
have the drive belt replaced.
Friction Wheel Inspection (Steerable 500 & Non-Steerable Single
Speed 600 Series)
IIf the snow blower fails to drive with the drive control engaged, and performing
the drive control cable adjustment fails to correct the problem, the friction wheel
may need to be replaced. Follow the instructions below. Examine the friction wheel
rubber for signs of wear or cracking and replace wheel if necessary.
1. To prevent spillage, remove all fuel from tank by running engine until it
stops.
2. Place the shift lever in first Forward (F1) position.
3. Carefully pivot the snow blower up and forward so that it rests on the auger
housing.
4. Remove the frame cover from the underside of the snow blower by removing
the self-tapping screws which secure it.
5. Remove the right-hand wheel by removing the screw and bell washer which
secure it to the axle. See Figure 59.
Figure 59
Loading ...
Loading ...
Loading ...