Loading ...
Loading ...
Loading ...
14
Before you record one-time events, make a trial recording to make sure that your
camcorder is working properly,
Keep the lens clean, or the focus cannot be adjusted properly.
It is very easy to start recording scenes,
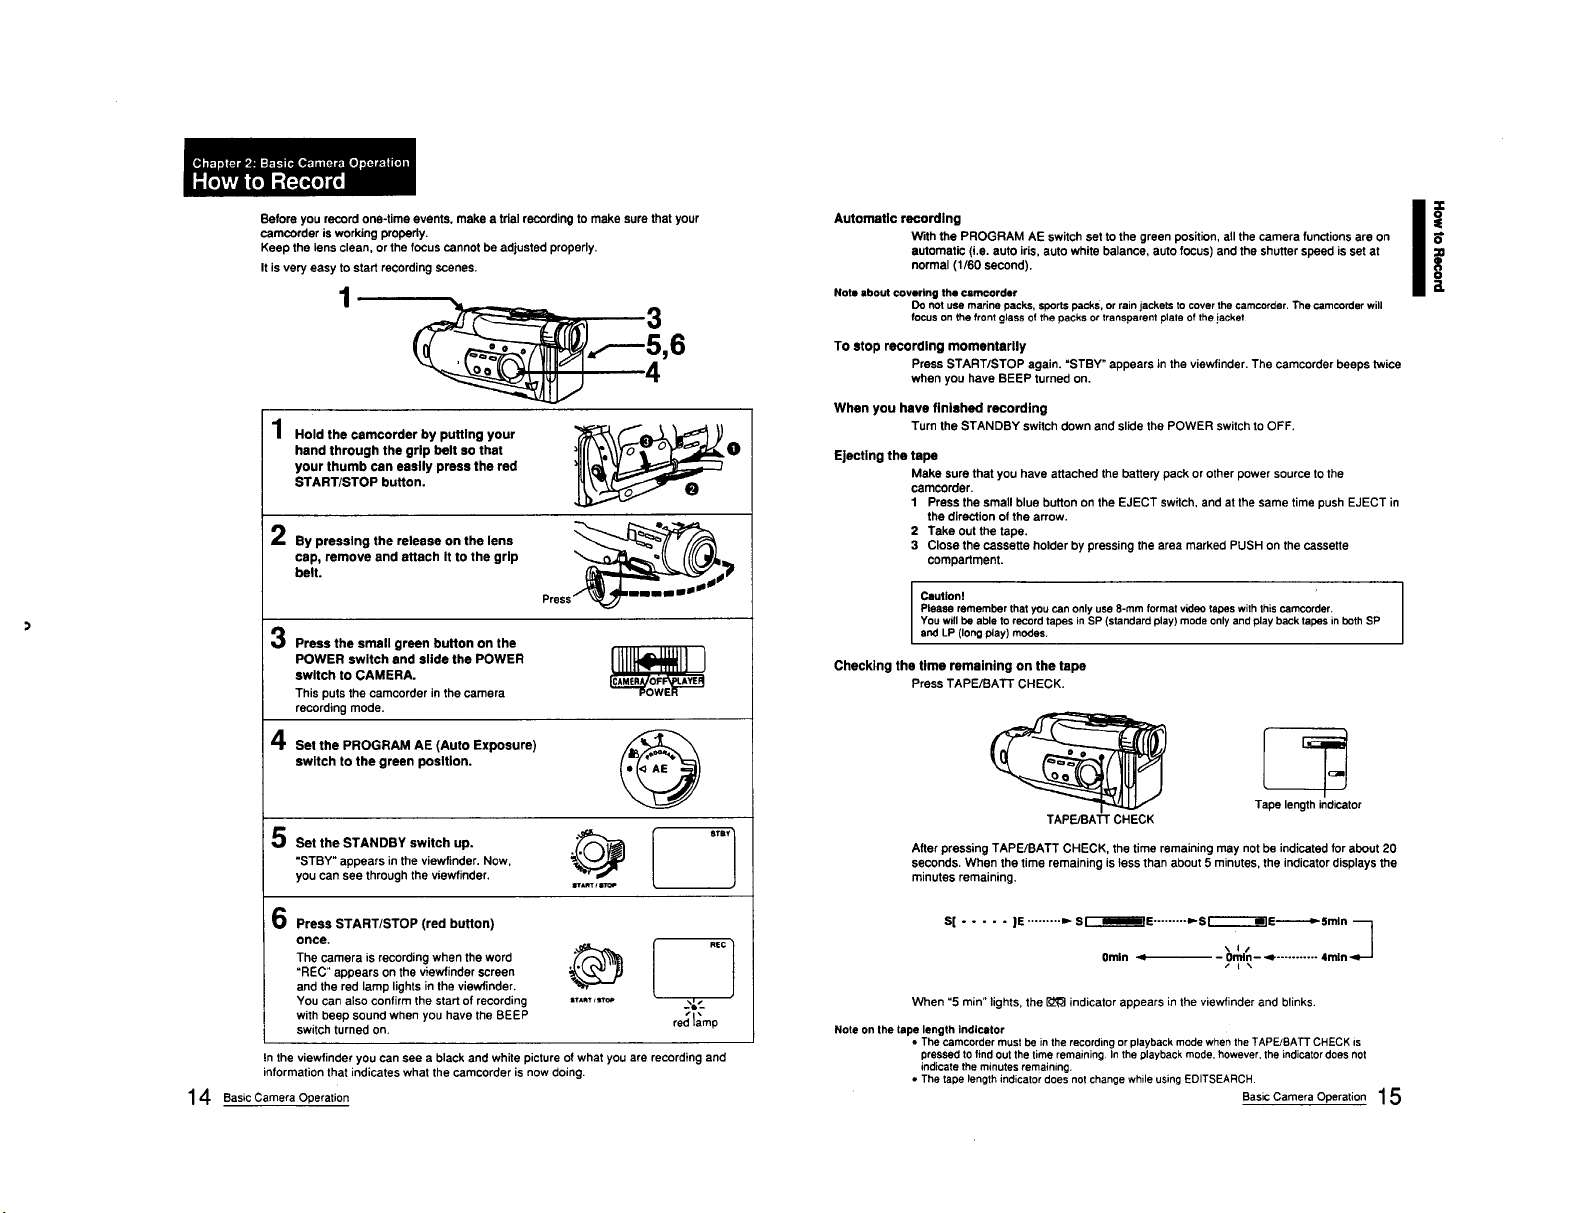
Hold the cemcorder by putting your
hand through the grip belt so that
your thumb can easily press the red
START/STOP button.
By pressing the release on the lens
cap, remove and attach It to the grip
belt.
Press the small green button on the
POWER switch end slide the POWER
switch to CAMERA.
This puts the camcorder in the camera
recording mode.
Set the PROGRAM AE (Auto Exposure)
switch to the green position.
[llll ll I
5
Set the STANDBY switch up, '_ l
"STBY" appears in the viewfinder. Now.
you can see through the viewfinder,
STBV]
6
Press START/STOP (red button)
once,
The camera is recording when the word
"REC" appears on the viewfinder screen
and the red lamp lights in the viewfinder.
YOU can also confirm the start of recording ITMIT/3TOP
with beep sound when you have the BEEP
switch turned on.
In the viewfinder you can see a black and white picture of what you are recording and
information that indicates what the camcorder is now doing.
Basic Camera Operation
Automatic recording
With the PROGRAM AE switch set to the green position, all the camera functions are on
automatic (i,e. auto iris, auto white balance, auto focus) and the shutter speed is set at
normal (1/60 second).
Note about covertng the camcorder
Do not use marine packs, sports pecks, or rain jackets to cover the carncorder. The camcorder will
fOCUS on the front glass of the packs or transparent plate of the jacket
To stop recording momentarily
Press START/STOP again. "STBY" appears in the viewfinder. The camcorder beeps twice
when you have BEEP turned on.
When you have finished recording
Turnthe STANDBY switchdownandslide thePOWER switchto OFF.
Ejecting the tape
Make sure that you have attached the battery pack or other power source tO the
camcorder.
1 Press the small blue button on the EJECT switch, and at the same time push EJECT in
the direction of the arrow.
2 Take out the tape.
3 Close the cassette holder by pressing the area marked PUSH on the cassette
compartment.
Cautlonl
Please remember that you can only use 8-ram format v_leo tapes with thissemcorder.
You will be able to record tapes in SP (standard play) mode only and play back tapes inbeth SP
end LP (longplay) modes.
Checking the time remaining on the tape
Press TAPE/BATT CHECK.
Tape length indicator
TAPE/BATr CHECK
After pressing TAPE/BAIT CHECK, the time remaining may not be indicated for about 20
seconds. When the time remaining is tess than about 5 minutes, the indicator displays the
minutes remaining.
S[ ..... |E .......... S [IiIiII-IE .......... S r"I'--'Iil E -------_ 5 ml n it
/
Omin e - Ondn- -4- ........... 4rain _iJ
•" I\
When "5 min" lights, the _ indicator appears in the viewfinder and blinks.
Note on the tape length Indicator
• The camcorder must be in the recording or playback mode when the TAPE/BATT CHECK is
pressed to find Out the time remaining. In the playback mode. however, the indicator does not
indicate the minutes remaining.
• The tape length indicator does not change while using EDITSEARCH
Basic Camera Operation 1 5
I;
Loading ...
Loading ...
Loading ...