Loading ...
Loading ...
Loading ...
COMMISSIONING
75
BURNER GAS PRESSURE
It is necessary to check the burner gas pressure at both the minimum and maximum operational settings. To
check and if necessary adjust the operational gas pressures, the electrical supply to the water heater must be
switched on, the burners ignited and hot water must be flowing from a hot tap.
Warning: The removal of the front panel will expose 240 volt wiring. Take care not to touch wiring terminals.
Note: If an 874 series model is installed as an in-series gas booster for a solar water heater, then during this
procedure the temperature of the water entering the in-series gas booster must be below 58°C. Otherwise the
gas burners will not ignite and the operational gas pressures cannot be measured.
Minimum test point gas pressure
Refer to the rating label on the water heater for the minimum test point gas pressure.
1. Close any hot taps and ensure the burners are not operating.
2. Turn off the controller(s), if one is fitted, by pressing the
on / off ( ) button and switch off the electrical supply at the
power outlet to the water heater.
3. Remove the top and bottom cover strips to gain access to the
front panel screws by pressing on the two ridged finger points
and gently pulling forward.
4. Remove the screws holding the front panel to the jacket.
5. Gently disengage the front panel and pull forward to remove
from the water heater.
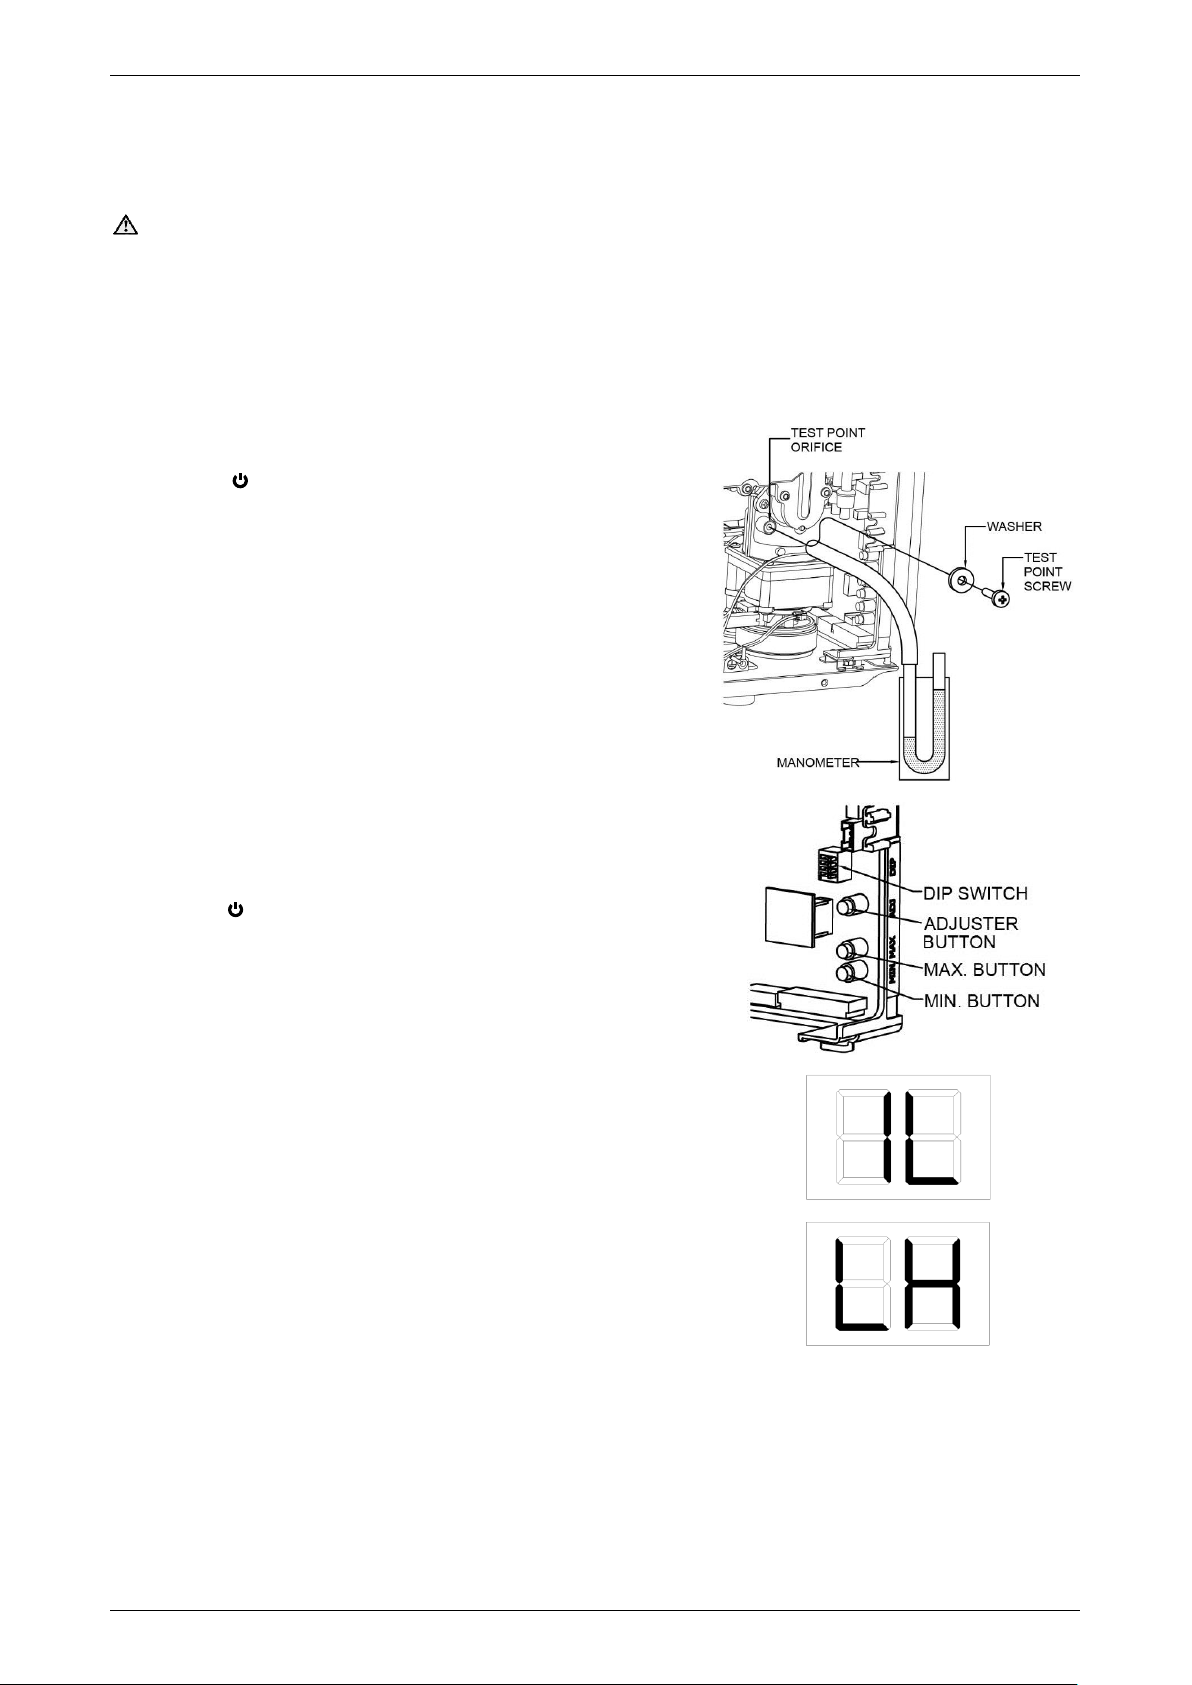
6. Locate the burner pressure test point on the main burner
manifold
Remove the test point screw and washer from the test
point orifice.
Connect the manometer.
7. Switch on the electrical supply at the power outlet to the water
heater and turn on a controller, if one is fitted, by pressing the
on / off ( ) button.
The priority light and the on / off operating light will both glow.
8. Open the gas isolation valve fully at the gas inlet to the water
heater, if not already open.
9. Open a hot tap slowly until the burners ignite.
10. Press and hold down the MIN button and observe the reading
on the manometer.
“1L” is shown on the LED display.
11. Release the MIN button.
If the manometer reading observed in step 10 agrees with the
rating label, no further adjustment is required.
12. To adjust, press and hold down the adjuster button.
“LH” is shown on the controller display.
Note: The adjuster button must be held down continuously
through steps 12 to 14.
13. Press and hold down the MIN button and observe the reading on the manometer.
The manometer reading will change as the test point gas pressure adjusts.
Note: While the MIN button is pressed, the gas pressure will at first increase then decrease, cycling
between an upper gas pressure limit (59 on the LED display) and a lower gas pressure limit (01 on the
LED display).
14. Release the MIN button when the reading on the manometer agrees with the rating label.
15. Release the adjuster button.
X 10L
88
°C
X 10L
88
°C
Loading ...
Loading ...
Loading ...