Loading ...
Loading ...
Loading ...
GROUNDING INSTRUCTIONS
This appliance must be grounded.
In the event of malfunction or break-
down, grounding will reduce the risk
of electric shock by providing a path
of least resistance for electric current.
The power supply cord must be plugged
into an appropriate outlet that is properly
installed and grounded in accordance
with all local codes and ordinances.
WARNING: Improper connection of the
equipment-grounding conductor can
result in a risk of electric shock. Check
with a qualified electrician or serviceman
if your are in doubt as to whether the
appliance is properly grounded.
Do not modify the plug on the power
supply cord. If it will not fit the outlet,
have a proper outlet installed by a
qualified electrician.
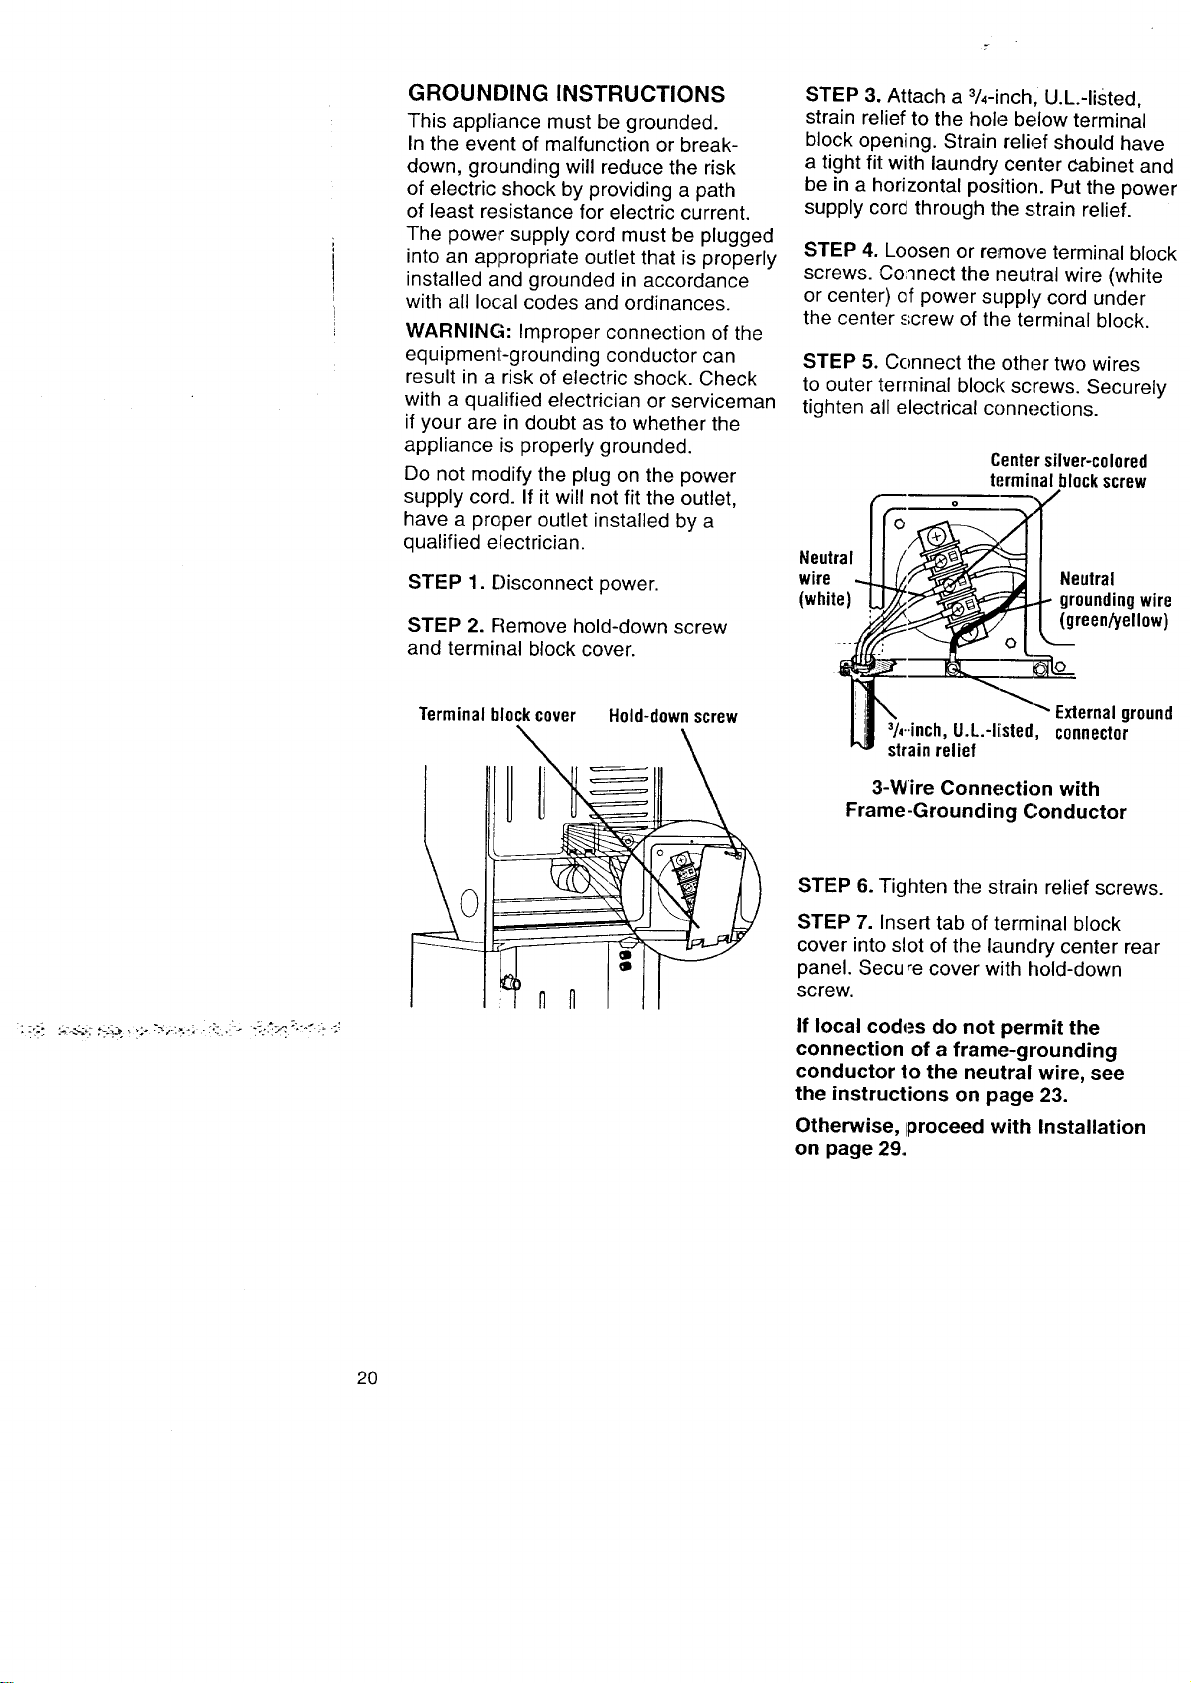
STEP 1. r)isconnect power.
STEP 2. Remove hold-down screw
and terminal block cover.
STEP 3. Attach a 3/4-inch, U.L.-listed,
strain relief to the hole below terminal
block opening. Strain relief should have
a tight fit with laundry center cabinet and
be in a horizontal position. Put the power
supply core through the strain relief.
STEP 4. Loosen or remove terminal block
screws. Co:_nect the neutral wire (white
or center) of power supply cord under
the center .:;crew of the terminal block.
STEP 5. Connect the other two wires
to outer terminal block screws. Securely
tighten all electrical connections.
Centersilver-colored
terminal blockscrew
Neutral
wire Neutral
(white) groundingwire
: (green/yell0w)
Terminalblockcover Hold-downscrew
External ground
3h..inch, U.L.-listed, connector
strain relief
3-Wire Connection with
Frame-Grounding Conductor
STEP 6. Tighten the strain relief screws.
STEP 7. Insert tab of terminal block
cover into slot of the laundry center rear
panel. Secu re cover with hold-down
screw.
If local codes do not permit the
connection of a frame-grounding
conductor to the neutral wire, see
the instructions on page 23.
Otherwise, proceed with Installation
on page 29.
2O
Loading ...
Loading ...
Loading ...