Loading ...
Loading ...
Loading ...
Installation procedure en-us
9
2.7 Installation checklist
Please refer to the following pages for complete installa-
tion instructions. Use this checklist to verify that you have
completed each step of the installation process. This can
help you avoid mistakes.
Installation step
Before installing the range, be sure to verify the
cabinet dimensions are correct for your unit and
that the required electrical connections are
present.
Before installing the range, make sure that any
opening in the wall behind the appliance and in
the floor under the appliance shall be sealed.
Read this installation manual for content regard-
ing Safety, Cabinet Dimensions, Removing
Packaging, Electrical Installation and Customer
Service.
Removing the oven door prior to installation re-
duces the unit weight and makes the range eas-
ier to move. Additionally, the removal of the
oven door provides access to handholds for lift-
ing.
Install and adjust the feet.
Move the range (2 people needed) into place in
front of the installation opening, leaving the bot-
tom packaging on the unit to avoid damaging
flooring.
Plug the range into a properly configured recep-
tacle.
Protect the flooring from damage, then slide the
unit all the way into place, making sure to route
the power cord correctly.
Reinstall the oven door.
Make sure the anti-tip bracket is engaged.
Installation procedure
3 Installation procedure
Installation procedure
3.1 How to remove the oven door
WARNING
Failure to follow these instructions when removing the
oven door may lead to personal injury or product damage.
▶ Make sure oven is cool and power to the oven has been
turned off before removing the door. Failure to do so
could result in electrical shock or burns.
▶ The oven door is heavy and parts of it are fragile. Use
both hands to remove the oven door.
▶ The door front is glass. Handle it carefully to avoid
breakage.
▶ Grasp only the side of the oven door. Do not grasp the
handle. It may swing in your hand and cause damage or
injury. Failure to grasp the oven door firmly and properly
could result in personal injury or product damage.
▶ To avoid injury from hinge bracket snapping closed, be
sure both levers are securely in place before removing
the door.
▶ Do not force the door open or closed. The hinge could
be damaged and cause damage or injury.
▶ Do not lay the removed door on sharp or pointed ob-
jects as this could break the glass. Lay it on a flat,
smooth surface, positioned so that the door cannot fall
over.
Note:To avoid injury or damage, make sure that you read
the above WARNING before attempting to remove the
oven door.
1. Open the oven door to its fully open position.
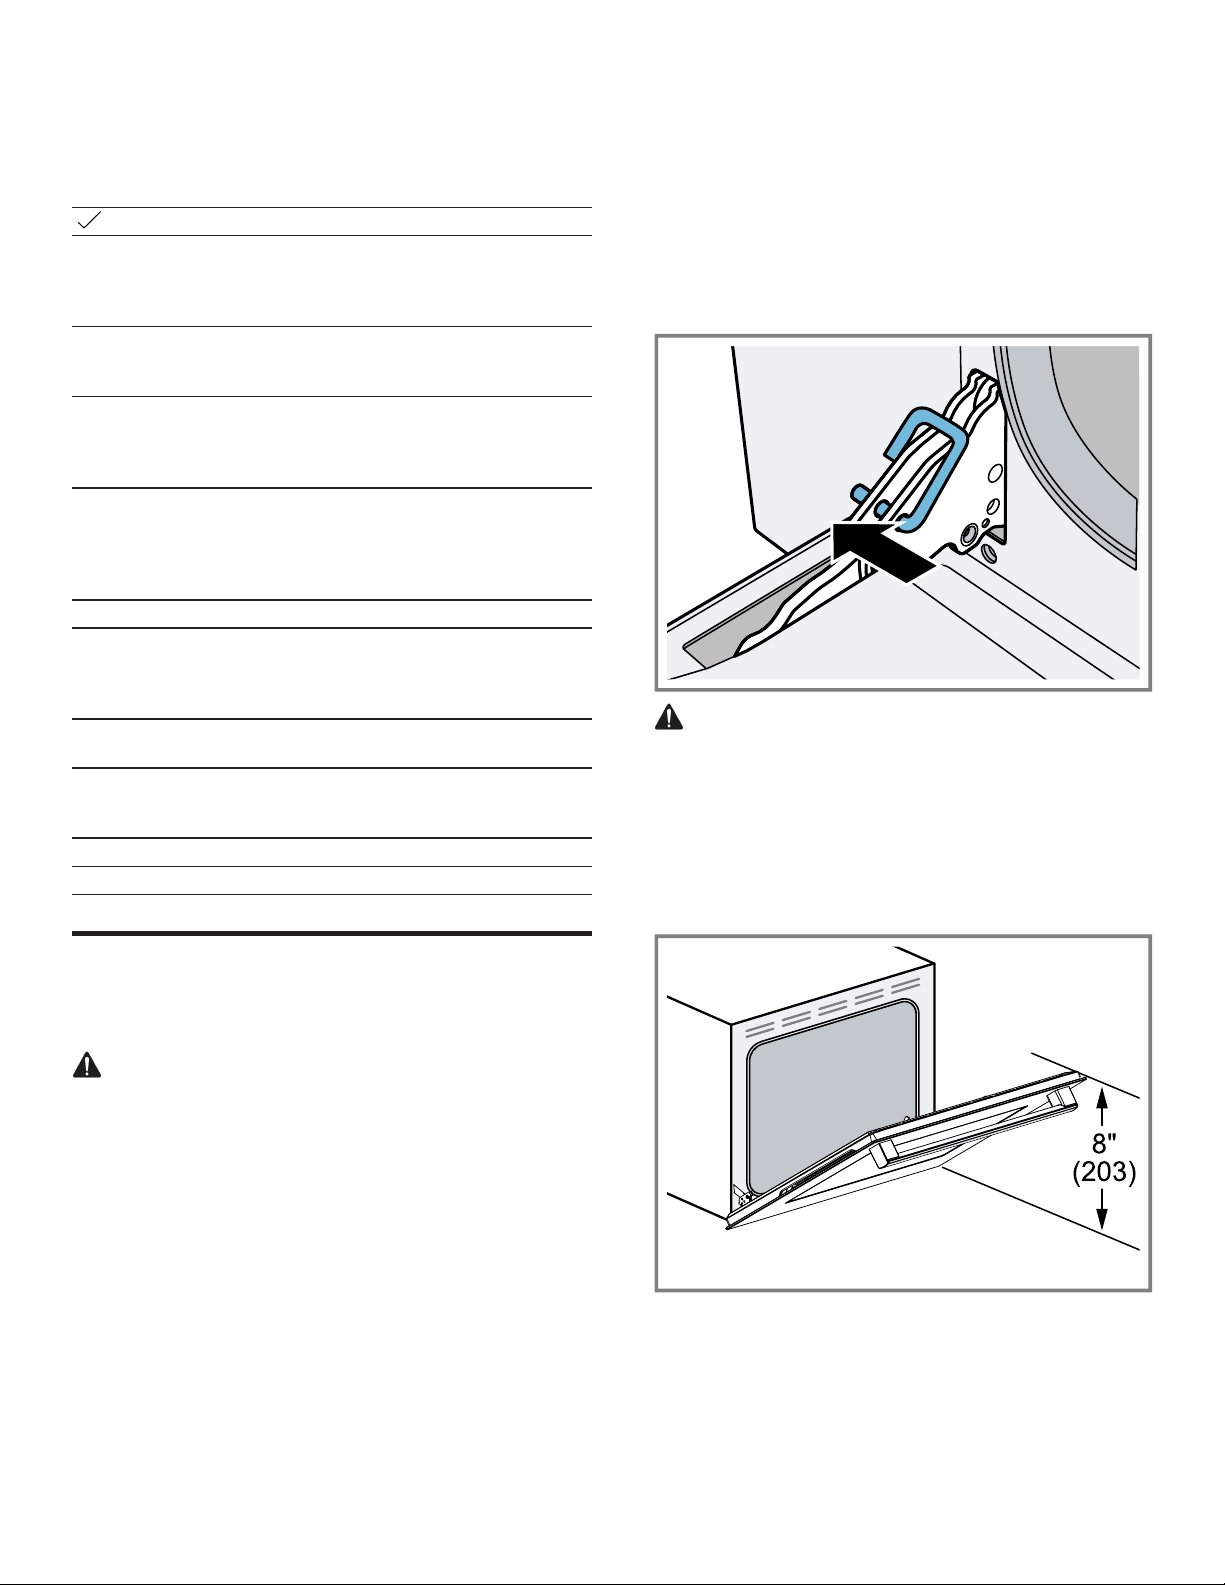
2. Lock the two hinges on the left and right using the lock-
ing pin. The locking pins must be fully inserted into the
holes in the hinges.
3.
CAUTION Closing the door by 8" (203mm) takes
the pressure off the spring. If this is not done, the door
can still be removed but the latch will now slam shut
and may pinch or cut your hand.
Close the oven door until it catches on the hinge stop
levers, locking the hinges at the correct angle for door
removal. The door can be removed when it is pulled up
from the open position by about 8 inches (203mm).
This takes the tension off the spring-loaded hinges so
that the door can be easily lifted out.
4. The door is heavy. Use both hands to firmly grip it by
the sides. Do not grip the door by the handle. Keeping
the angle of the door the same, lift the door straight up
approximately 3/4" (19mm) to unhook the hinges from
the slots. Pull the door out towards you until the hinges
are clear of the oven housing.
5. Place the door in a convenient and stable location for
cleaning.
Loading ...
Loading ...
Loading ...