Loading ...
Loading ...
Loading ...
en-us Installation procedure
12
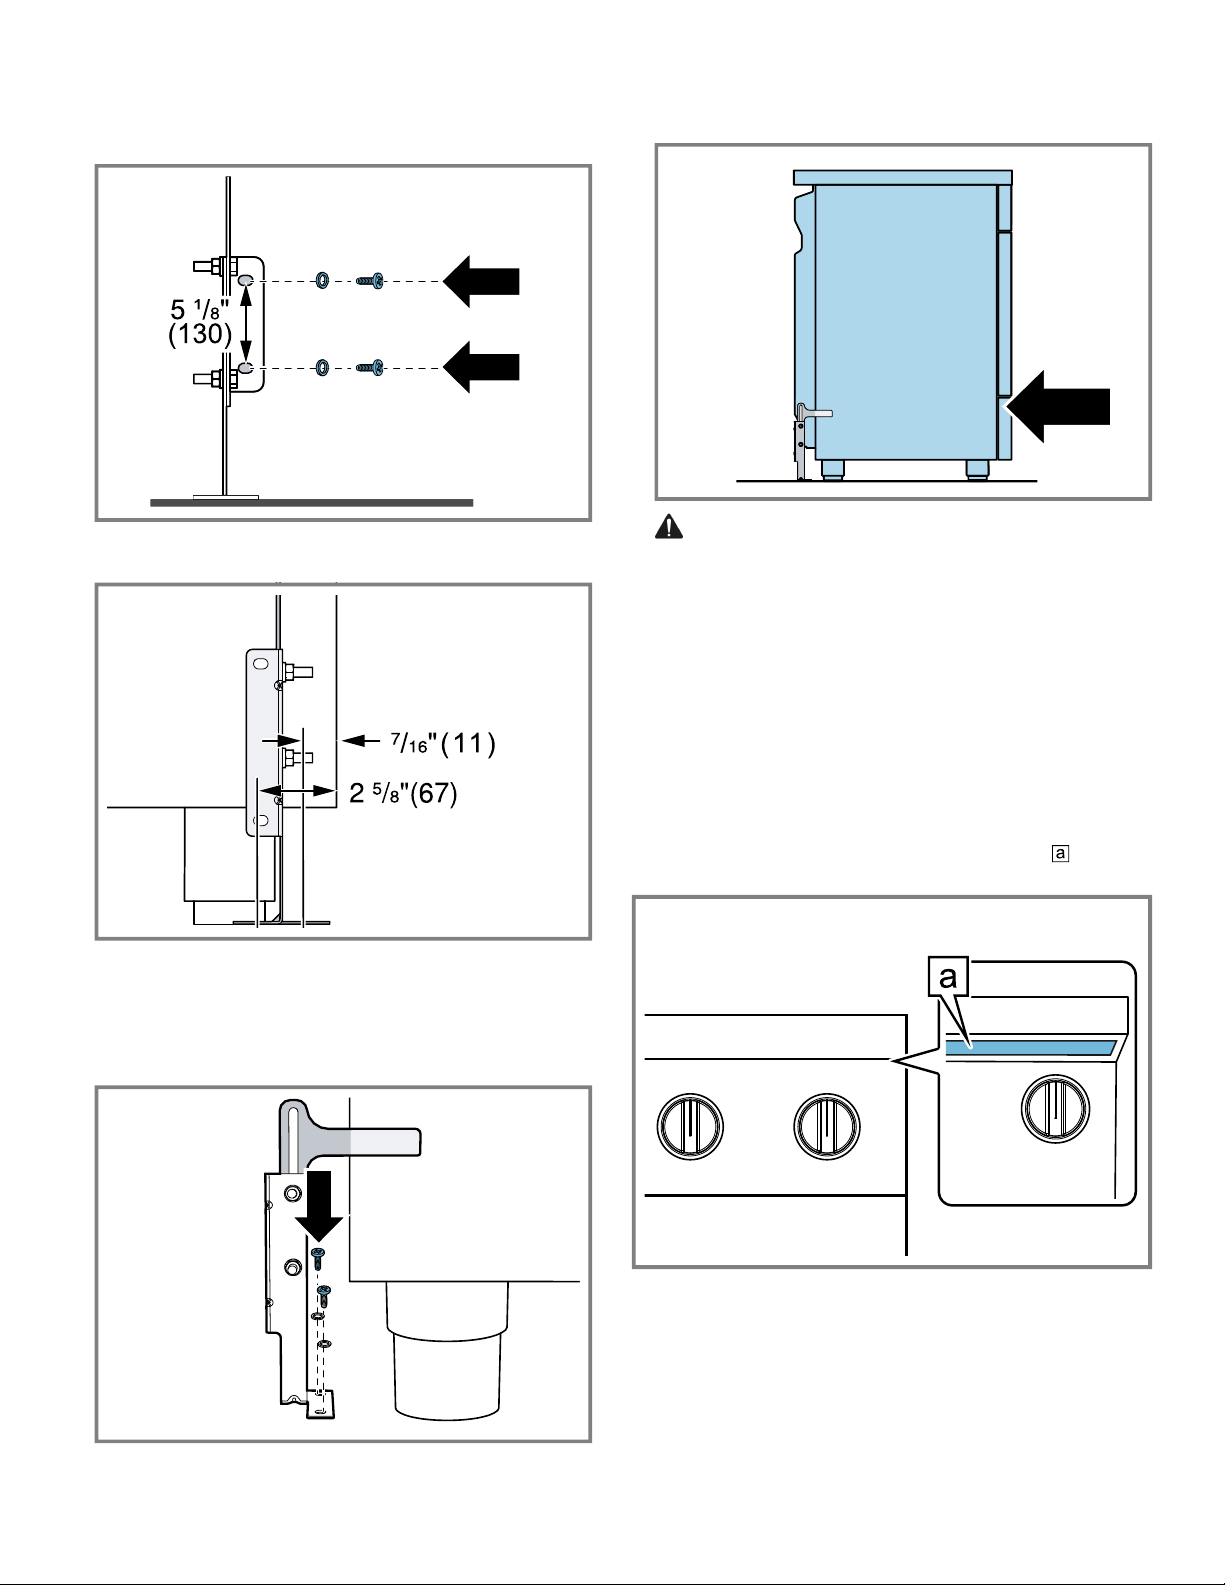
6. Move the bracket onto the wall and fix with the two
washers and screws. A qualified technician must verify
suitability of the materials in accordance with the type
and condition of the wall.
7. Use the following distances for the distance from the
side of the appliance to the bracket holes.
8. After having positioned and leveled the appliance, move
the bracket close to the rear of the appliance and an-
chor it to the floor with the two washers and screws. A
qualified technician must verify suitability of the materi-
als in accordance with the type and condition of the
floor.
9. Push the cooker towards the wall, and at the same time,
insert the bracket in the plate fastened to the rear of the
appliance.
10.
WARNING The rear vent trim has 3/16” (5mm)
standoffs to keep the appliance slightly off of the back
wall. Do not remove or tamper with standoffs due to po-
tential temperature issues.
Check for proper installation and use of the anti-tip
bracket. Carefully tip the range forward pulling from the
back to ensure that the anti-tip bracket engages the
range leg and prevents tip-over. The range should not
move more than 1” (2.5cm).
3.6 Connect electrical supply
This dual-fuel range may be connected using an electric
range cord or using a flexible conduit electrical connection.
The length must be at least 5ft (1.5m).
For technical specifications see the rating label
on the
underside of the projecting control panel.
Do not use multiple outlets, extension cords or adapters.
Note
¡ In Canada, the range is shipped from the factory with
the power cord already installed.
¡ We recommend that only qualified persons add a power
cord or make electrical connections to this appliance.
For installations other than those in Canada, connect the
power cord at the terminal block. Access the terminal
block by removing the cover in the lower right-hand corner
of the range back panel.
Loading ...
Loading ...
Loading ...