Loading ...
Loading ...
Loading ...
Installation procedure en-us
11
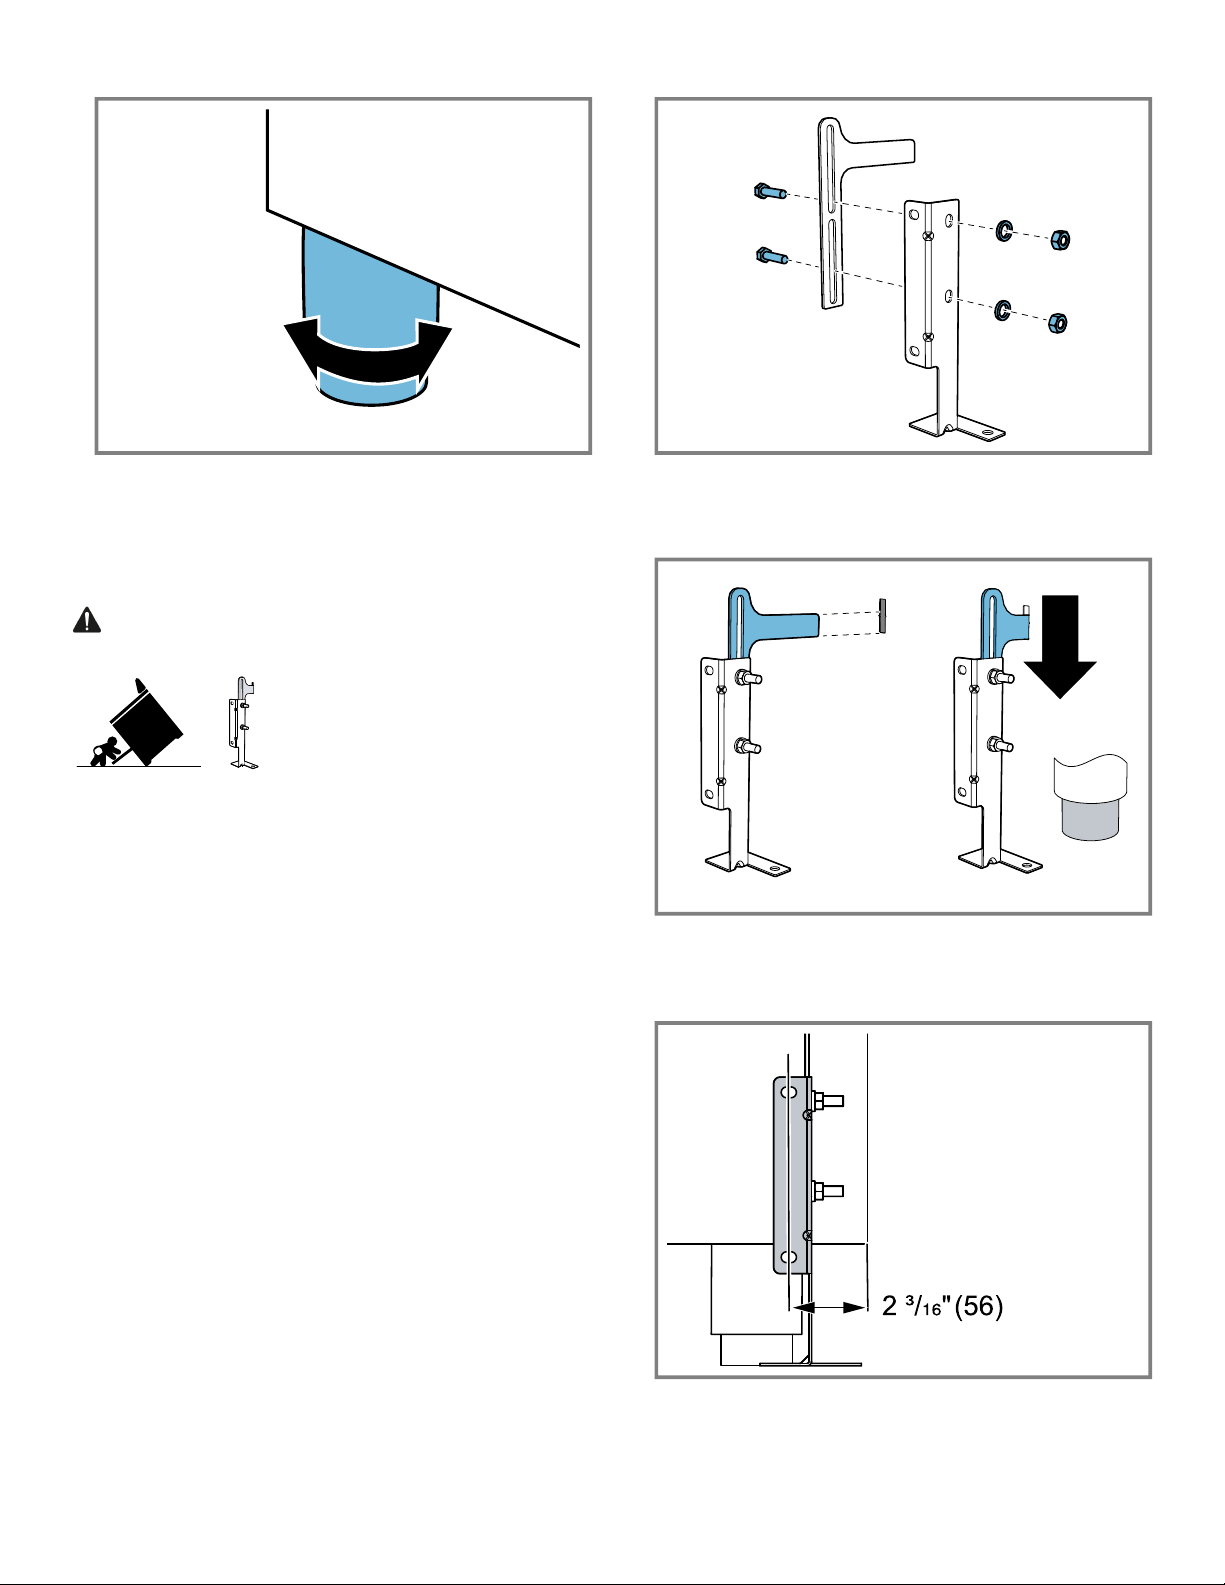
6. Turn the adjustable feet to align the appliance.
Note:Measure the installation height of the cabinetry and
adjust appliance height accordingly prior to placing appli-
ance in cabinetry.
3.4 Install appliance
WARNING
TIP OVER HAZARD! A child or adult can tip the range
over and be killed.
▶ Install the anti-tip device to the structure and/or the
range.
▶ Verify the anti-tip device has been properly installed and
engaged.
▶ Engage the range to the anti-tip device. Ensure the anti-
tip device is re-engaged when the range is moved.
▶ Re-engage the anti-tip device if the range is moved. Do
not operate the range without the anti-tip device in place
and engaged.
▶ See installation instructions for details.
▶ Failure to follow the instructions in this manual can re-
sult in death or serious burns to children and adults.
▶ Check for proper installation and use of the anti-tip
bracket. Carefully tip the range forward pulling from the
back to ensure that the anti-tip bracket engages the
range leg and prevents tip-over. The range should not
move more than 1" (2.5cm).
3.5 Installing the anti-tip bracket
1. Ensure that the electrical connection and the gas con-
nection are in the correct position.
2. Assemble the bracket.
3. Align the base of the hook of the bracket with the base
on the slot of the rear wall fastening bracket. Align the
base of the fastening bracket with the ground and
tighten the screws to fix the measurements.
4. For wall mounting, proceed with steps 5–7 and 10. For
floor mounting, proceed with steps 8–9 and 10.
5. Use the specified distance from the side of the appli-
ance to the bracket holes.
Loading ...
Loading ...
Loading ...