Loading ...
Loading ...
Loading ...
11
Operating Instructions
Power On
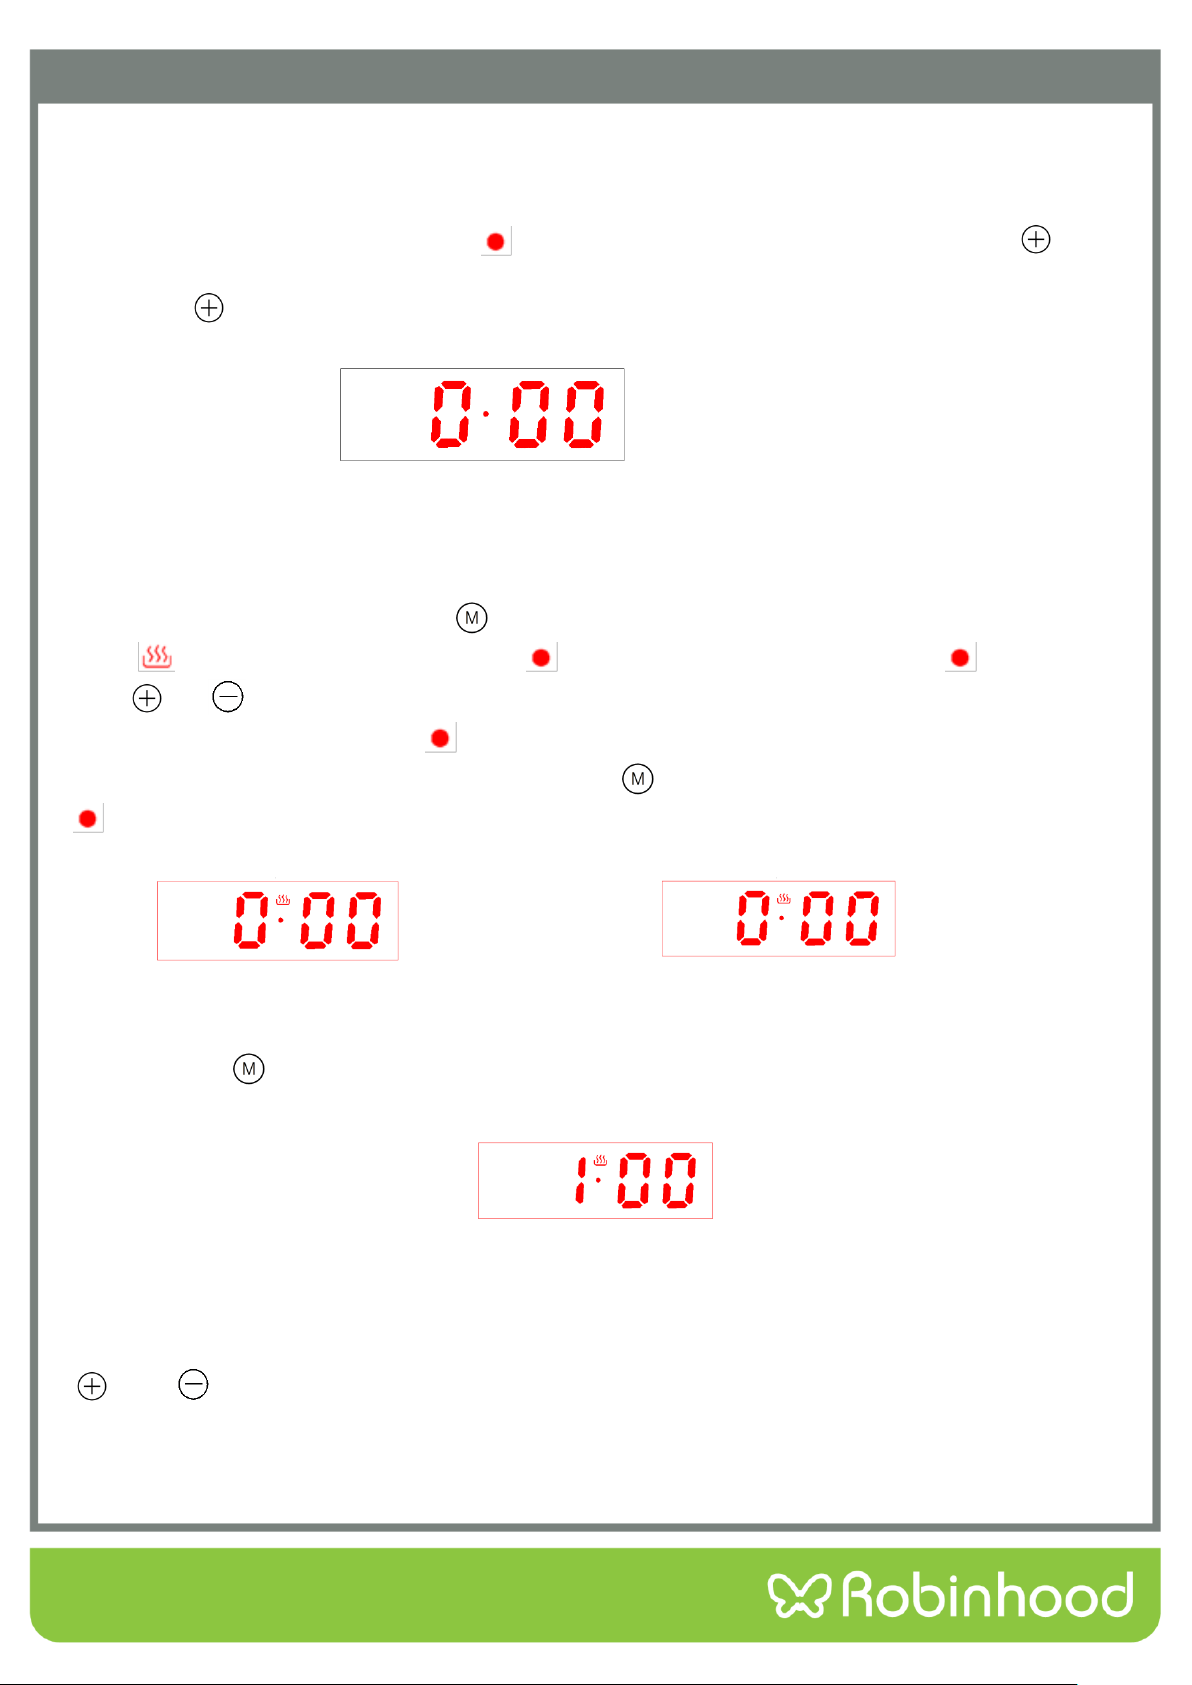
For the first time, the buzzer “beep” for once to show that the timer enters into the standby state. The clock
shows the time of the system and starts the timing. Power-on displays as “0·00”, the display screen displays
the system time, the decimal point symbol “ ” is flashing,1 second 1 time, like Pic 5.You can push“ ”to
choose 3 kinds of ring tone, The default is the second ring tone. Whenever user wants to adjust the ring tone
again, press “ ”.
Pic 5: Power-on default clock diagram (standby state)
Start Up and Time Setting
When the display is flashing, press “ ”for 3 seconds to start up the oven. Then oven in use
symbol“ ”lights up and decimal point symbol “ ” twinkles. When decimal point symbol “ ” twinkles,
press “ ”or “ ” to set the system time. After choosing the time , lift the finger off the buttons and wait for
5 seconds, then decimal point symbol “ ” stop twinkling. It means time is well set. Like pic 8.Whenever user
wants to set the time again, In the status of pic 7, push “ ” once, when user sees decimal point symbol
“ ” twinkles, then can set the time again.
Pic 6: Clock setting state Pic 7: Feature to be selected state
(Second digit flicking) (Second digit always bright)
Press button“ ” again for 3 seconds, oven is turned off and returns to standby status. The display of
pic 6 is flashing.
Pic 8 System time well set diagram
Note 1:System time setting range is 0:00-23:59.
Note 2:When setting the time for each function of the timer, you can set the time by short press or long press
“ ” and “ ”,short press will add 1 minute or reduce 1 minute each press of the button, while long press will
quickly increase or decrease the time by 1 minute, so it can set the time fast.
Loading ...
Loading ...
Loading ...