Loading ...
Loading ...
Loading ...
ii, i ,i,,UU,lll u
SERVICE AND ADJUST TS
IMPORTANT: IF YOU THINK THE CARBURETOR IS
NOT OPERATING PROPERLY, CONTACT YOUR
NEAREST SEARS SERVICE CENTER
CARBURETOR ADJUSTMENT
The carburetor has been presser at the factory and
readjustment should not be necessary However, if the
carburetor does need to be adjusted, proceed asfollows:
• Ctose high speed adjusting screw by hand Do not
over tighten (See Fig. 7, page 13)
e Open it 1-1/4 to 1-1/2 turns
e Start the engine and let it warm up
e Adjust the high speed adjusting screw in (clockwise)
until the engine speed or sound alters. Adjust the
screw out (counter-cl0ckwise) until the engine speed
or sound alters.. Note the difference between the two
limits and set the screw in the middle of the range
O tf the engine tends to stall under load, adjust the high
speed screw out in 1/8 turn increments until the
problem is resolved.
e Let the engine run undisturbed for 30 seconds be-
tween each setting to allow the engine to react to the
previous adjustment
NOTE: On two cycle eng ines the adjustment must be
as far out as possible without resulting in poor
engine performance to prevent engine damage.
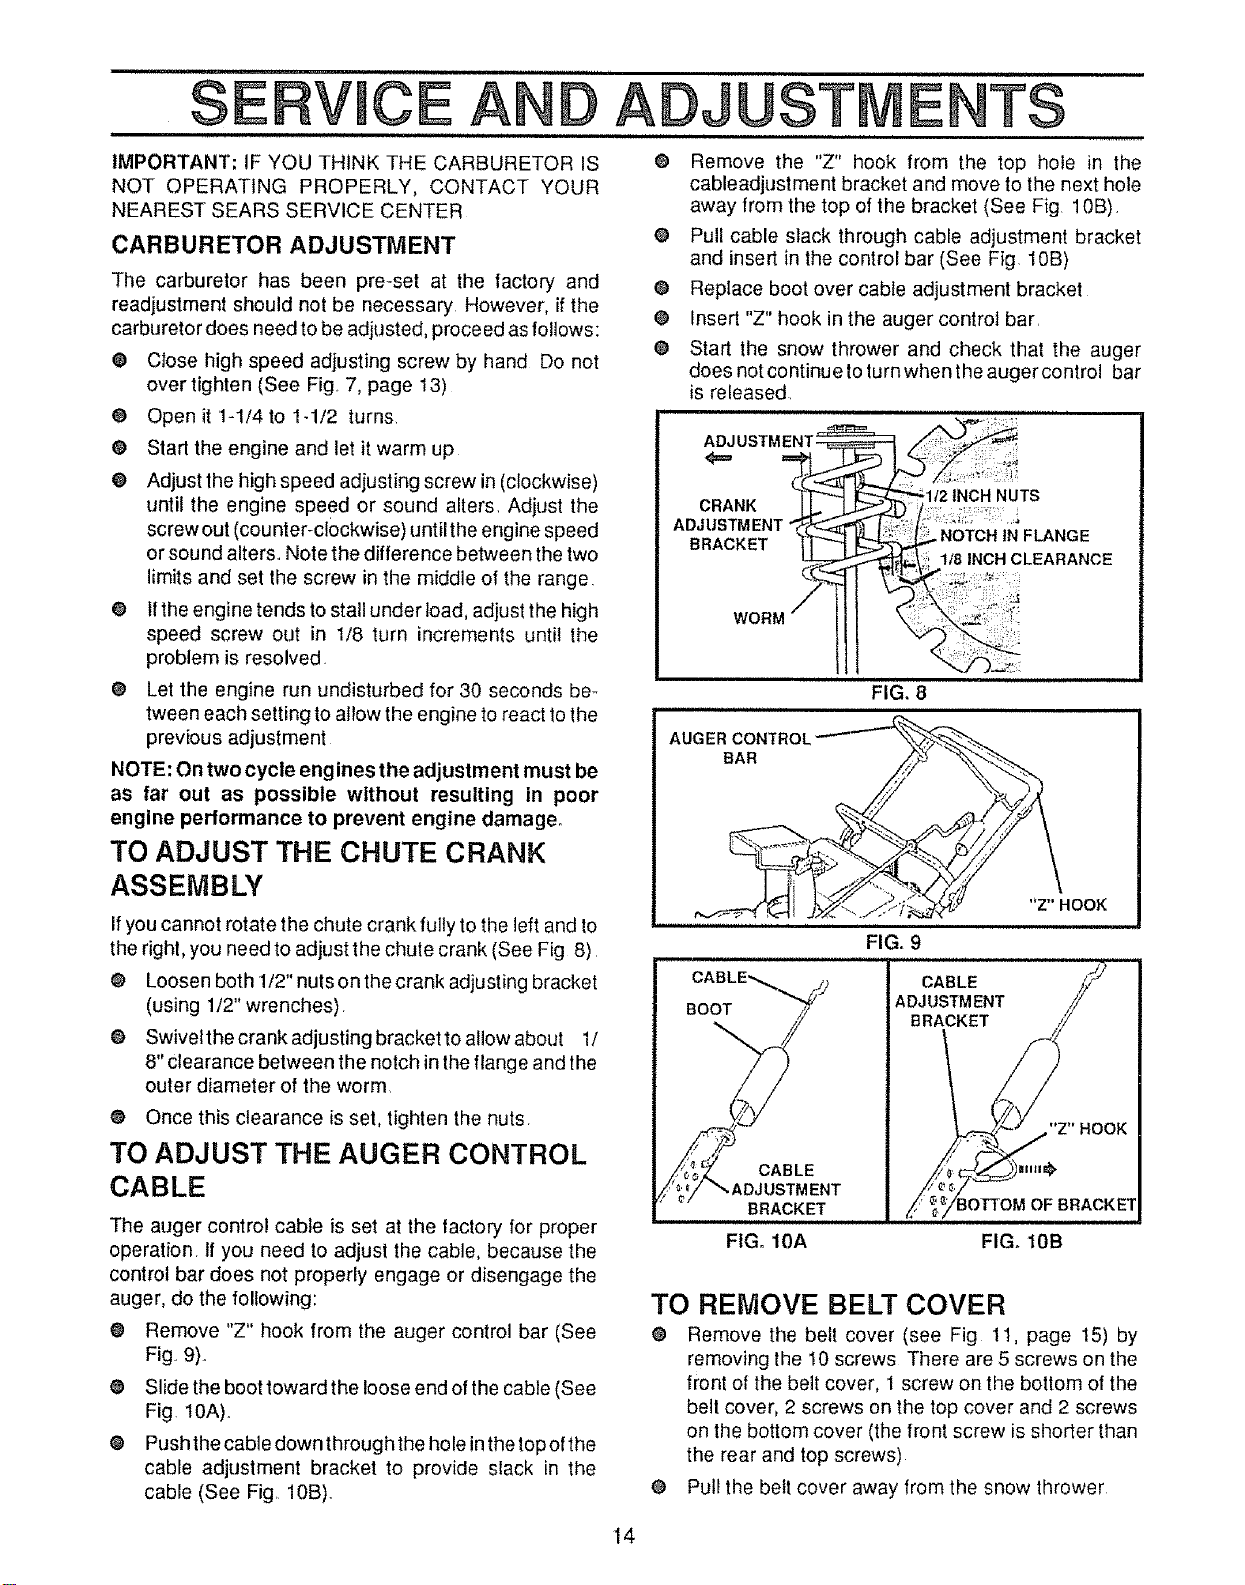
TO ADJUST THE CHUTE CRANK
ASSEMBLY
If you cannot rotate the chute crank fully to the left and to
the right, you need to adjust the chute crank (See Fig 8)
O Loosen both !/2" nutsonthecrank adjusting bracket
(using 1/2" wrenches)
O Swivelthe crank adjusting bracket to allow about 1/
8" Clearance between the notch in the flange and the
outer diameter of the worm.
O Once this clearance is set, tighten the nuts
TO ADJUST THE AUGER CONTROL
CABLE
O Remove the "Z" hook from the top hole in the
cableadjustment bracket and move to the next hole
away from the top of the bracket (See Fig 10B)_
@ Pull cable slack through cable adjustment bracket
and insert in the control bar (See Fig 10B)
e Replace boot over cable adjustment bracket
O Insert "Z" hook in the auger control bar.
e Start the snow thrower and check that the auger
does not continue to turnwhen the auger control bar
is released.
NUTS
CRANK
ADJUSTMENT : :_
BRACKET NOTCHINFLANGE
118INCHCLEARANCE
WORM
FIG. 8
AUGER CONTROL
_,.._,--,.__7 _Y "Z" HOOK
FIG,. 9
The auger control cable is set at the factory for proper
operation If you need to adjust the cable, because the
control bar does not properly engage or disengage the
auger, do the following:
e Remove "Z" hook from the auger control bar (See
Fig..9).
@ Slide the boot toward the loose end of the cable (See
Fig, IOA).,
0 Push the cable down through the hole inthe top ofthe
cable adjustment bracket to provide slack in the
cable (See Fig, lOB).
FIG. 10A FIG. 10B
TO REMOVE BELT COVER
O Remove the belt cover (see Fig tl, page 15) by
removing the 10 screws There are 5 screws on the
front of the belt cover, 1 screw on the bottom of the
belt cover, 2 screws on the top cover and 2 screws
on the bottom cover (the front screw is shorter than
the rear and top screws)
O Pull the belt cover away from the snow thrower
14
Loading ...
Loading ...
Loading ...