Loading ...
Loading ...
Loading ...
10 11
Designer Wall Range Hood Installation Designer Wall Range Hood Installation
Please unpack your range hood when it is delivered and inspect to ensure all parts
are included.
Parts Supplied
1. Main Hood with All Lights and Button 6. Packet of Screws and Anchors
Banks Pre-Installed 7. Top Mounting Bracket
2. Chimney 8. Crown Molding Bracket
3. Transition Piece (for 6” or 8”) 9. Crown Molding
4. Baffle Filters 10. Grease Cup
5. Flexible Duct (for 6” or 8”)
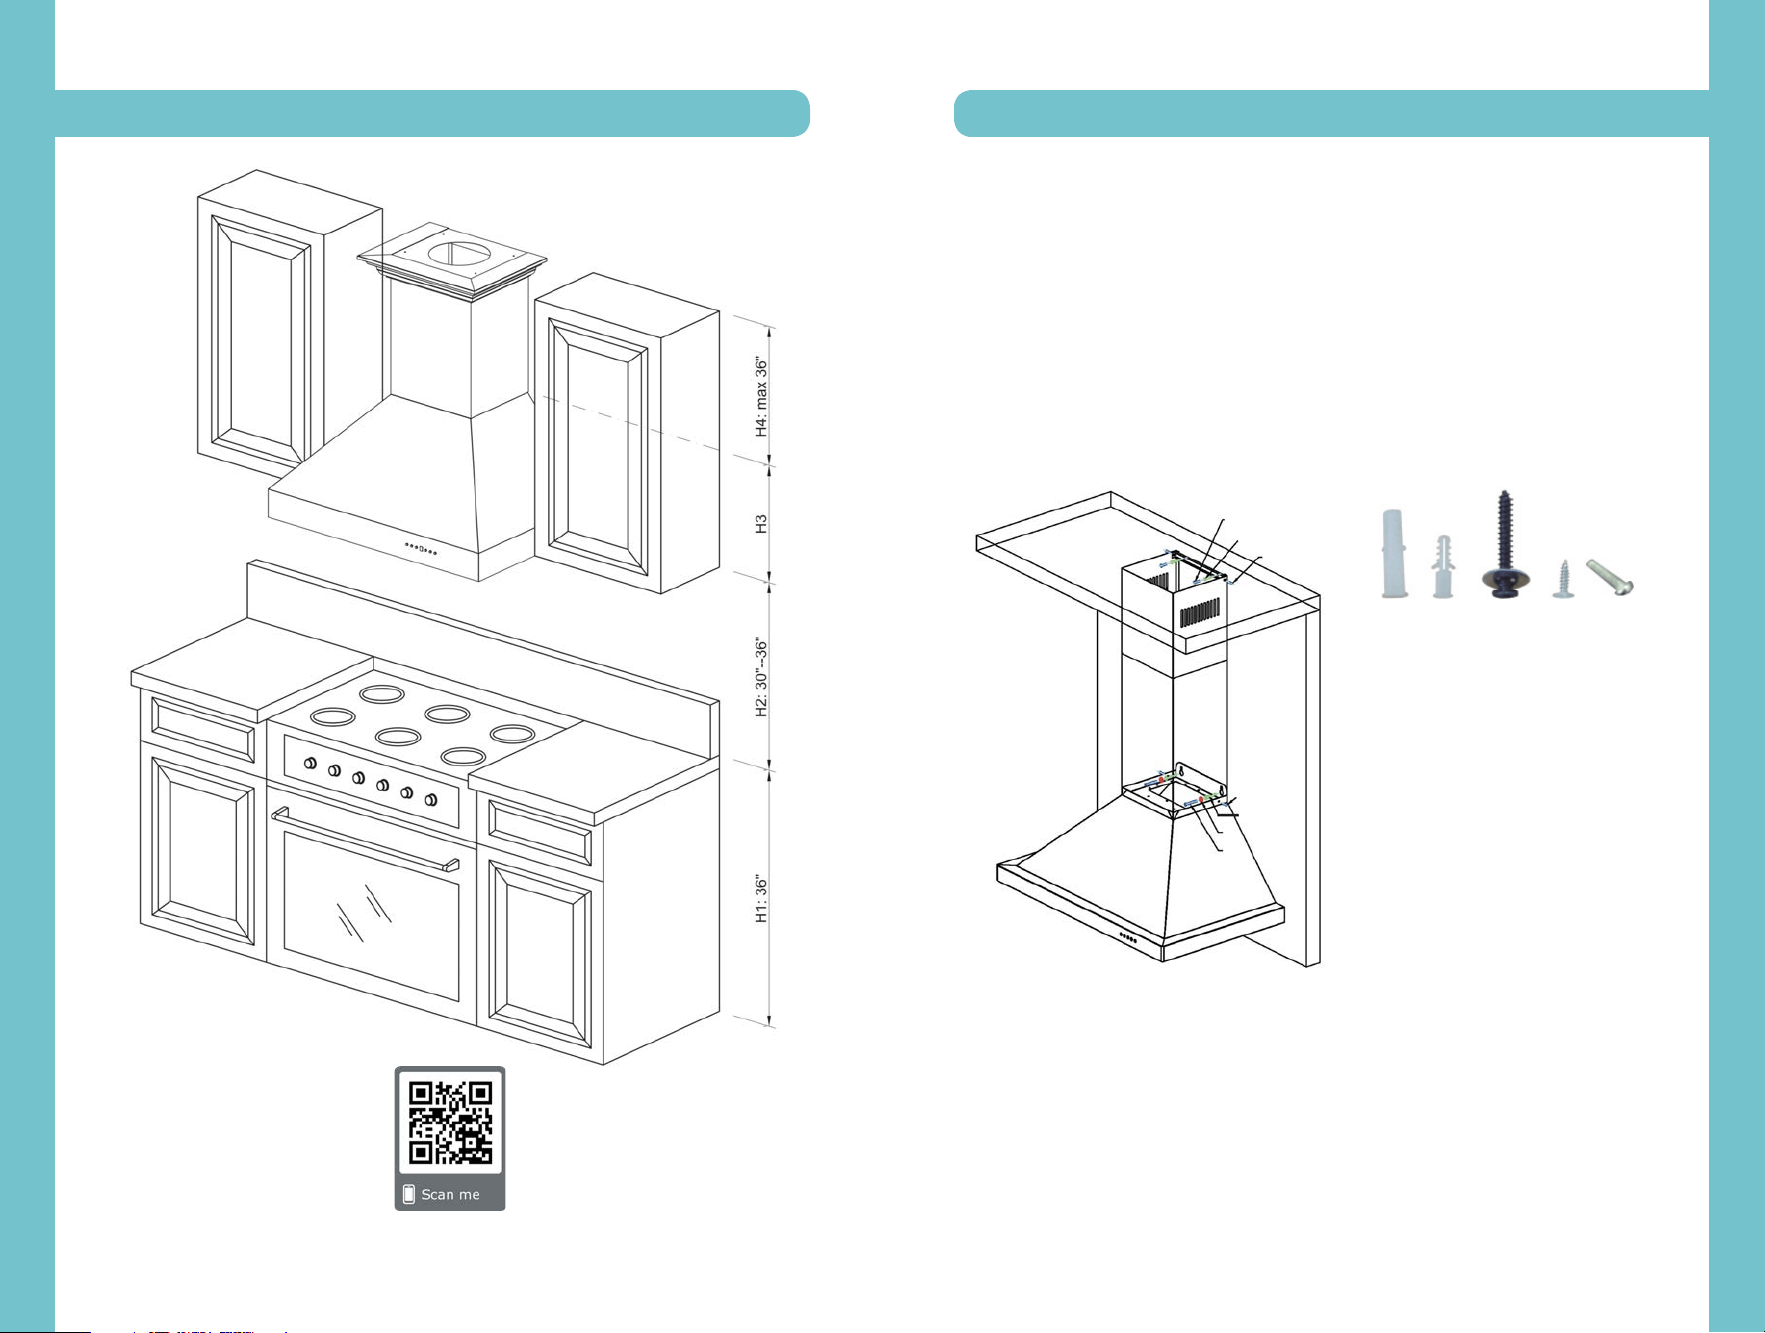
Installation Tutorial Video
*Note: Wall range hoods with single motors will come with a square to 6˝ round
transition piece and will include a back draft damper. The ducting with these range
hoods is 6˝. Dual motor wall hoods will come with a square to 8˝ round transition
piece without a back draft damper. The ducting with these range hoods is 8˝.
*Use rigid ducting wherever possible. Try and minimize the use of elbows. More
elbows and lon-ger runs create higher static pressure. The hood comes with a
grounded three prong plug that can either be direct wired or plugged into a 20 amp
circuit.
A
A
B
B
C
C
D
D
6
E
E
F
F
Loading ...
Loading ...
Loading ...