Loading ...
Loading ...
Loading ...
16 17
Designer Wall Range Hood Installation
The recommended height to install your hood is 30˝ minimum and 36˝ maximum
above the cooktop.
For Outdoor (304 Series) hood installation, the unit must be installed at a minimum of
36˝ above the grill.
Step 1
Locate the center above the stove where the hood is to be installed. Ensure that
the bracket will be secured to solid wood backing. Attach mounting bracket to the
ceiling.
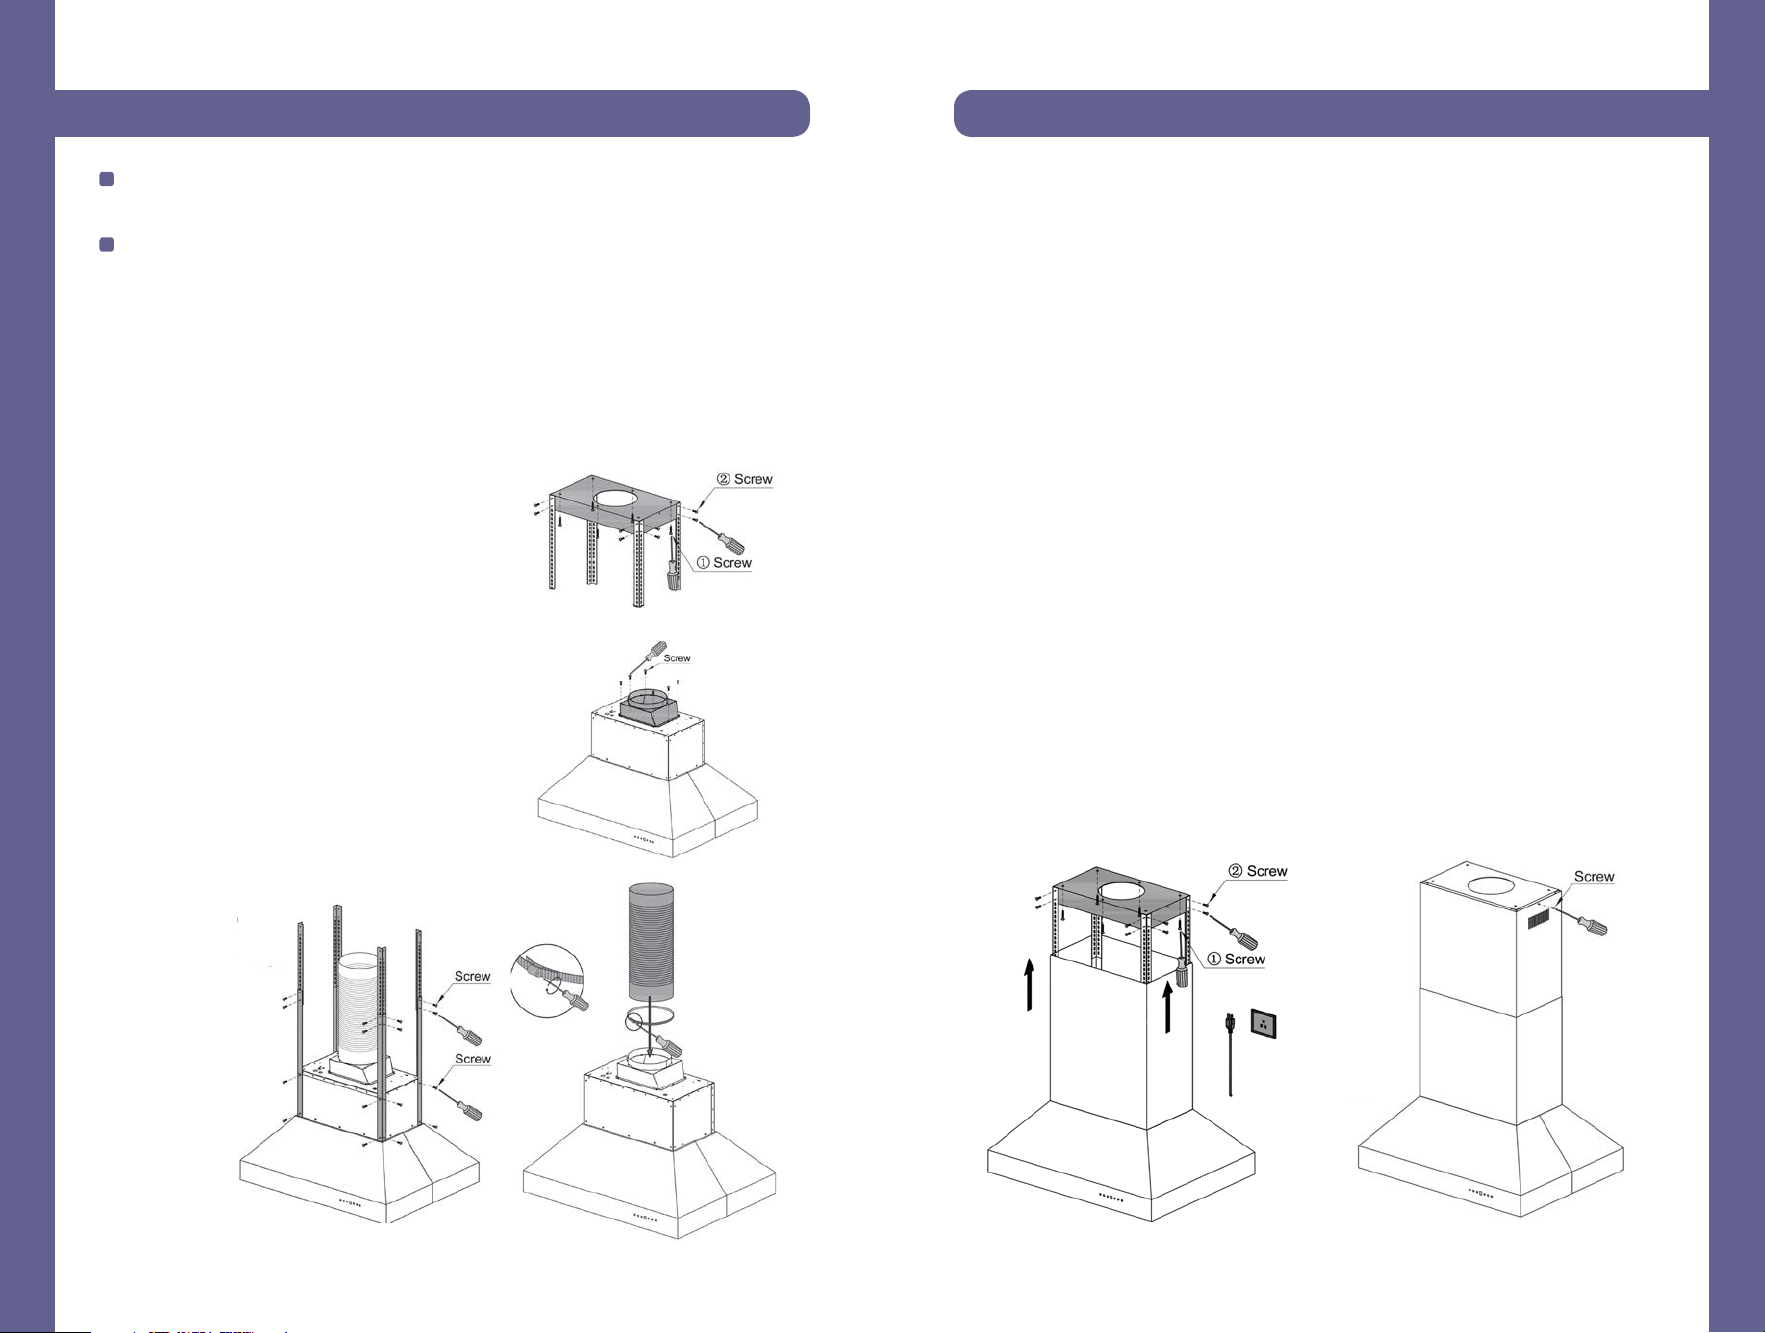
Step 2
Attach the transition piece and ducting to top of the
hood. Figure 1 and 2
Step 3
Attach the four long angle iron pieces to the hood’s
motor housing. Figure 3
Step 4
Determine desired height and attach the four short
angle iron pieces to the long angle iron pieces that
are attached to the hood. Figure 3
Step 5
Install the duct
work in the
center of the
ceiling bracket.
Step 6
Slide chimney pieces over the angle iron on the hood. Pull the electrical plug to the
top of the chimney sections. Figure 4
Step 7
Lift the hood to attach the angle iron to the ceiling bracket. Use screws provided to
attach.
Step 8
Make your electrical and ducting connections. Use rigit duct wherever possible. Try
and minimize the use of elbows. More elbows and longer runs create higher static
pressure. The hood comes with a grounded three prong plug that can either be direcly
wired or plugged into a 20 amp circuit.
Step 9
Slide top chimney piece up over the mounting bracket on the ceiling and secure it in
place with the provided screws. Figure 5
Step 10
Install stainless steel baffle filters. Before installing baffle filters, make sure that you
insert the grease cup under the motor blower.
Figure 1
Figure 4
Figure 5
Figure 2
Figure 3
Island Hood Installation
Loading ...
Loading ...
Loading ...