Loading ...
Loading ...
Loading ...
20 21
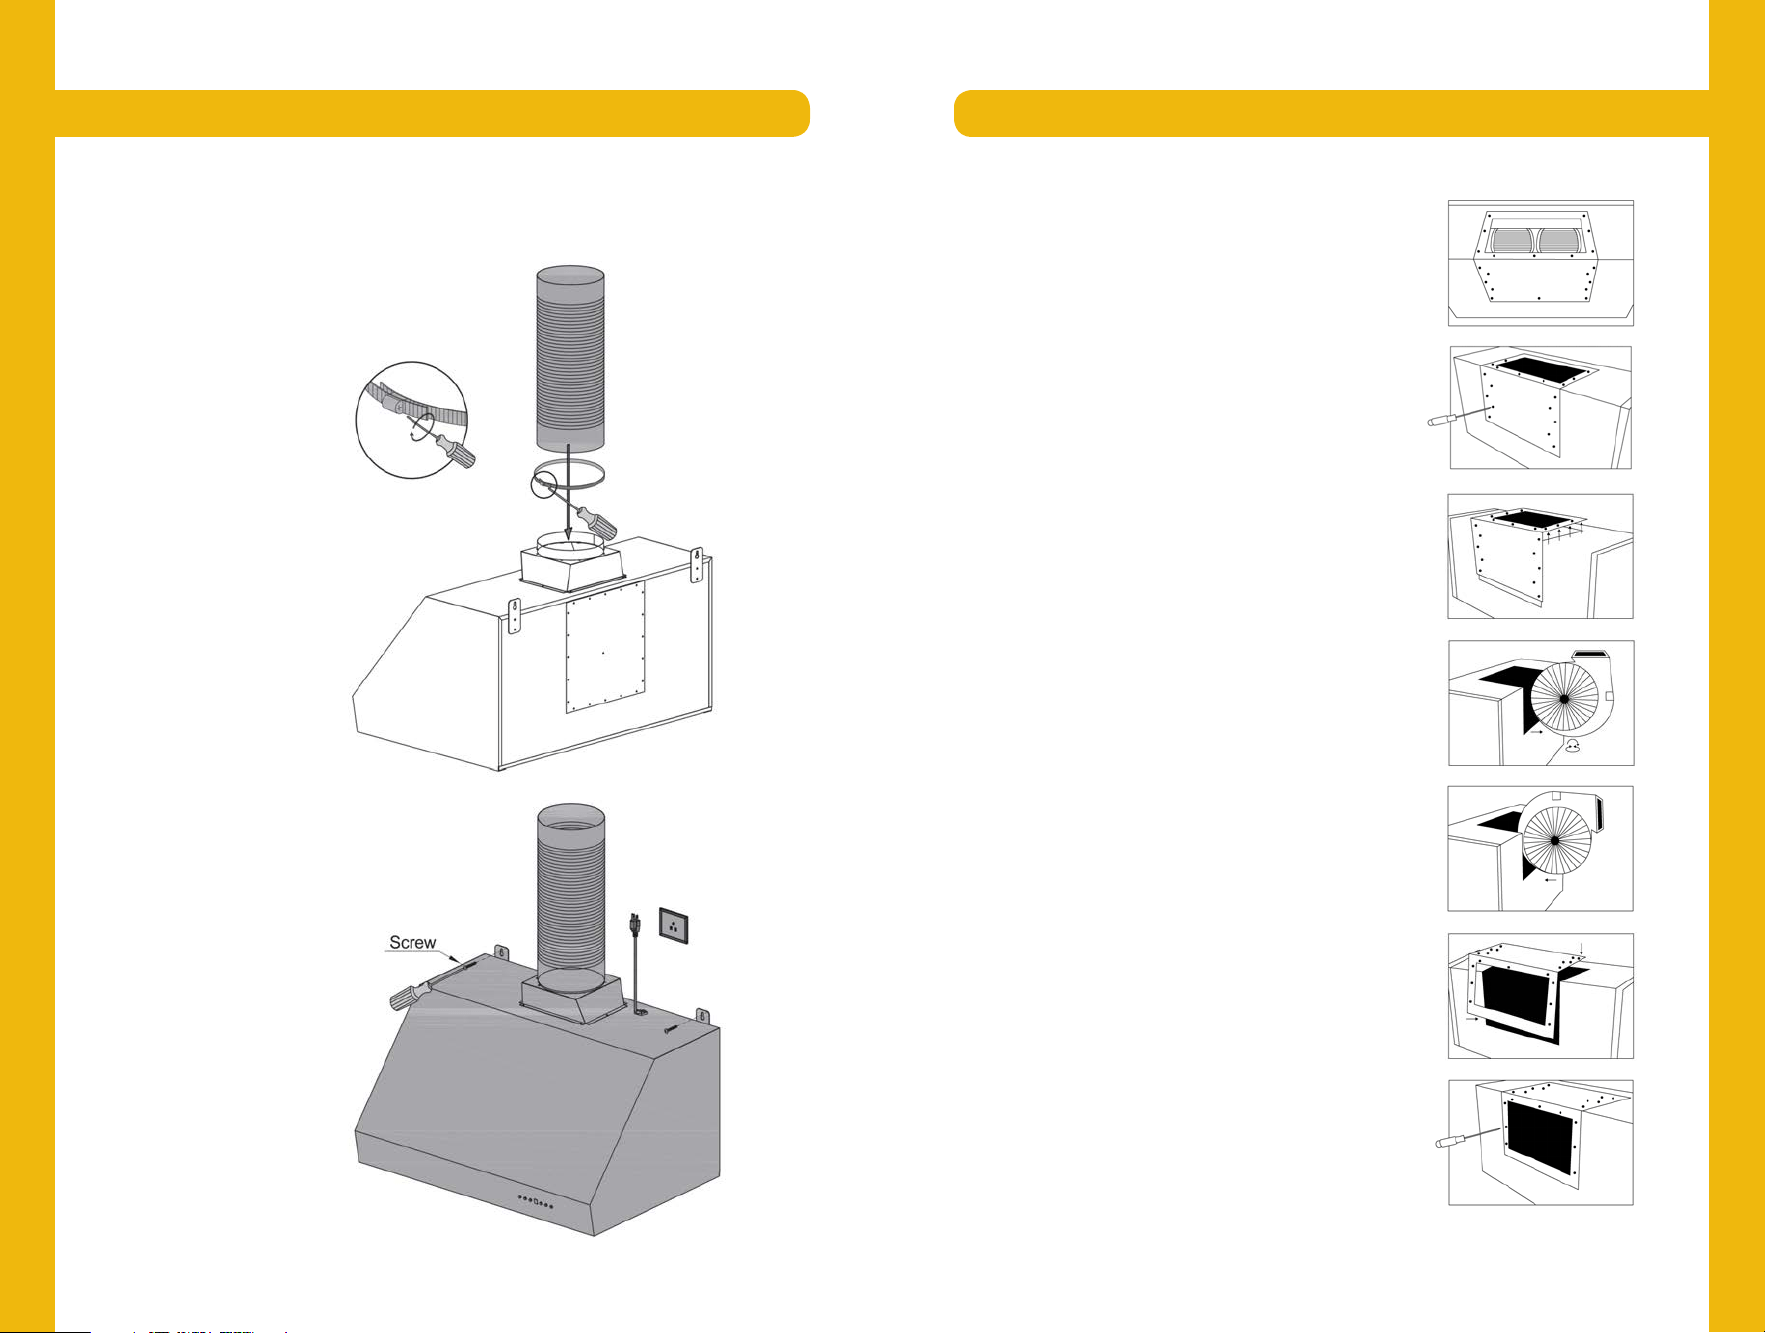
Under-Cab Rear Ducting ConversionUnder cabinet Installation
Step 5
Draw electrical wires through cabinet access opening, center the hood beneath the
cabinet.
Step 6
Align hood-mounting
brackets to the screws on
the wall and hook hood
into place. Tighten screws
to secure hood to the wall.
Step 7
Connect ducting.
If you need to convert your under cabinet range hood to rear ducting please follow
the instructions below. Please note that converting the
undercab to rear ducting is a modification of the standard
hood and part of the installation process. It is recomended
that the hood is inspected before this procedure. If you are
uncomfortable doing this process on your own, you can
have our team professionally do it for a $50 fee* prior
to shipping.
Step 1
First remove the screws from the stainless steel panel. The
small screws attach the panel to the range hood while the
larger screws attach the panel to the motor.
Step 2
Remove the panel from the hood
Step 3
Remove the blower/motor from the range hood. Be careful
not to pull and disconnect the attached wiring.
Step 4
Rotate the blower/motor so that the opening is facing out
the rear of the range hood.
Step 5
Replace the panel so that the opening aligns with the
opening of the blower/motor.
Step 6
Attach the panel to the range hood then attach the
blower/motor to the panel using the larger screws.
Loading ...
Loading ...
Loading ...