Loading ...
Loading ...
Loading ...
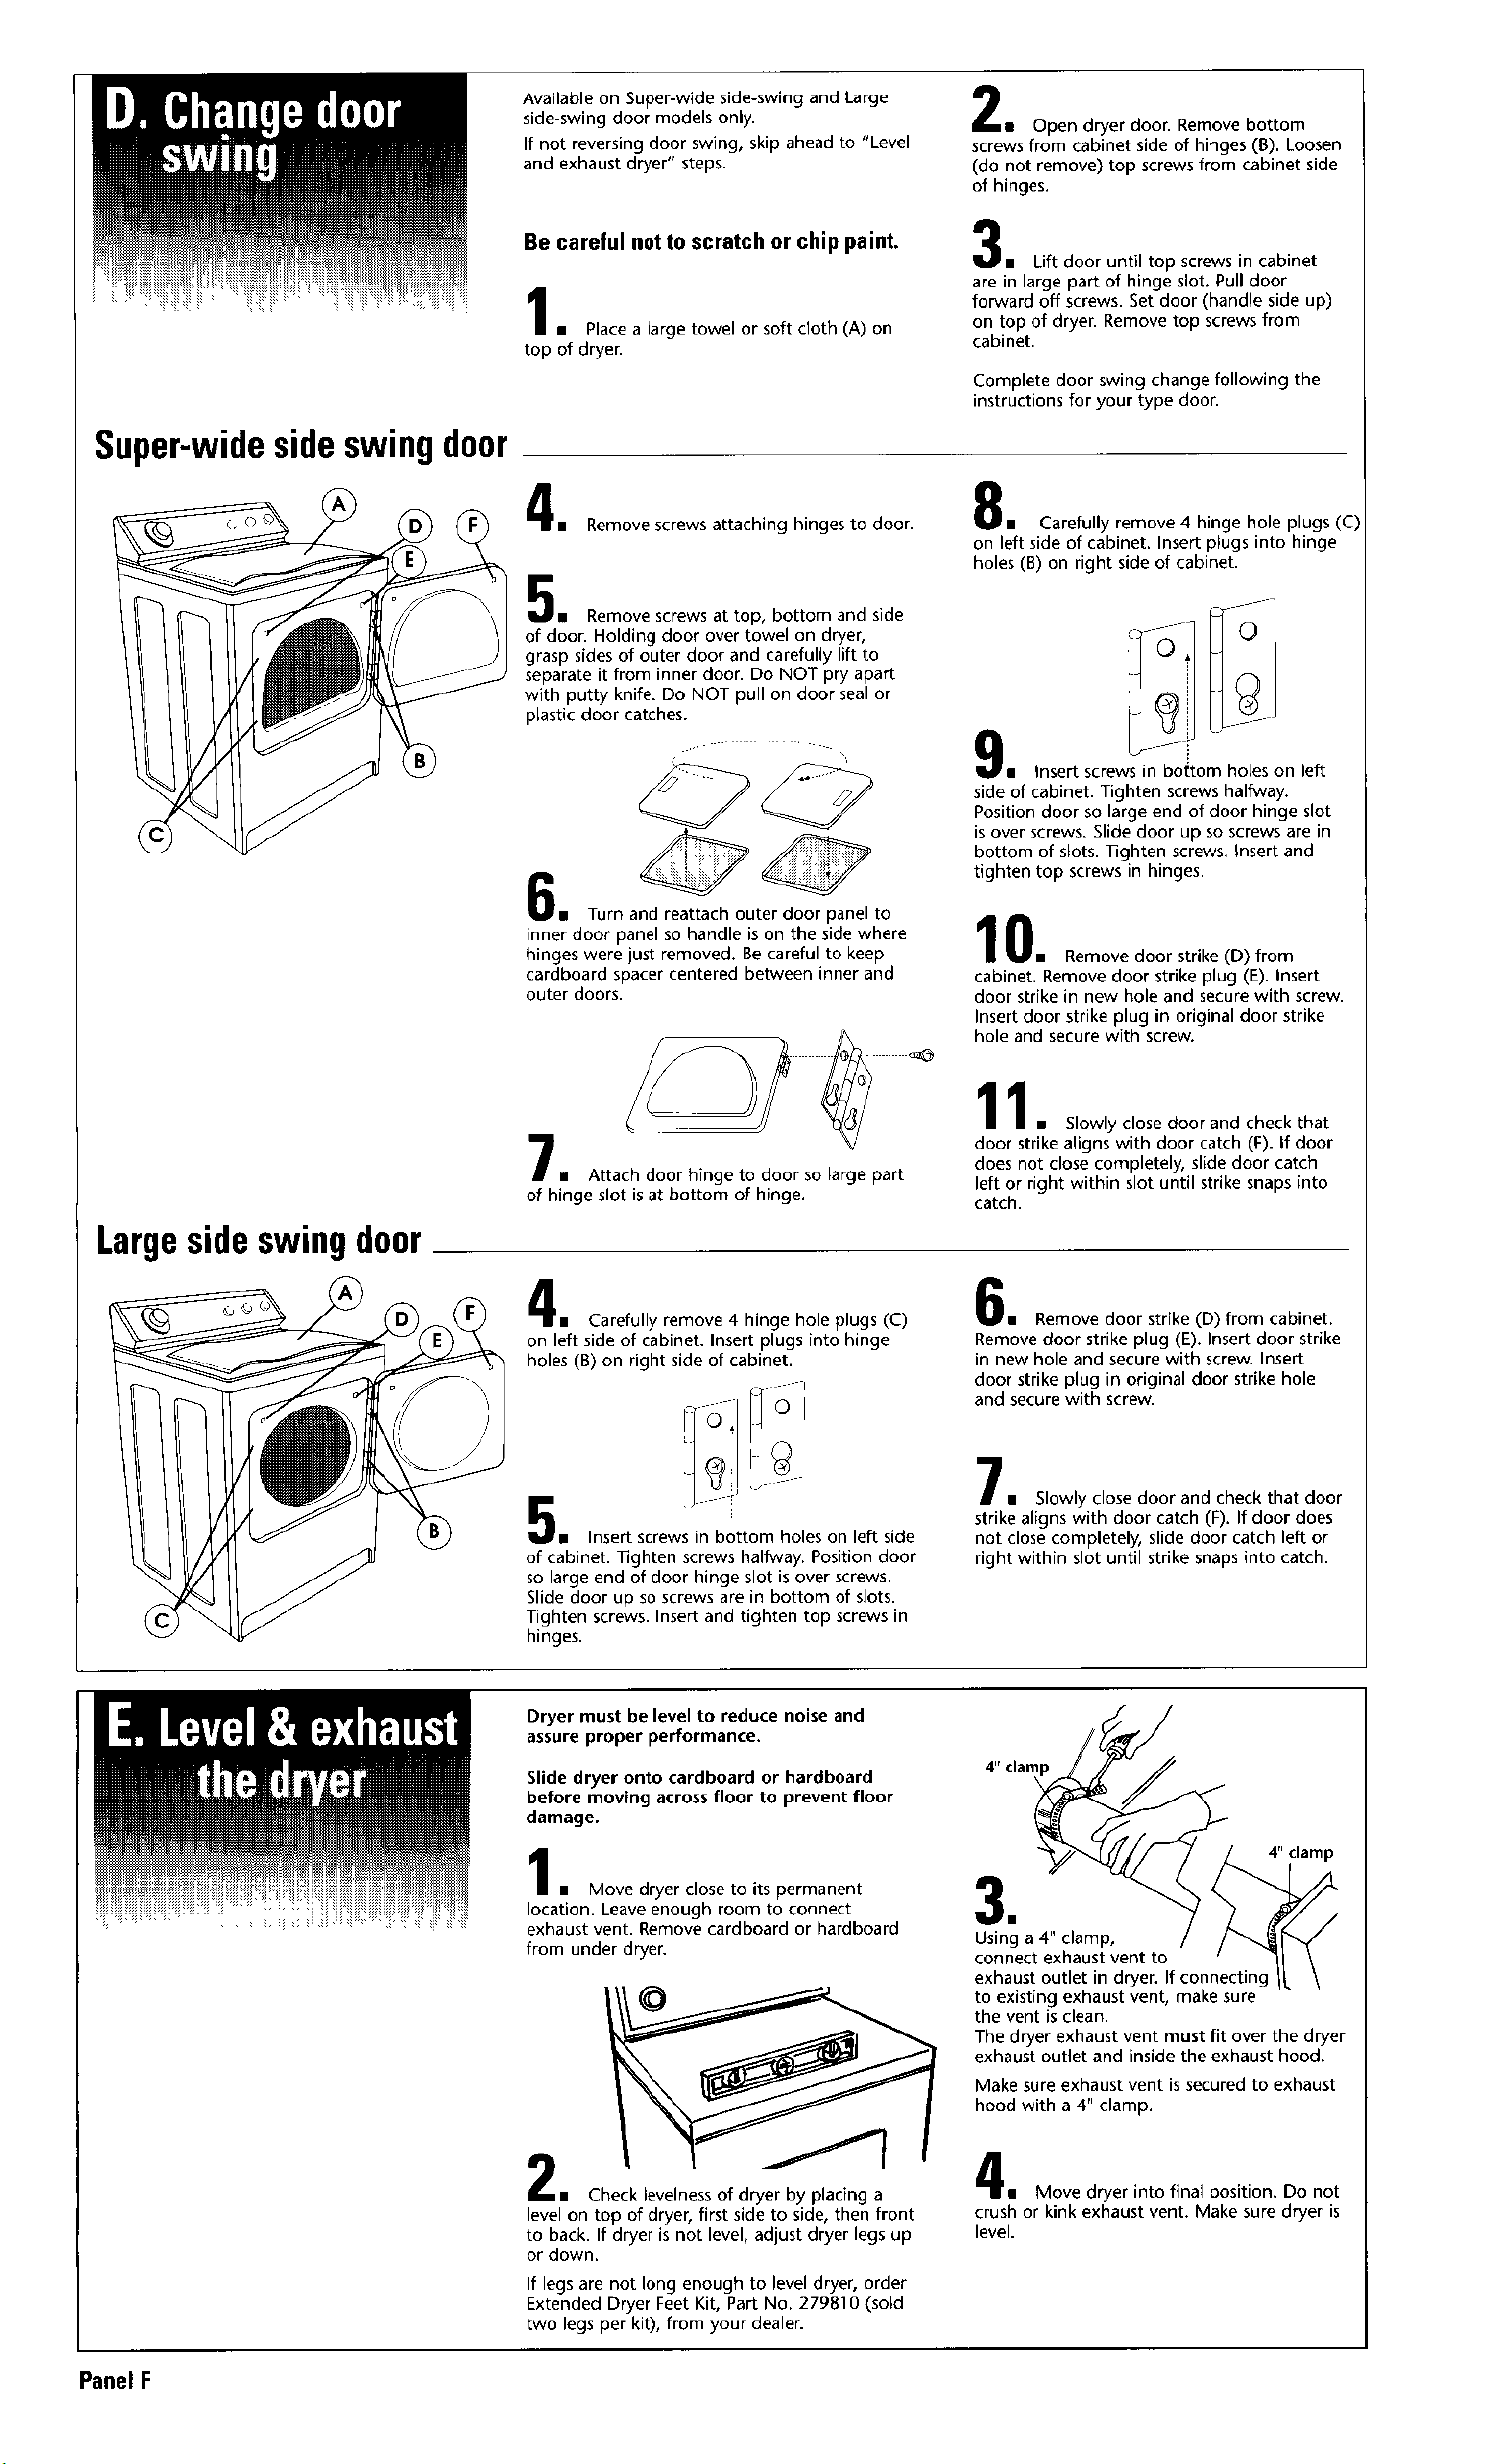
Super-widesideswingdoor
Available on Super-wide side-swing and Large
side-swing door models only•
If not reversing door swing, skip ahead to "Level
and exhaust dryer" steps.
Be careful not to scratch or chip paint.
11 Placea large towel or soft cloth(A) on
top of dryer.
1 Open dryer door. Remove bottom
screws from cabinet side of hinges (B). Loosen
(do not remove} top screws from cabinet side
of hinges.
m Lift door until top screws in cabinet
are in large part of hinge slot. Pull door
forward off screws• Set door (handle side up)
on top of dryer• Remove top screws from
cabinet•
Complete door swing change following the
instructions for your type door.
m Remove screws attaching hinges to door.
m Remove screws at top, bottom and side
of door• Holding door over towel on dryer,
grasp sides of outer door and carefully lift to
separate it from inner door• Do NOT pry apart
with putty knife. Do NOT pull on door seal or
plastic door catches.
u Turn and reattach outer door panel to
inner door panel so handle is on the side where
hinges were just removed. Be careful to keep
cardboard spacer centered between inner and
outer doors.
• Carefully remove 4 hinge hole plugs (C)
on left side of cabinet. Insert plugs into hinge
holes (B) on right side of cabinet•
• Insert screws in bottom holes on left
side of cabinet. Tighten screws halfway.
Position door so large end of door hinge slot
is over screws. Slide door up so screws are in
bottom of slots. Nghten screws. Insert and
tighten top screws in hinges•
0• Remove door strike (D) from
cabinet• Remove door strike plug (E). insert
door strike in new hole and secure with screw•
Insert door strike plug in original door strike
hole and secure with screw.
Largesideswingdoor
m Attach door hinge to door so large part
of hinge slot is at bottom of hinge.
1. Slowly close door and check that
door strike aligns with door catch (It). If door
does not close completely, slide door catch
left or right within slot until strike snaps into
catch.
• Carefully remove 4 hinge hole plugs (C)
on left side of cabinet. Insert plugs into hinge
holes (B) on right side of cabinet.
• Insert screws in bottom holes on left side
of cabinet. Hghten screws halfway. Position door
so large end of door hinge slot is over screws•
Slide door up so screws are in bottom of slots.
Tighten screws• Insert and tighten top screws in
hinges•
w Remove door strike (D) from cabinet.
Remove door strike plug (E). Insert door strike
in new hole and secure with screw. Insert
door strike plug in original door strike hole
and secure with screw.
• Slowly close door and check that door
strike aligns with door catch (F). If door does
not close completely, slide door catch left or
right within slot until strike snaps into catch.
Dryer must be level to reduce noise and
assure proper performance.
Slide dryer onto cardboard or hardboard
before moving across floor to prevent floor
damage.
I • Move dryer close to its permanent
location. Leave enough room to connect
exhaust vent. Remove cardboard or hardboard
from under dryer.
2.
Check levelness of dryer by placing a
level on top of dryer, first side to side, then front
to back. If dryer is not level, adjust dryer legs up
or down,
If legs are not long enough to level dryer, order
Extended Dryer Feet Kit, Part No. 279810 (sold
two legs per kit), from your dealer.
4' clamp
•
Using a 4" clamp,
connect exhaust vent to
exhaust outlet in dryer. If connecting
to existing exhaust vent, make sure
the vent is clean.
The dryer exhaust vent must fit over the dryer
exhaust outlet and inside the exhaust hood.
Make sure exhaust vent is secured to exhaust
hood with a 4" clamp.
• Move dryer into final position. Do not
crush or kink exhaust vent. Make sure dryer is
level.
Panel F
Loading ...
Loading ...