Loading ...
Loading ...
Loading ...
PelPro Pellet Stove • 7103-171E • January 9, 2020
pelprostoves.com
13
Installing Your Stove
Installing Your Stove
Pro Tip
Installing a clean-out “T” (sold separately) to the rear of your Stove, when venting
vertically can save time during cleaning.
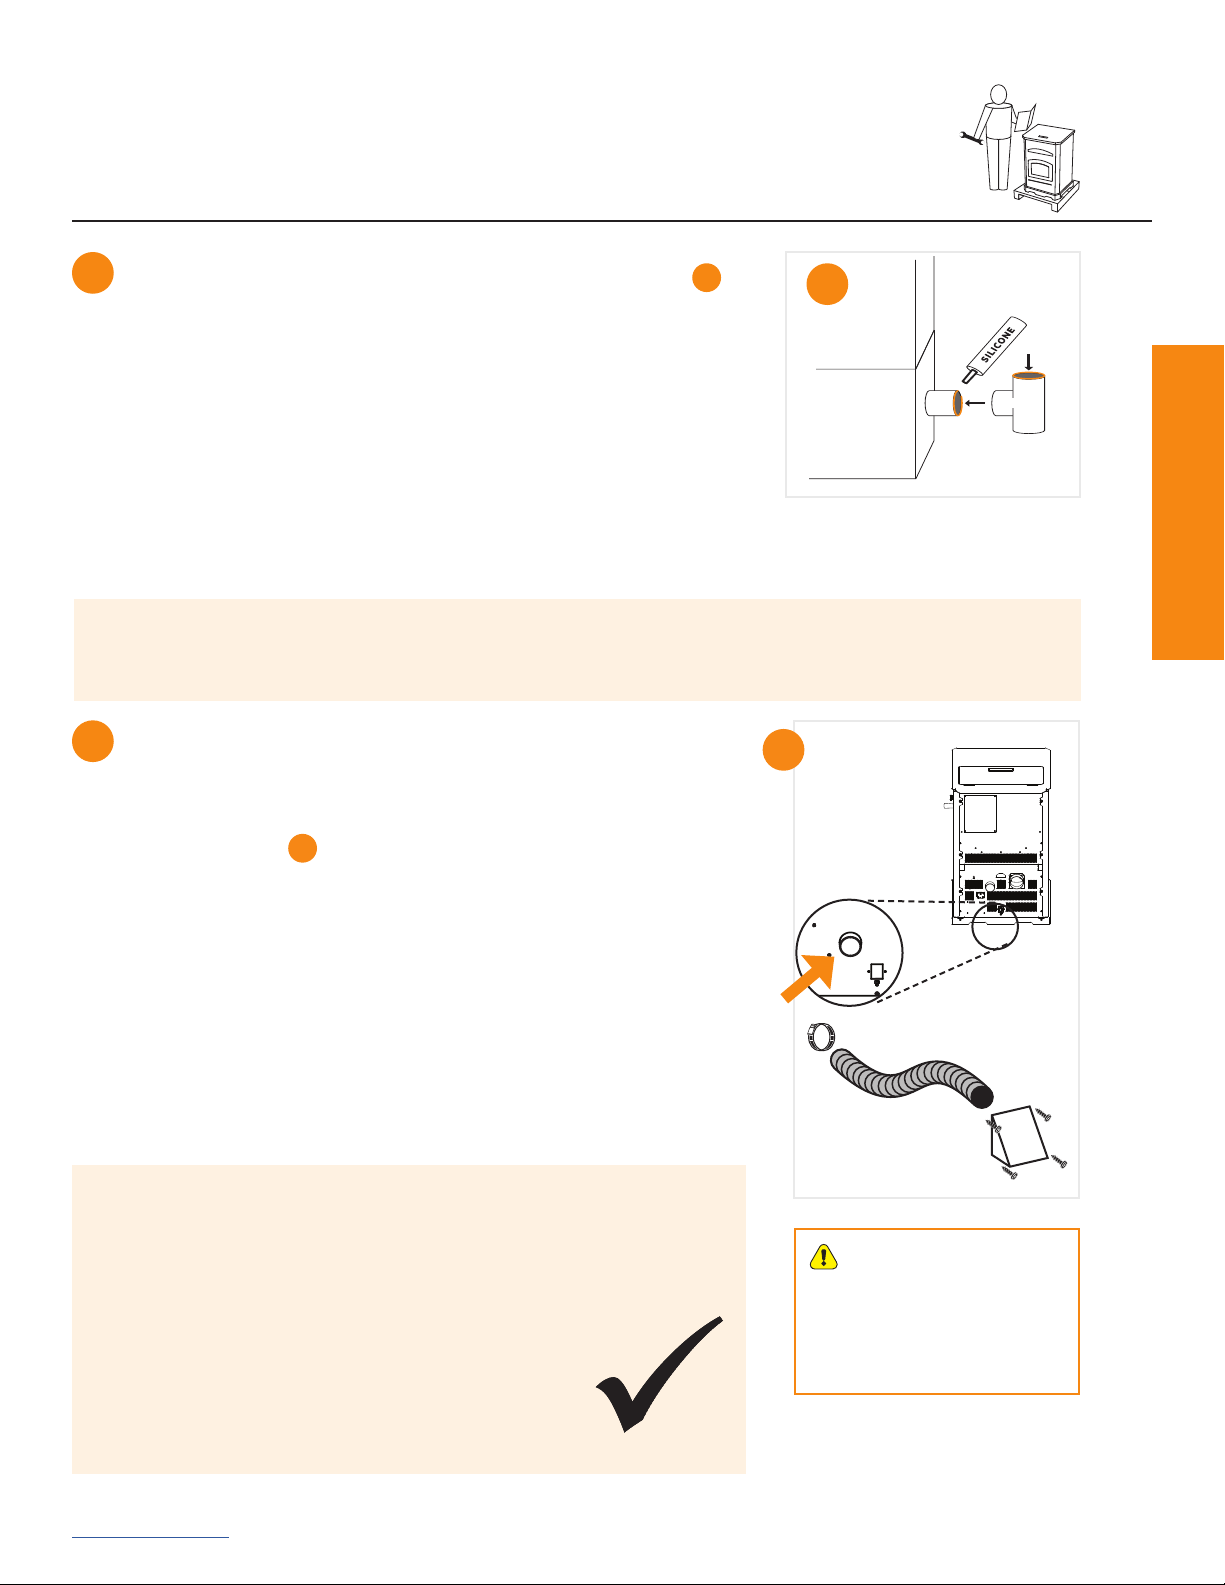
Install outside air kit (included)
For optimal performance, PelPro recommends the outside air kit for
all installations. Outside air kit is required for all mobile/manufactured
home installations.
Install through wall
B
• Maintain clearances from exhaust
• Remove knock out in the rear of Stove
- Attach ex pipe to outside air connection
on Stove
- Use hose clamp
- Route tube outside the structure
- Attach cap
- Secure to outside wall with appropriate fasteners
6
B
CAUTION!
Never draw outside combustion
air from:
• Wall, oor or ceiling cavity
• Enclosed space such as an
attic, garage or crawl space.
• Install pellet venting through wall and connect vent/pipe to Stove
A
• Some venting manufacturers oer pellet Stove adapters for their
venting for easier installation
• Seal all pipe joints using high-temp silicone (500°+)
• Secure exhaust venting system to the Stove with at least 3 screws or
rivets per the pipe manufacturer’s instructions. Also secure all connector
pipe joints with at least 3 screws through each joint.
• Install termination cap
• Conrm all required Stove clearances to combustibles
A
5
Take a Break
Inspect your work:
_____ Conrm clearances to combustibles are maintained
_____ Pipe joints are secure and properly sealed
_____ Outside air kit installed properly
_____ Conrm termination clearances
Loading ...
Loading ...
Loading ...