Loading ...
Loading ...
Loading ...
PAGE: 8 / 11
Type B11
E12 LED
Bulbs
Max 60W
2-4W
Type B11
E12 LED
Bulbs
(included)
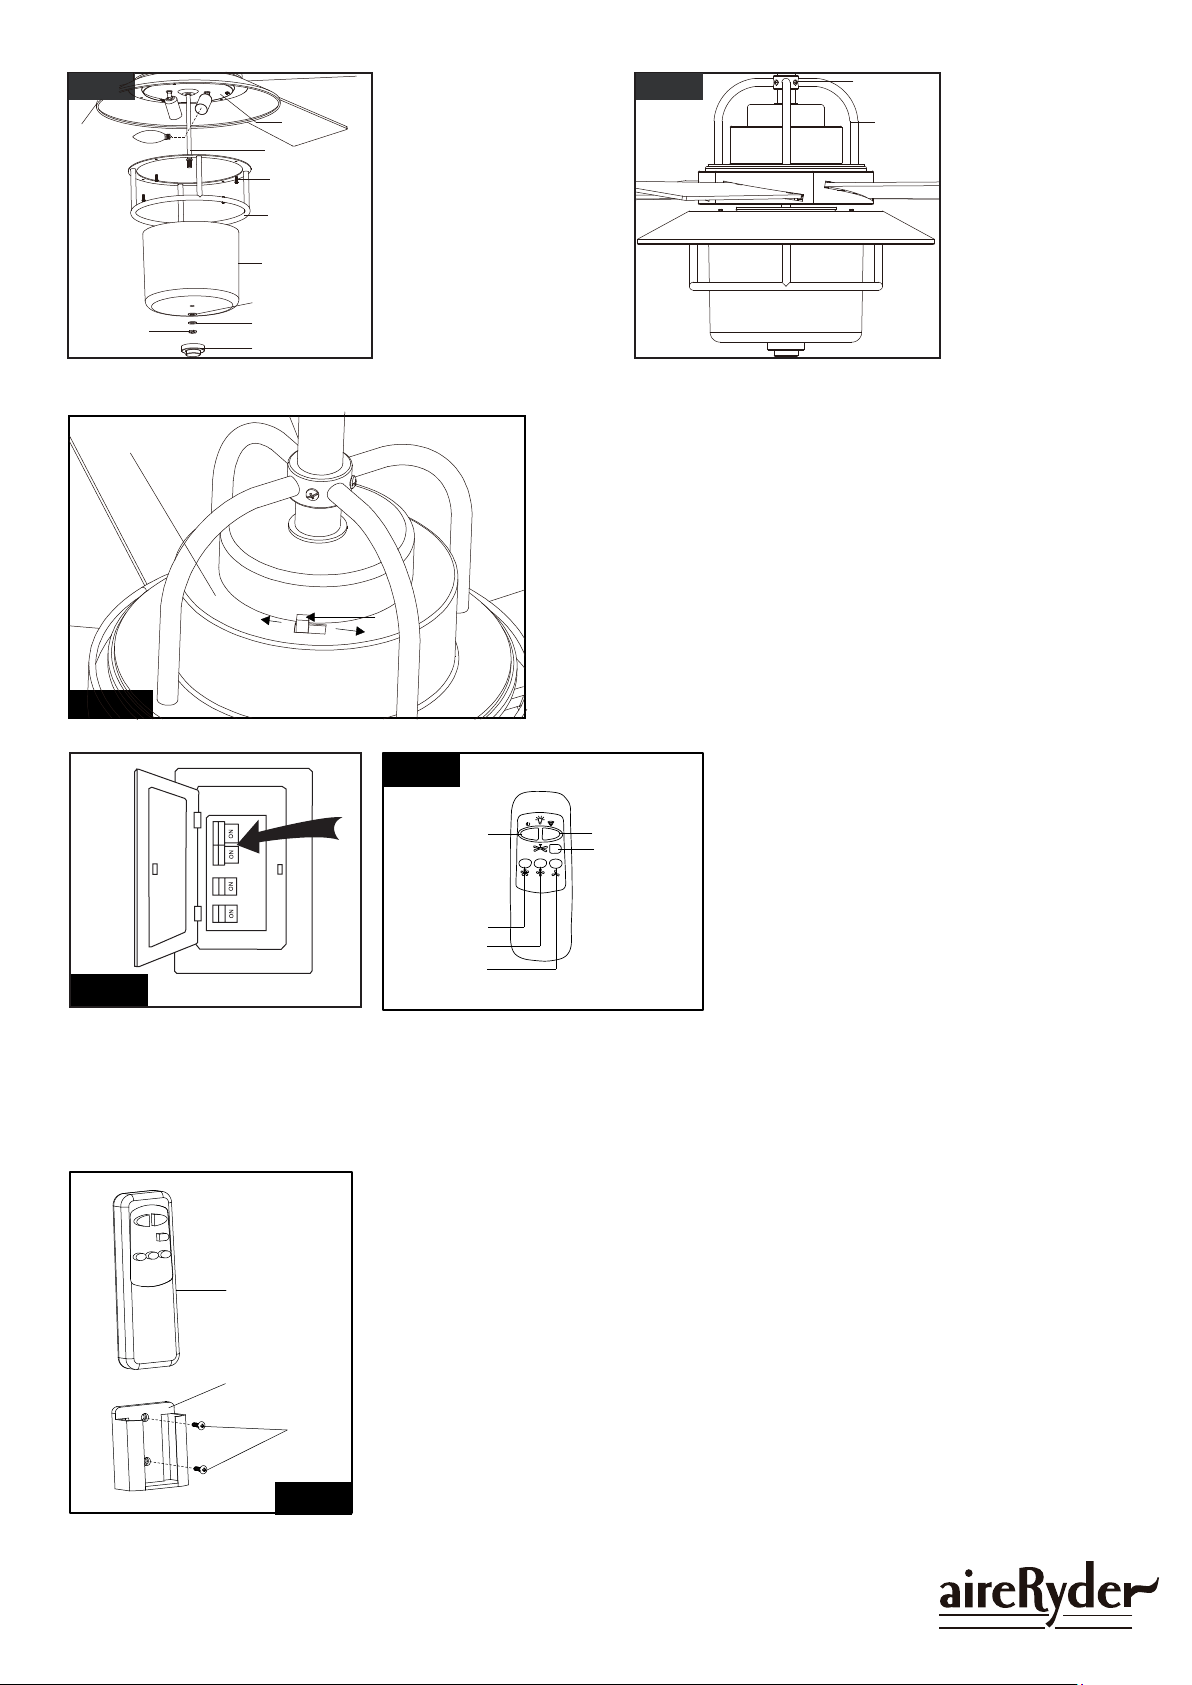
Attach the metal frame to the
light kit, secure it with four
metal frame screws.
Install bulbs (included). See
relamping label at socket
area or packaging for
maximum allowed wattage.
Attach the glass shade to the
light kit by inserting the
threaded pipe into the hole
of the glass shade, secure it
with the rubber pad, metal
pad and the hex nut.
Attach the finial to the
threaded pipe.
Adjust the direction of
the downrod stand
cover as you desire,
and then tighten two
set screws.
F A N C O
181008
Metal Frame
Set Screw
Downrod
Stand
Cover
Light Kit
Glass Shade
Metal Pad
Finial
Hex Nut
Rubber Pad
Metal Frame
Screw
Threaded Pipe
Fig.19
Slide Switch
Fig.20
Turn ON the electric circuit at the
main fuse or circuit breaker box.
Forward
Reverse
Motor
The slide switch on motor sets direction of fan rotation.
Select the desired direction of fan rotation.
Push the slide switch left for " Forward" and right for "Reverse".
Note: Wait for fan to stop before reversing the direction of blade
rotation.
Fig.21
Install the battery (9V, included) to the transmitter.
* Press "HI" button to turn on the fan at high speed.
* Press "MED" button to turn the fan in medium
speed.
* Press "LOW" button to turn the fan in low speed.
* Press "FAN OFF" button to turn off the fan.
* Press "LIGHT ON /OFF" button to turn on or turn
off the light.
* Press and hold the "DIMMER" button to dim or
brighten lights to the desired level and release,
and the brightness level will be memorized. Turn
on the light again, then fan light will restore on of
the brightness level which was dimmed last time.
Note:
This remote controller has memory function
setting. The fan will operate at the same speed
and the fan light will stay at the same
brightness as the last time the power supply
was turned off.
HI
MED
LOW
FAN OFF
DIMMER
LIGHT
ON/OFF
Fig.22
Install the transmitter wall bracket in wall by two screws
and hang transmitter in it carefully.
Wall Bracket
Screw
Transmitter
Fig.17 Fig.18
Loading ...
Loading ...
Loading ...