Thanks for purchasing our Gevi products. Gevi has focused on creating perfect home appliances for our customers. In the past few years,
it took us time to do lots of research and many prototypes to achieve our goal. We would like to give you a different user experience. If you want FAQs and more information, please feel free to contact us.
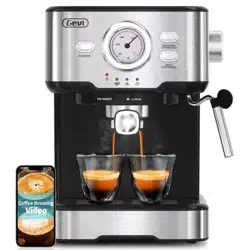
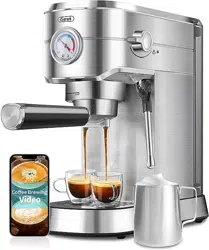
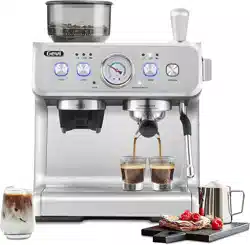
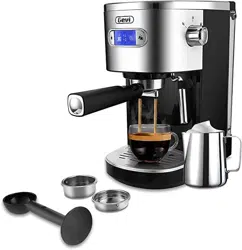
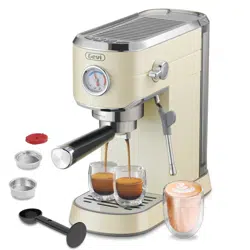
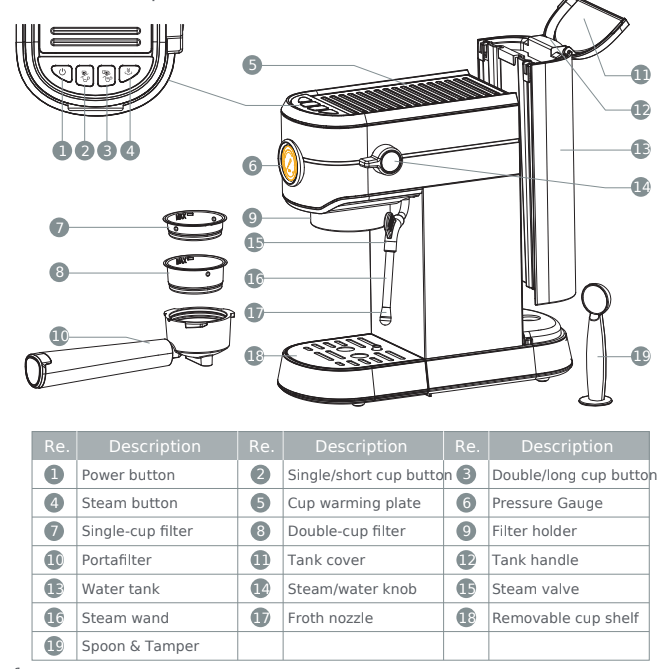
DESCRIPTION OF THE APPLIANCE
Electrical parameters: 120V~ 60Hz 1350W
IMPORTANT SAFEGUARDS
Read these instructions carefully and keep it for future use. If this appliance is passed to a third party, then these instructions must be
included. Before using the electrical appliance, some basic precautions should always be followed including the following:
—1. Read all instructions.
—2. Before using, check the output voltage of the wall outlet should be correspond to the rated voltage marked on the appliance’s rating plate. —3. To protect against fire, electric shock and injury, please do not immerse cord and plug into water or other liquid. —4. Unplug from wall outlet before cleaning and when it is not in use.
Allow the appliance to cool down completely before taking off, attac- hing components or cleaning.
—5. Do not operate the appliance with damaged power cord or plug after the equipment malfunctions, falls or operates the equipment in any way causing damage. Return it to the nearest authorized service for inspection, repair and electrical or mechanical adjustment.
—6. Using accessories not recommended by the manufacturer may result in fire, electric shock or injury. —7. Place the appliance on flat surface or table, do not hang power cord over the edge of table or counter. —8. Ensure the power cord not touch any hot surface of the appliance. —9. Do not place the coffee maker on hot surface or beside fire in order to avoid damage.
—10. To disconnect, turn off all control buttons, then unplug from wall outlet. When unplug the appliance, always hold the plug and do not pull the cord directly. —11. Do not use the device for other purposes than its intended uses and place it in a dry area. —12. Close supervision is necessary when your appliance is being used by or near children. —13. Be careful not to get burned by the steam. —14. Do not touch the hot surface of the steam wand and filter ⓰ holder ❾ when boiling directly. Use handle or knobs. —15. Connect plug to wall outlet before using and turn all buttons off before the plug being removed from wall outlet. —16. Relieve pressure through steam wand before removing port- ⓰ afilter ❿.
—17. This appliance is not intended for being used by persons (including children) with reduced physical, sensory or mental capabilities, or lack of experience and knowledge, unless they have been given supervision or instruction concerning use of the appliance by a person responsible for their safety.
—18. Children should be supervised to ensure that they do not play with the appliance. —19. This appliance is intended to be used in household and similar applications such as: staff kitchen areas in shops, offices and other working environments; farm houses; bed and breakfast type environments. —20. Do not use outdoors.
—21. Do not place on or near a hot gas or electric burner, or in a heat- ed oven.
CORD & PLUG INSTRUCTION
SPECIAL NOTES ON PLUG
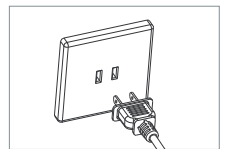
This appliance has a polarized plug (one blade is wider than the other).
To reduce the risk of electric shock, this plug is intended to fit into a polarized outlet in only one way. If the plug does not fit fully into the outlet, reverse the plug. If it still does not fit, contact a qualified elec- trician. Do not attempt to modify the plug in any way.
SHORT CORD INSTRUCTION
a) A short power-supply cord (or detachable power-supply cord) is provided to reduce the risk of entanglement or tripping over a long cord.
b) Longer detachable power-supply cords or extension cords are available and may be used if care is exercised in their use.
c) If a longer detachable power-supply cord or extension cord is used:
1) The marked electrical rating of the cord set or extension cord sh- ould be at least as large as the electrical rating of the appliance;
2) The power cord should be arranged so that it will not dangle on the countertop or desktop, so as not to be pulled by children or 4 CORD & PLUG INSTRUCTION SPECIAL NOTES ON PLUG SHORT CORD INSTRUCTION 5 trip over accidentally;
3) If the electrical appliance is grounded type, the extension cord should be a grounded type 3-core wire;
MAID OPERATION FUNCTION INSTRUCTION
BEFORE FIRST USE OR A LONG TIME NOT USE
For a better taste and good for your health, we suggest you to rinse the machine and release the water out.
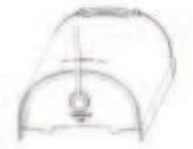
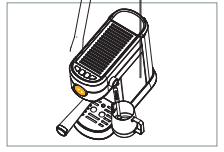
( 1 ) Remove the tape on the water tank ⓭ valve.
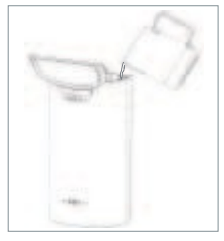
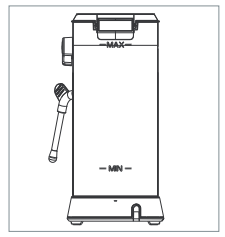
( 2 ) Fill the water tank with clean, room ⓭ temperature water. NOT exceed the “MAX” line.
Note: The appliance is supplied with a detachable water tank ⓭ for easy filling and cleaning, you can fill the water tank firstly, ⓭ and then put it in the appliance.
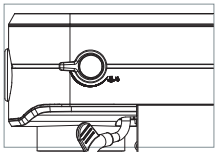
( 3 ) Close the tank cover , and put the ⓫ water tank on the back of coffee maker.
Note: Set up the water tank vertically and align the buckles to the hole on the back of the machine, and press it down to be pa- rallel to the top of the machine.
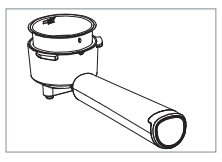
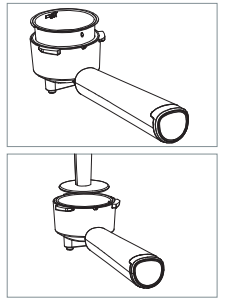
( 4 ) Fix filter into portafilter ❿ (no coffee powder in portafilter ❿).
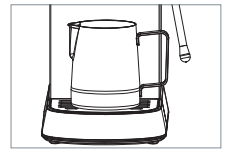
( 5 ) Place a cup on Removable cup shelf ⓲.
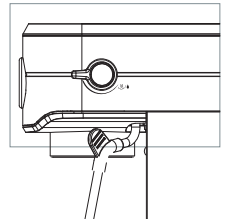
( 6 ) Make sure the steam/water knob is ⓮ in a horizontal position (off-position).
( 7 ) Plug in.
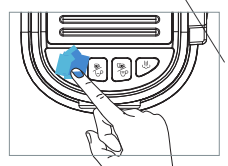
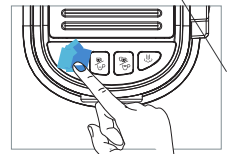
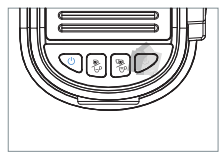
( 8 ) Press the power button ❶. The power button ❶ start to blink blue light slowly, other buttons do not light up. The applia- nce will start heating.
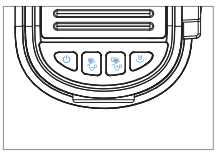
( 9 ) When single cup button ❷, double cup button ❸ and steam button ❹ switch on (power button ❶ stop to blink) and the ap- pliance pass to ready condition.
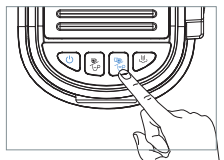
( 10 ) Press double cup button ❸, wait for a moment, the water will flow out.
Note: There may be noise when pumping the water on the first time, it is normal, the appliance is releasing the air inside. After about 20s, the noise will disappear. It’s also recommended to release some water before brewing coffee at the first time or when you don’t use the appliance for a long time.
HOW TO MAKE ESPRESSO
HOW TO MAKE ONE CUP/TWO CUPS OF ESPRESSO
To make a good Espresso, we recommend you to preheat all the parts, like portafilter ❿, single-cup filter ❼, double-cup filter ❽ and your cup, so you can better enjoy the taste flavour of your coffee.
( 1 ) Fix corresponding single-cup filter ❼/ double-cup filter ❽ into portafilter ❿ , make sure the dot on the filter aligns with groove in the portafilter ❿, and add corre- sponding coffee powder to single-cup filter ❼/ double-cup filter ❽ with the spoon & tamper .
Note: A spoon of flat coffee powder is approximately equal to 7g. Collect the coffee powder with the spoon and shake it gently to make the surface flat, the amount of coffee powder is around 7g. One spoon coffee powder (7g) can make one cup of top-grade coffee, while two spoons (14g) is two cups of top-grade coffee.
Tamp the coffee powder gently below the the MAX line of port- afilter ❿ . Don’t tamped the coffee powder too firmly.
( 2 ) Insert the portafilter ❿ into the applia- nce in the flat position and turning anti- clockwise from the “INSERT” position to “ Lock” position.
( 3 ) Place corresponding espresso cup on cup shelf . ⓲
Note: The appliance is not equipped with any jug, please use your jug or cof- fee cup.
( 4 ) Make sure the steam/water knob is ⓮ in a horizontal position (off-position).
( 5 ) Plug in.
(6) Press the power button ❶. The power button ❶ start to blink blue light slowly, other buttons do not light up. The applia- nce will start heating.
( 7 ) When 4 button’s light keep blue fixed, the appliance pass to ready condition.
(8)Make one cup of espresso: Press single cup button ❷, the single cup button ❷ will blink white light slowly. After a while, coffee will flow out.
(9) Make two cups of espresso: Press dou- ble cup button ❸, the double cup button ❸ will blink white light slowly. After a while, coffee will flow out.
(10) The appliance will automatically stop working when the coffee-brewing is finished. Your coffee is ready now. All 4 button’s light keep blue fixed, you can operate other functions.
Safety advise: If during the coffee brew, you rotate the steam/water knob ⓮ in the on position, the appliance will stop to brew but from the steam wand ⓰ will flow hot water. Must remember not to do this because the hot water can burn you or people around you.
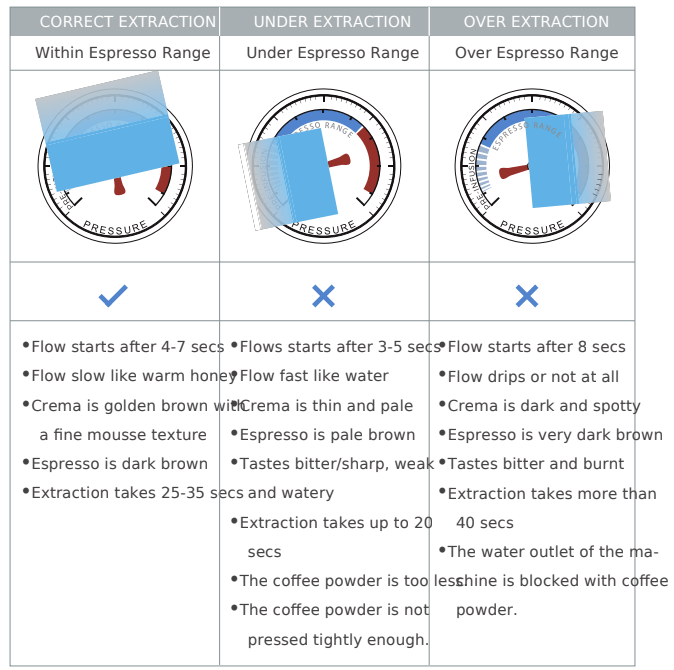
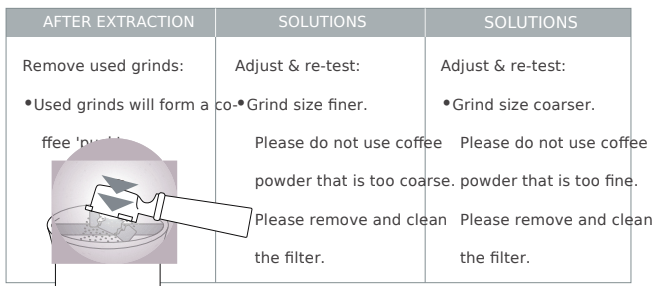
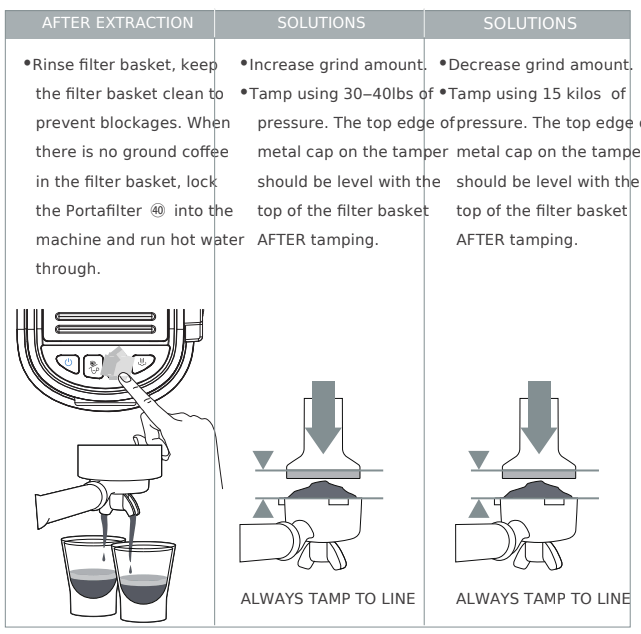
PRESSURE GAUGE PROBLEM
HOW TO CUSTOMIZE THE AMOUNT OF ESPRESSO
( 1 ) You can customize the amount of single cup/short dose according to your own needs from 25mL to 60mL.
( 2 ) You can customize the amount of double cup/long dose according to your own needs from 60mL to 130mL.
OPERATION STEPS
(1) When the appliance’s heating is finish- ed (power button ❶ stop to blink, other 3 buttons keep blue light fixed).
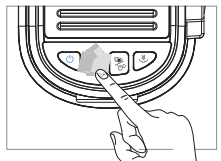
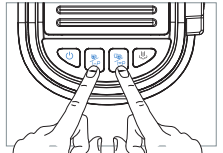
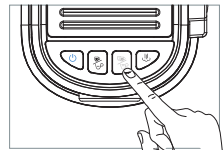
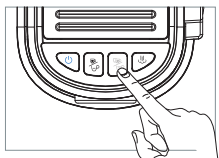
(2) Hold and press together the single cup button ❷ and double cup button ❸ for 3 seconds to enter into the mode of setting the dispensing amount.
(3) The single cup button ❷ and double cup button ❸ start to blink blue light quickly, the power button ❶ keeps blue light fixed, the steam button ❹ do not light up.
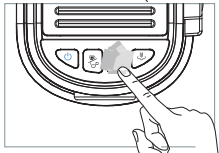
(4.1) Customize the amount of single cup/ short dose. Press the single cup button ❷; After get the desired amount of coffee, press single cup button ❷ again to stop.
(4.2) Customize the amount of double cup/ long dose. Press the double cup button❸, and follow the same procedures of (4.1)Customize the amount of single cup brew.
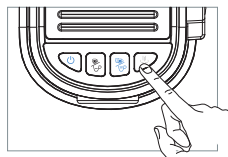
(5.1) Save the new setting. Press the steam button ❹ within 15 seconds, the power button ❶ will blink blue light slowly for 3 times and the machine will have 3 beeps. Then the machine will automatically back to ready mode, all the buttons will keep blue light fixed, the new settings will be saved.
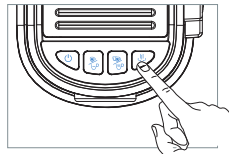
(5.2) Back to the ready without save. Press the power button ❶ within 15 seconds. The machine will beep for one time and be back to ready mode without saving the new settings.
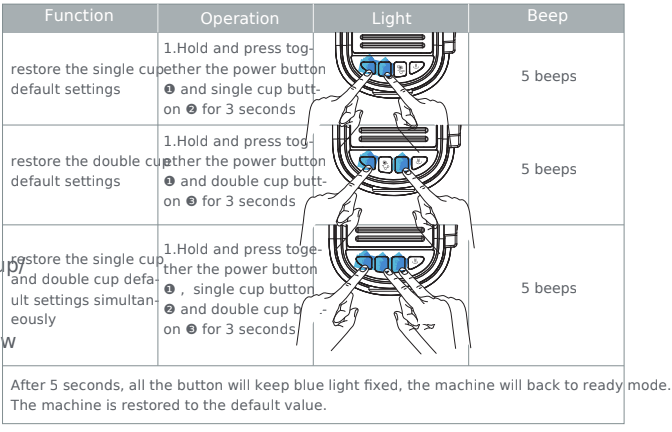
RESTORE THE DEFAULT SETTING STEPS
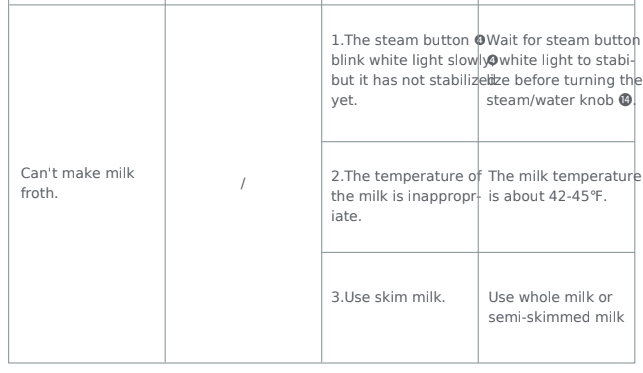
HOW TO MAKE MILK FOAM
Milk that has been textured correctly has a thick, rich microfoam with a silky sheen. Texturing involves both heating and aerating milk using steam. Vital elements include positioning of the Steam wand ,when to ⓰ adjust the Milk Jug position and reaching the correct temperature. Use the below steps to help you create café-style microfoam.
For a better result, we suggest you, every time before starting the frothing, to release some water out from the Steam wand and rinse the Pitcher. ⓰
OPERATION STEPS
Steam Warm Up:
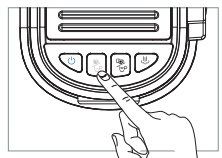
Press the steam button ❹ from the ready mode, and it starts to blink white light slowly.
The steam button ❹ stops blinking and keeps white light fixed. It means the heating for steam is finished.
Note:For a better taste and your good health, we suggest you rinse the pitcher and release some water out from the Steam wa- nd . ⓰
A) Turn on the steam/water knob to the ⓮ “” position for 10 seconds and there will be water coming out from the froth nozzle . Be careful of the hot steam.
B) Turn the steam/water knob to horizo- ⓮ ntal position(off-position). Pour away the water in the pitcher.
Then turn the steam/water knob to the ⓮ “ ”position fully, steam will come out from the Froth nozzle . ⓱
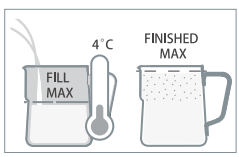
Fill milk pitcher
Add 100-150mL of cold milk around 4°C(40 °F) into a chilled clean stainless steel pitc- her. Fill to the bottom of the pitcher spout.
Note: The volume of milk will increase or ’stretch’ during tex- turing, so don’t overfill the pitcher.
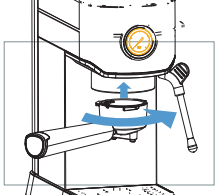
Position :
Place the Steam wand ⓰ Arm in the pitcher spout at the 12 o'clock position, with the Froth nozzle in the milk at the ⓱ 3 o'clock position, a finger width away from the edge of the pitcher.
Keep the Froth nozzle just under the surface of ⓱ the milk. Turn steam/water knob back ⓮ to STEAM position to start texturing. A whirlpool action should be created in the pitcher.
Sound :
How air is introduced to the milk determines the consistency of the foam. If large gulps of air are added to the milk, the foam will have large bubbles. Introducing air to the milk in a controlled, gentle fashion indicated by a gentle hissing sound, will ensure the milk has fine aerated microfoam. Barista Tip:
Milk Texturing Sounds
Gurgling: Froth nozzle not deep enough, raise pitcher.
Smooth Hissing: Just right for latte.
Screeching: Froth nozzle too deep, lower pitcher.
Keeping Froth nozzle Position
As the steam heats & textures the milk, the milk will stretch causing the level of the milk in the pitcher to rise. As this happens follow the level of the milk by lowering the pitcher, keeping the Froth nozzle just ⓱ below the surface.
Note:Some adjustments to technique will be required when using non-dairy milk.
Amount of Foam :
Create the amount of microfoam you want. Cappuccinos traditionally have more microfoam than flat whites.
Immerse Froth nozzle ⓱ :
After creating the desired amount of foam, immerse the Steam wand half depth ⓰ way into the milk. This heats all the milk and pulls in milk instead of air. This ensures the milk & foam are blended together, ma- king it denser & smoother.
Correct Temperature :
An indication of reaching correct milk temperature is when the pitcher base can only be touched comfortably for approximately 3 seconds.
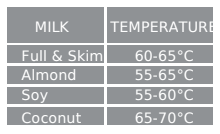
Barista Tip: Milk Temperature
• Under: If not heated long enough, it will be warm with little texture.
• Optimum: See below table.
• Over: If heated for too long it will start to boil around 72°C and will have a burnt taste with all texture lost.
Note:Above recommendations might vary from one milk brand to another and depending on your taste preference.
Purging the Steam wand
After the milk increase in volume by two times or your required purpose is reach- ed, you can turn the steam/water knob ⓮ to horizontal position(off-position). The Single/short cup button ❷ and Double/l- ong cup button ❸ do not light up. Beca- use the appliance is in steam function, if you want to go to standby mode, press st- eam button ❹ , Single/short cup button ❷ or Double/long cup button ❸ to exit. Press the Power button❶ , the appliance has no any response.
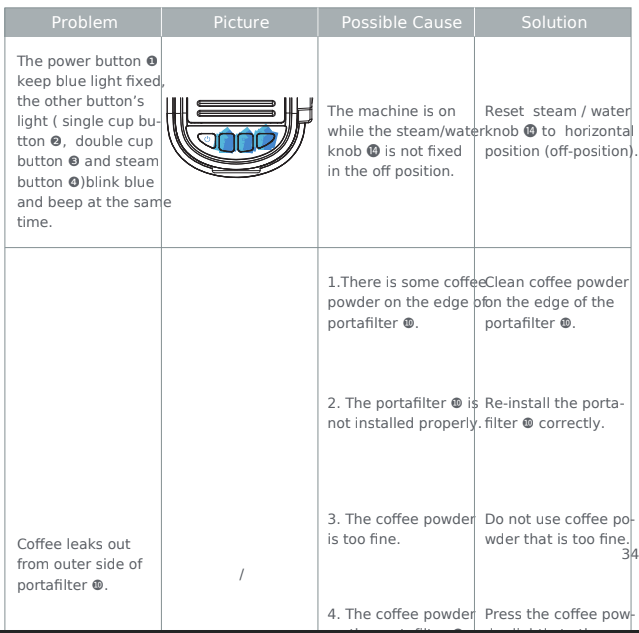
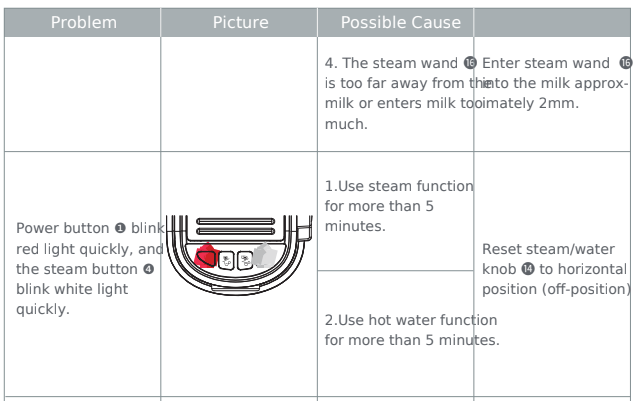
Note:If steam function is being used for more than 5 minutes, the Power button ❶ blinks red light quickly, and the steam butt- on ❹ blinks white light quickly. Thus, reset steam/water knob ⓮ to horizontal position (off-position) to stop it.
Wipe Steam wand ⓰ :
Wipe the Steam wand Arm & froth nozzle ⓰ ⓱ with a clean damp cloth to remove any m- ilk residue.
Tap & Swirl the Pitcher
Gently tapping the Pitcher on the benchtop helps to release larger trapped air bubbles. Swirling helps the milk & froth to combine for an even consistency & a silky appearance.
The Finishing Touches :
Pour from the Milk Pitcher into your cup in one steady motion.
Note:If there is no operation after 5 minutes, the appliance will pass to sleep mode.
MAKE ESPRESSO IMMEDIATELY AFTER FROTHING MILK
( 1 ) After making the froth milk through the steps above, if you want to continue to brew coffee, by press the single cup button ❷ or double cup button ❸.
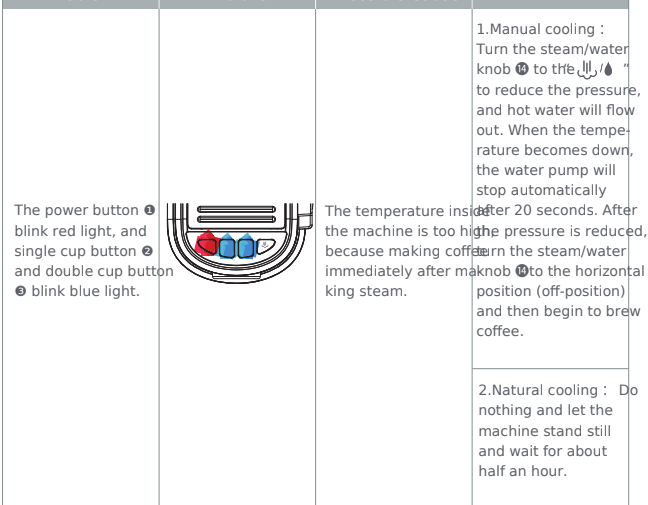
( 2 ) You will find the high-temperature status. Then the appliance will show you the single cup button ❷ and double cup button ❸ are blinking blue light quickly, and the power button ❶ is blinking red light quickly It is necessary to cool down the machine firstly. Then we could continue to brew espresso.
( 3 ) Place a cup under the froth nozzle . ⓱ Turn the steam/water knob to the steam ⓮ “ ” position to release water out and make the appliance to cool down. Wait until 4 buttons switch on and blue light fixed. After that, turn the steam / water knob to ⓮ horizontal position (off-position). Now, the appliance is ready to brew coffee.
MAKE HOT WATER
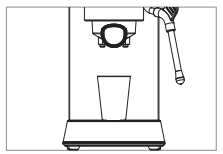
( 1 ) When the appliance is ready, put a cup under the froth nozzle , turn the steam/ ⓱ water knob to ⓮ “ ”.
( 2 ) The single cup button ❷ and double cup button ❸ will flash blue light slowly, then the hot water will dispense from froth nozzle ⓱.
( 3 ) Until you reach the desired amount of hot water, then turn the steam/water knob ⓮ to horizontal position (off-position). All buttons will keep blue light fixed. The appliance will be back to ready condition.
OTHER FUNCTION
AUTOMATIC SLEEP MODE FUNCTION
( 1 ) If there is no any operation after 5 m- inutes, the appliance will beep for a while and all button’s light will be turned off and the appliance will pass to sleep mode.
( 2 ) To reactivate the appliance, press power button ❶, the power button ❶ start to blink blue light slowly, other buttons do not light up.
( 3 ) When 4 button’s light keep blue fixed, then the heating is finished and the appli- ance come into ready condition. Long press the power button ❶ for 2 seconds, the appliance will switch off.
Note:After you make the milk foam, if there is no operation after 5 minutes, the appliance will pass to sleep mode. All but- ton’s light will be turned off. Press the power button ❶ , the appliance will pass to ready condition without warm up and all the lights switch on. Because the appliance’s temperature is too high. And it is not suitable to make coffee. In this case, please refer to the section of “HOW TO MAKE ESPRESSO IM- MEDIATELY AFTER FROTHING MILK” to lower the inner the temperature down.
WATER SHORTAGE MODE FUNCTION
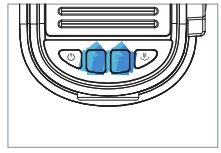
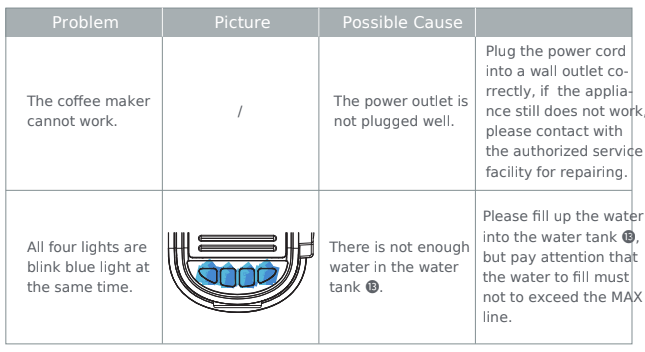
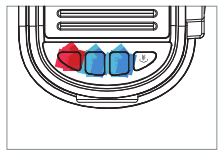
( 1 ) During the brew function, if the water tank ⓭ is out of water, the appliance’s 4 buttons light (power button ❶, single cup button ❷ , double cup button ❸, steam button ❹) will blink blue light together and the appliance will automatically stop to brew.
( 2 ) Press any button to stop the water shortage alarm. Then refill the water tank ⓭ with clean water immediately. All button’s light will keep blue light fixed.
Note: Due to the water shortage in the portafilter ❿, the appliance will have high temperature and high pressure, so we recommend you to follow the two steps: Firstly, remove the portafilter ❿ and clean the coffee powder and don't use the same coffee powder again. Secondly, put a cup under the steam wand . Turn the steam ⓰ /water knob and brew some water to refill the inner boiler. ⓮ After that, the appliance is ready to use again.
CARE & CLEANING
The espresso making process involves extracting oils out of ground coffee. Deposits of grinds & oils build up over time, affecting the taste of the coffee & operation of the appliance.
Purging water through the filter holder & Steam Wand, before & after making each coffee, is the easiest way to keep your appliance clean.
CLEANING ACCESSORIES & REMOVABLE PARTS
Clean parts in warm water with a mild detergent, rinse & dry.
Note:Do not use alkaline cleaning agents, abrasives or metals courers, as these will scratch the surfaces of parts.
Dishwasher Safe parts: √ Stainless Steel Removable cup shelf √Stainless Steel Single—cup filter ❼ √ Stainless Steel Double—cup filter ❽ NON Dishwasher Safe parts: √ Water tank ⓭ √ Portafilter ❿
√ Drip tray √Spoon & Tamper ⓳
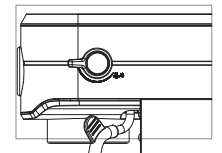
Cleaning Drip Tray
• When Required Empty if the red Water Level Indicator appears through the Stainless Steel Grill, otherwise water will overflow.
Note:Over time it is normal for the inside of the Drip Tray to be stained by the oils in the coffee grinds.
• Weekly Clean in warm water with a mild detergent, rinse & dry. Cleaning Portafilter & Filter Basket
• Every Time Wash after each use by rinsing them with warm water under the tap.
• Regular Intervals In warm soapy water using a mild detergent, rinse & dry.
Cleaning Filter Baskets
2-3 Months
1. Soak the Filter Baskets overnight in the Milk Pitcher with warm water.
2. In the morning rinse the Pitcher & Filter Basket (s) under running water ensuring all traces of the cleaning tablet have been removed.
3. Place a Filter Basket into Portafilter [without coffee grinds] and insert i- nto filter holder.
4. Press Double/long cup button ❸ when the appliance pass to ready co- ndition.
5. Wait for a moment, Allow water to run through until it stops.
CLEANING THE MACHINE
Cleaning Cup warming tray & Exterior
• When Required
Wipe over the appliance with a soft damp cloth with a mild detergent and wipe dry.
CAUTION: To prevent damage to the appliance, do not use alkaline cleaning agents, abrasives or metal scourers.
CAUTION: Do not immerse the appliance in water.
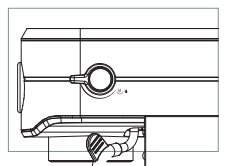
Filter holder Silicone Seal
- A silicone seal is located in the filter holder ❾ and creates a seal against the Filter Basket when making an espresso.
Note:Clean the seal ring of the filter holder ❾ each time im- mediately with hot water using the brewing function after making coffee.
Important: When the appliance is not being used, we recommend that you don’t leave the Portafilter inserted into the filter holder, as this will reduce the life of the silicone seal.
Over time this Seal loses its elasticity and may require replacement. The seal may need replacing when watery espresso leaks from around the po- rtafilter handle during extraction, or if the portafilter handle is loose when fully turned to the centre position.
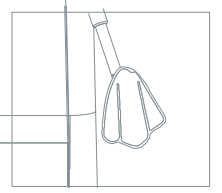
Cleaning Steam Wand
• Every Time
1. After frothing milk, purge the Steam wand by ⓰ turning the steam/water knob to " " for just ⓮ 1—2 seconds. 2. Wipe the Steam wand with a damp cloth. ⓰
• 2—3 Months
1. Soak the Steam wand overnight in the Milk ⓰ Pitcher with warm water.
2. In the morning remove the Pitcher and rinse ensuring that all traces of the solution have been removed.
3. Wipe Steam wand with a damp cloth ensuring ⓰ that all traces of the cleaning tablet have been removed. Note:Contact Gevi should you think that the filter holder seal needs replacing. Do not attempt to change the Silicone Seal with out first consulting Gevi.
- Over time this Seal loses its elasticity and may require replacement. The seal may need replacing when watery espresso leaks from around the po- rtafilter handle during extraction, or if the portafilter handle is loose when fully turned to the centre position.
4. Run Hot Water through the Steam wand for 40 ⓰ seconds.
Unblocking Steam Wand
If the Froth nozzle becomes clogged with milk resi- due:
1. Insert the thicker 'STEAM' Cleaning needle(Not i- ncluded) up the Froth nozzle hole and remove.
2. Run Hot Water through the Steam wand for 4- ⓰ 0 seconds.
Steam wand Remains Blocked
1. Unscrew the Froth nozzle and soak overnight in the Milk Pitcher with warm water & one Espresso Machine Cleaning Tablet.
2. In the morning rinse the Pitcher & Froth nozzle under running water ensuring all traces of the cleaning tablet have been removed.
3. Use the thicker 'Steam' Cleaning needle to clean the Froth nozzle.
4. Ensure transparent O—ring is present & undamaged.
5. Screw the Froth nozzle back into the Steam wand Arm. ⓰ 6. Run Hot Water through the Steam wand for ⓰ 40 seconds.
TIPS FOR PERFECT BARISTA
1.Always use clean, room temperature water in the coffee maker.
2.For an optimum coffee taste, buy whole coffee beans and finely grind them just before brewing.
3.Grind the bean every time before brew espresso in case you ever used coffee powder. You must keep the unused coffee powder in a cool, dry place.
4. Do not reuse coffee powder since this will greatly reduce the coffee’s flavor. Reheating coffee is not recommended as coffee is at its peak flavor immediately after brewing.


 ” position for 10 seconds and there will be water coming out from the froth nozzle . Be careful of the hot steam.
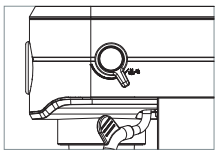
 ” position to release water out and make the appliance to cool down. Wait until 4 buttons switch on and blue light fixed. After that, turn the steam / water knob to ⓮ horizontal position (off-position). Now, the appliance is ready to brew coffee.
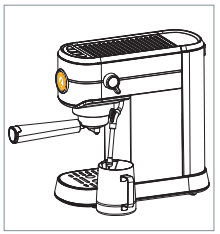
 ”.
”.