Loading ...
Loading ...
Loading ...
;OIVlPLETO
_cisodetenerel
enodeestacio-
Iaensacadora
)eidentifiquela
la ensacador&
_.>,-
ensacadora (3),
1superior y.gire-
ale en pomc_on,
,ndo trabaje en
_uede utilizar la
", "2"0 "3" ("3"
"nenos tupido).
_leta de la ensa-
re)orienlado ha-
cuentra situado.
azo (3) de man-
arte inferior del
lora (3) pase por
ta, y asegSrese
! compteto (3) y
los orificios de
; la ensacadora
ra apretarlo (8)_
e afiojar las su-
_rla paleta (5) y
TO LEVEL MOWER
Make sure tires are properly inflated to the
PSI shown on tires° If tires are over or under
inflated, it may affect the appearance ofyour
lawn and lead you to think the mower is not
adjusted properly.
VISUAL SIDE-TO-SIDE ADJUSTMENT
1. With all tires properly inflated and if your
Fawn appears unevenly cut, determine
which side of mower is cutting lower.
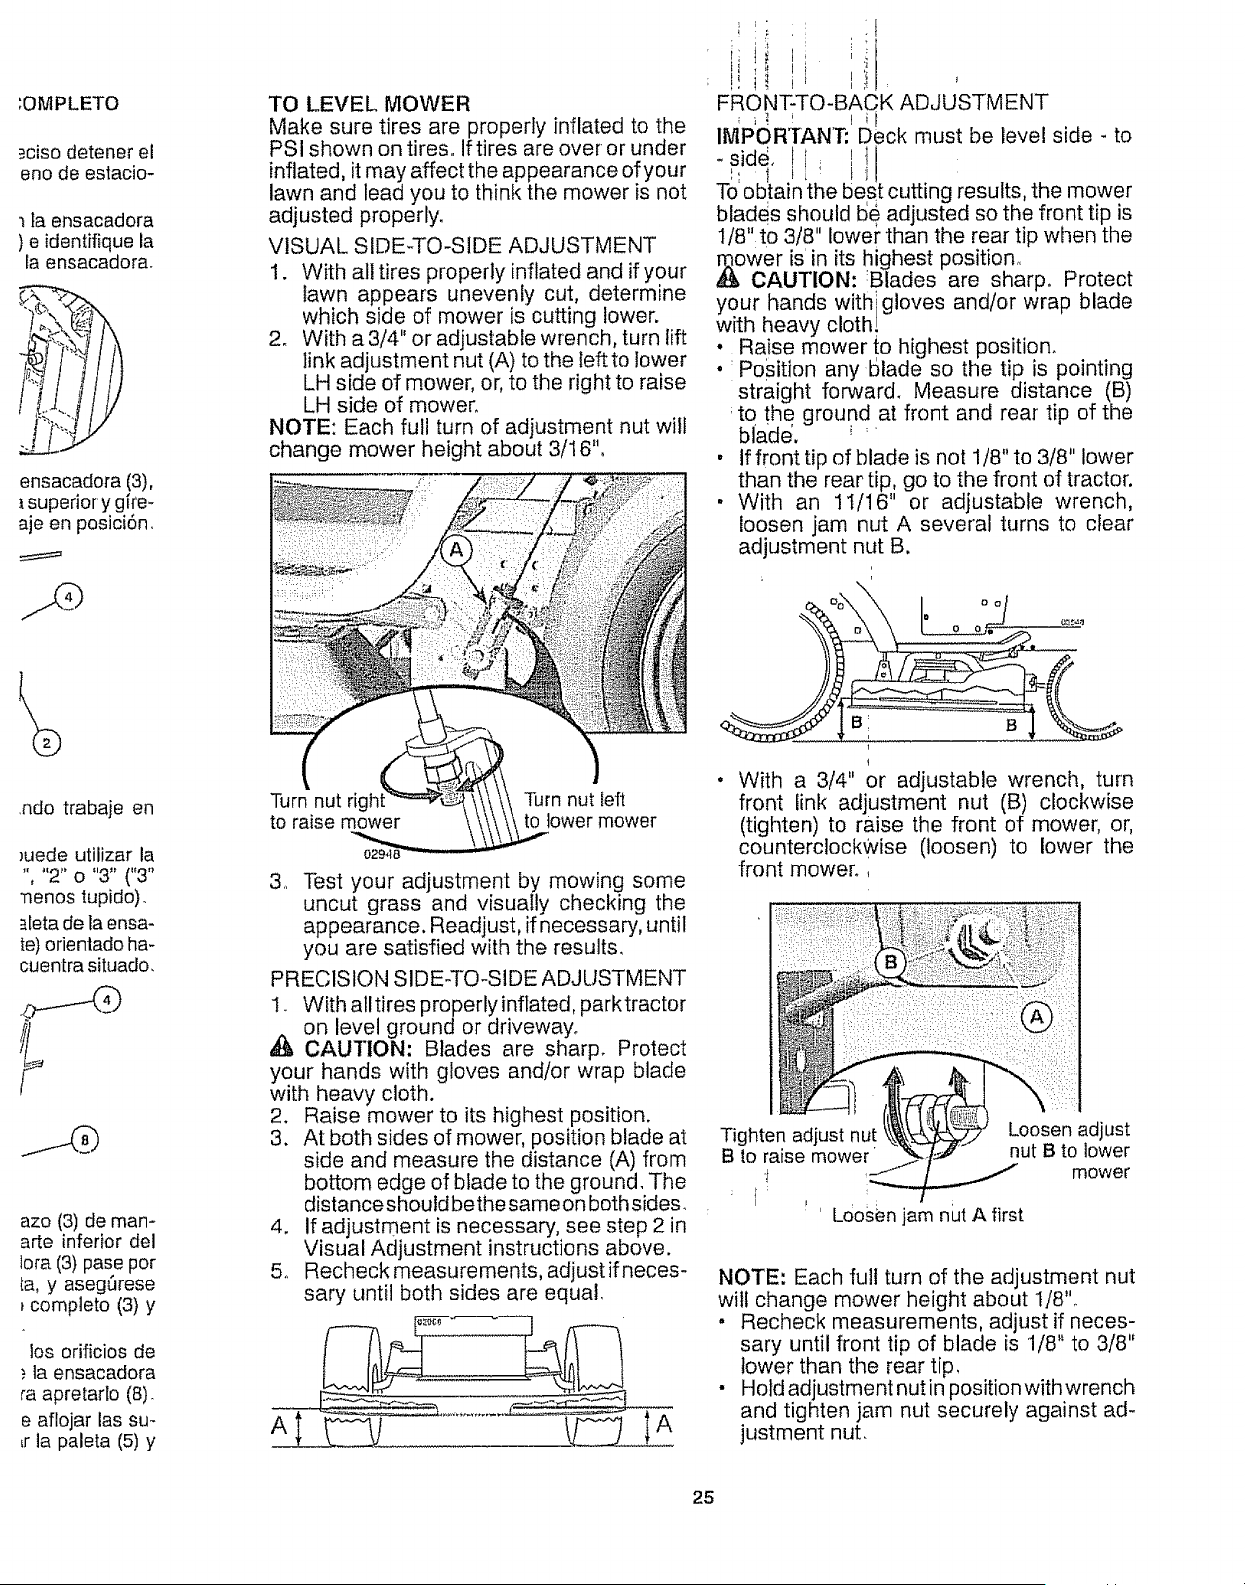
2o With a 3/4" or adjustable wrench, turn lift
link adjustment nut (A) to the left to lower
LH side of mower, or, to the right to raise
LH side of mowen
NOTE: Each full turn of adjustment nut wilt
change mower height about 3/16".
Turn nut righ
to raise mower
Turn nut left
to lower mower
3, Test your adjustment by mowing some
uncut grass and visually checking the
appearance. Readjust, if necessary, until
you are satisfied with the results.
PRECISION SIDE-TO-SIDE ADJUSTMENT
1. With atltires properly inflated, parktractor
on level ground or driveway°
_1_ CAUTION: Blades are sharp. Protect
your hands with gloves and/or wrap blade
with heavy cloth.
2. Raise mower to its highest position.
3. At both sides of mower, position blade at
side and measure the distance (A) from
bottom edge of blade to the ground. The
distance should be the same on both sides.
4. If adjustment is necessary, see step 2 in
Visual Adjustment instructions above.
5o Recheck measurements, adjustifneces-
sary until both sides are equal,
IA
• i
i; ii i>
FRONT-TO-BACK ADJUSTMENT
_ i! ! !ii
IMPOR'fANT: Deck must be level side - to
-sid6 'I _ej!
_', I i_ ! '
TO obtain the t cutting results, the mower
blades should 15Qadjusted so the front tip is
1/8" t0 3/8" lower than the rear tip when the
._ower is' in its highest position,.
CAUTION: Blades are sharp° Protect
your hands with igloves and/or wrap blade
with heavy cloth!
* Raise mower to highest position.
. Position any blade so the tip is pointing
straight forwar& Measure distance (B)
.to the ground at front and rear tip of the
blade, ' _
, If front tip of blade is not 1/8" to 3f8" lower
than the rear tip, go to the front of tractor.
, With an 1t/16" or adjustable wrench,
loosen jam nut A several turns to clear
adjustment nut B.
!
° With a 3/4" or adjustable wrench, turn
front link adjustment nut (B) clockwise
(tighten) to raise the front of mower, or,
counterclockwise (loosen) to lower the
front mower.,
Tighten adjust nut Loosen adjust
B to raise mower nut B to lower
! mower
: f ! ' Loosen jam nLit Afirst
NOTE: Each full turn of the adjustment nut
wilt change mower height about I/8"o
, Recheck measurements, adjust if neces-
sary until front tip of blade is 1/8" to 3/8"
lower than the rear tip,
• Hold adjustment nut in positionwithwrench
and tighten jam nut securely against ad-
justment nut,
25
Loading ...
Loading ...
Loading ...