Loading ...
Loading ...
Loading ...
11
Leak Testing
All gas piping and connections must be tested for leaks after
installation or service. All leaks must be corrected immediately.
Remember-before exchanging an empty bottle for a new one make
sure all control valves are in the “off” position.
Open the valve (shut-off or ‘ON’ LP tank). Test for leaks by applying
liquid soap solution to all joints. Bubbles forming indicate gas leak.
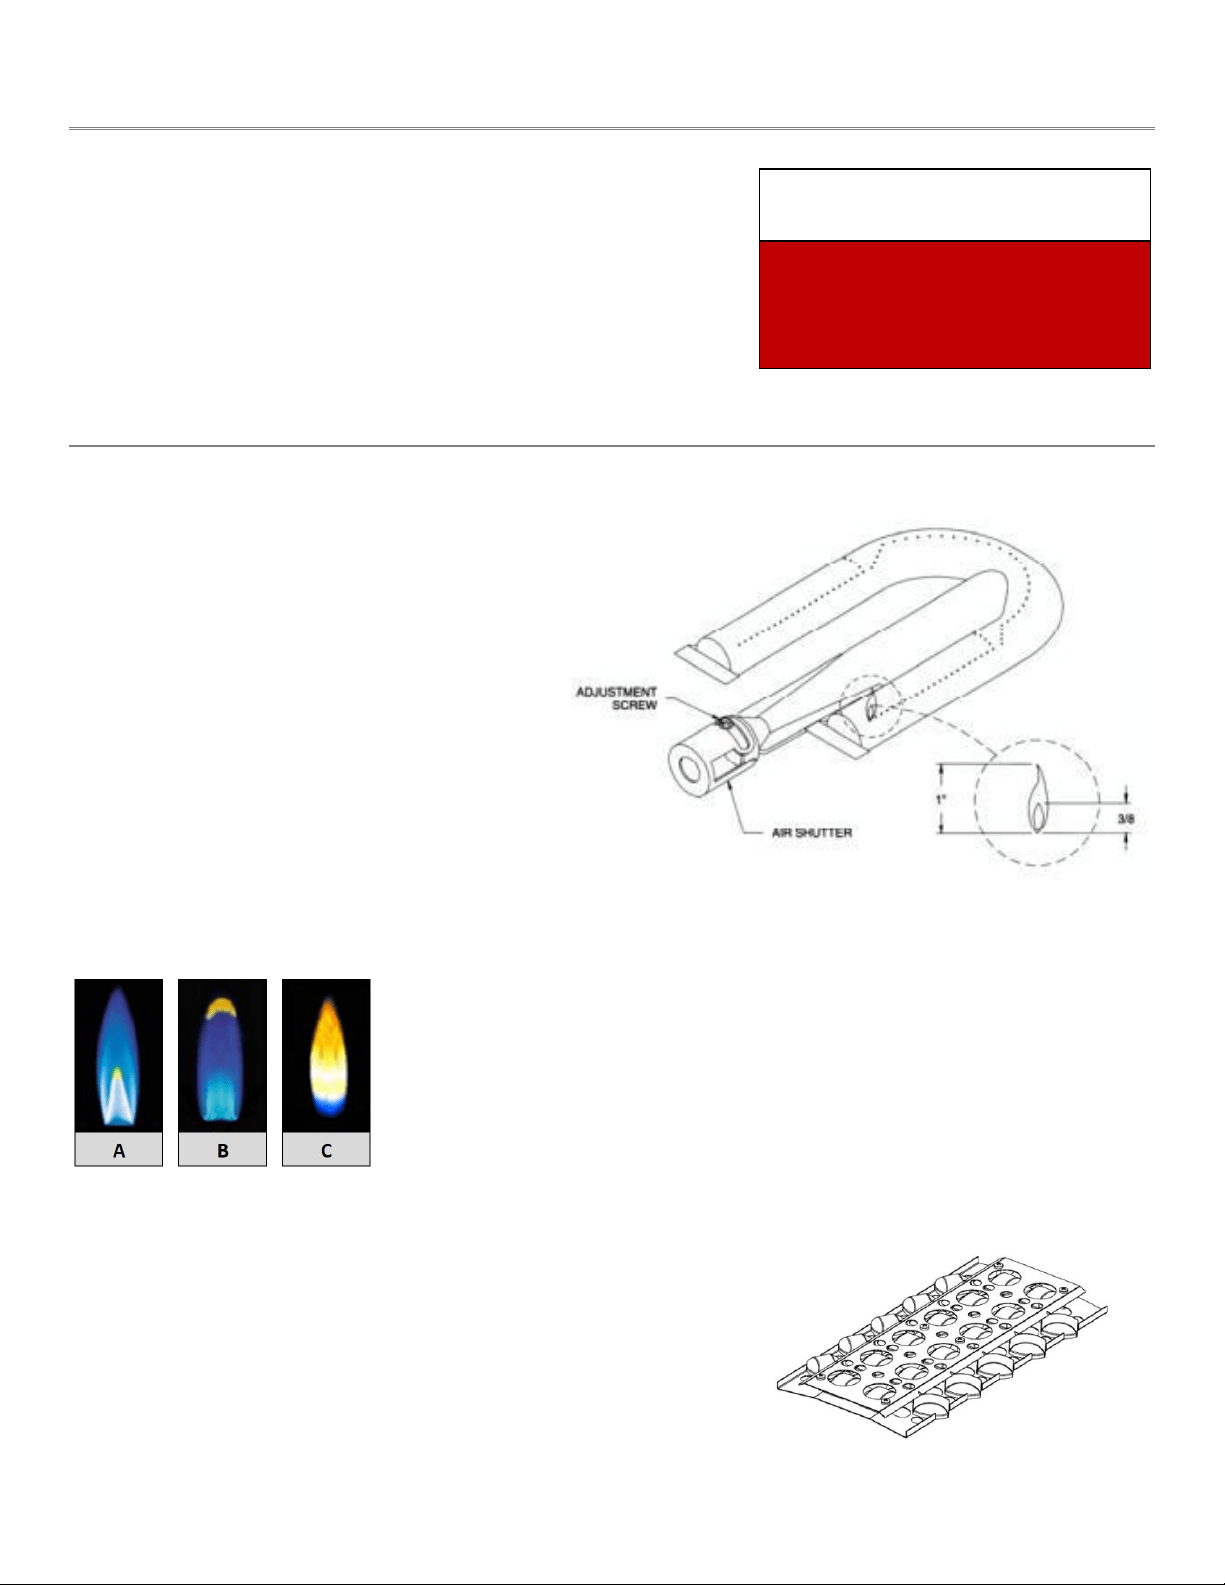
Burner Adjustments
All burners are thoroughly checked for proper lighting
and optimal flame pattern before shipment;
however, installation conditions or conversion
may necessitate minor adjustment to the air
shutter/intake. If the flame is not comparable to
figures A or B (shown below) adjust the air
shutter.
Adjusting the Air Shutter/Intake
The flame should be the full length of the burner,
blue and stable. The air intake should ONLY be
adjusted by a licensed gas professional if the
flame is lifting or has excessive amounts of
yellow visible in the flame. To gain access to the air
shutter the burner must be removed.
If flame is lifting, loosen the adjustment screw and rotate the air
shutter clockwise to achieve optimal flame pattern. Be sure to
tighten the adjustment screw before replacing the burner.
If the flame is more yellow than blue, loosen the adjustment
screw and rotate the air shutter counter clockwise to achieve
optimal flame pattern. Be sure to tighten the adjustment screw
before replacing the burner.
While replacing the burner,
ensure that the orifice is properly
seated inside the venturi opening
and that the burner is properly
seated and secured.
Briquettes: Place briquette burner covers above each burner
NEVER USE AN OPEN FLAME
TO CHECK FOR LEAKS!
!! WARNING !!
A. Natural Gas Flame
B. Liquid Propane Flame
C. Adjust Air Shutter
Loading ...
Loading ...
Loading ...