Loading ...
Loading ...
Loading ...
€. ANTI-TI P BRACKET ¡NSTALLATION INSTRUCTIONS
To reduce
the risk of tipping of the range, the range must be secured to the floor by
properly
installed anti-tip bracket and
screws
packed
with the
range. Failure
to
installthe anti-tip bracket will allow
the range to tip
over if excessive weight is
place
on an open door or
if
a
child
climbs upon
it. Serious injury might result from spilled hot liquids
or
from the range itself.
lf
range is ever moved to a different location, the ant¡-tip
bracket must be
also
moved
and
installed
with
range.
lnstructions
are
provided
for installation in wood or cement fastened to the floor. When fastening to the floor, be sure that
screws do not
penetrate plumbing.
Anti-tip
bracket installation:
1. The anti-tip
bracket must
be
installed to hold the right rear leg of
range.
2. lf the range
is
place
into a range opening,
place
the anti-tip bracket so that the closed edge of the bracket is against the
rear wall and its
right side against cabinet
adjacent.
3. lf the range is not
place
into a range opening,
just
place
the anti-tip bracket so that the closed edge of the bracket is
against the
rear
wall.
4,
To
mount
anti-tip bracket to wood floor, use the bracket to mark where
to drill mounting holes. Use a drill with a 1/8"
drill bit to drill the two holes. Use the
two screws
provided
to fasten anti-tip bracket
to
floor.
5. To
mount
anti-tip bracket to concrete or
ceramic floor, use the bracket to mark where to drill mounting holes.
Use a
drill with a3/16" drill bit
to drill the two holes. Tap
plastic
anchors into
mounting holes in floor with hammer. Line up holes
in anti-t¡p
bracket with holes in floor.
Use the two screws
provided
to fasten
anti-tip bracket to floor.
6. Move range close to
opening. Plug the
power
supply cord into
the
grounded
outlet and
gas
supply line.
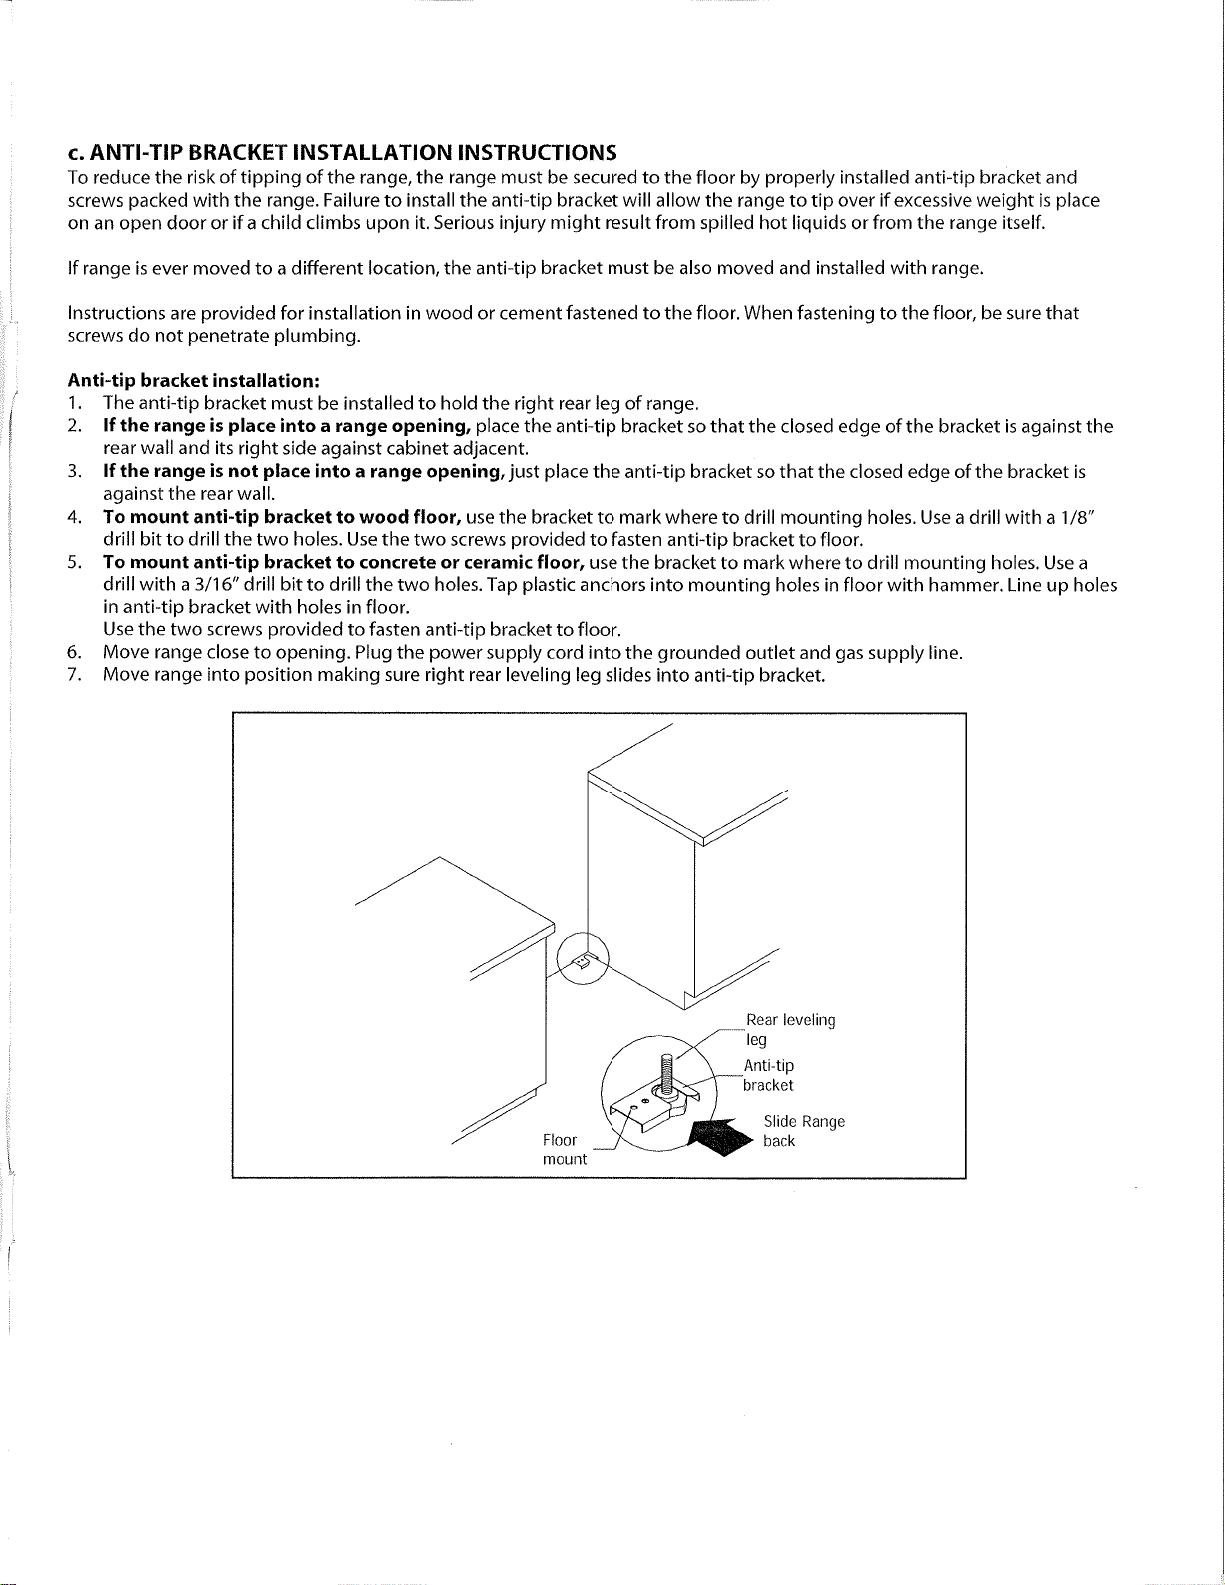
7. Move range
into
position
making sure right rear
leveling leg slides into
anti-tip
bracket.
Rear leveling
leg
Anti-tip
bracket
Slide Range
back
Loading ...
Loading ...
Loading ...