Loading ...
Loading ...
Loading ...
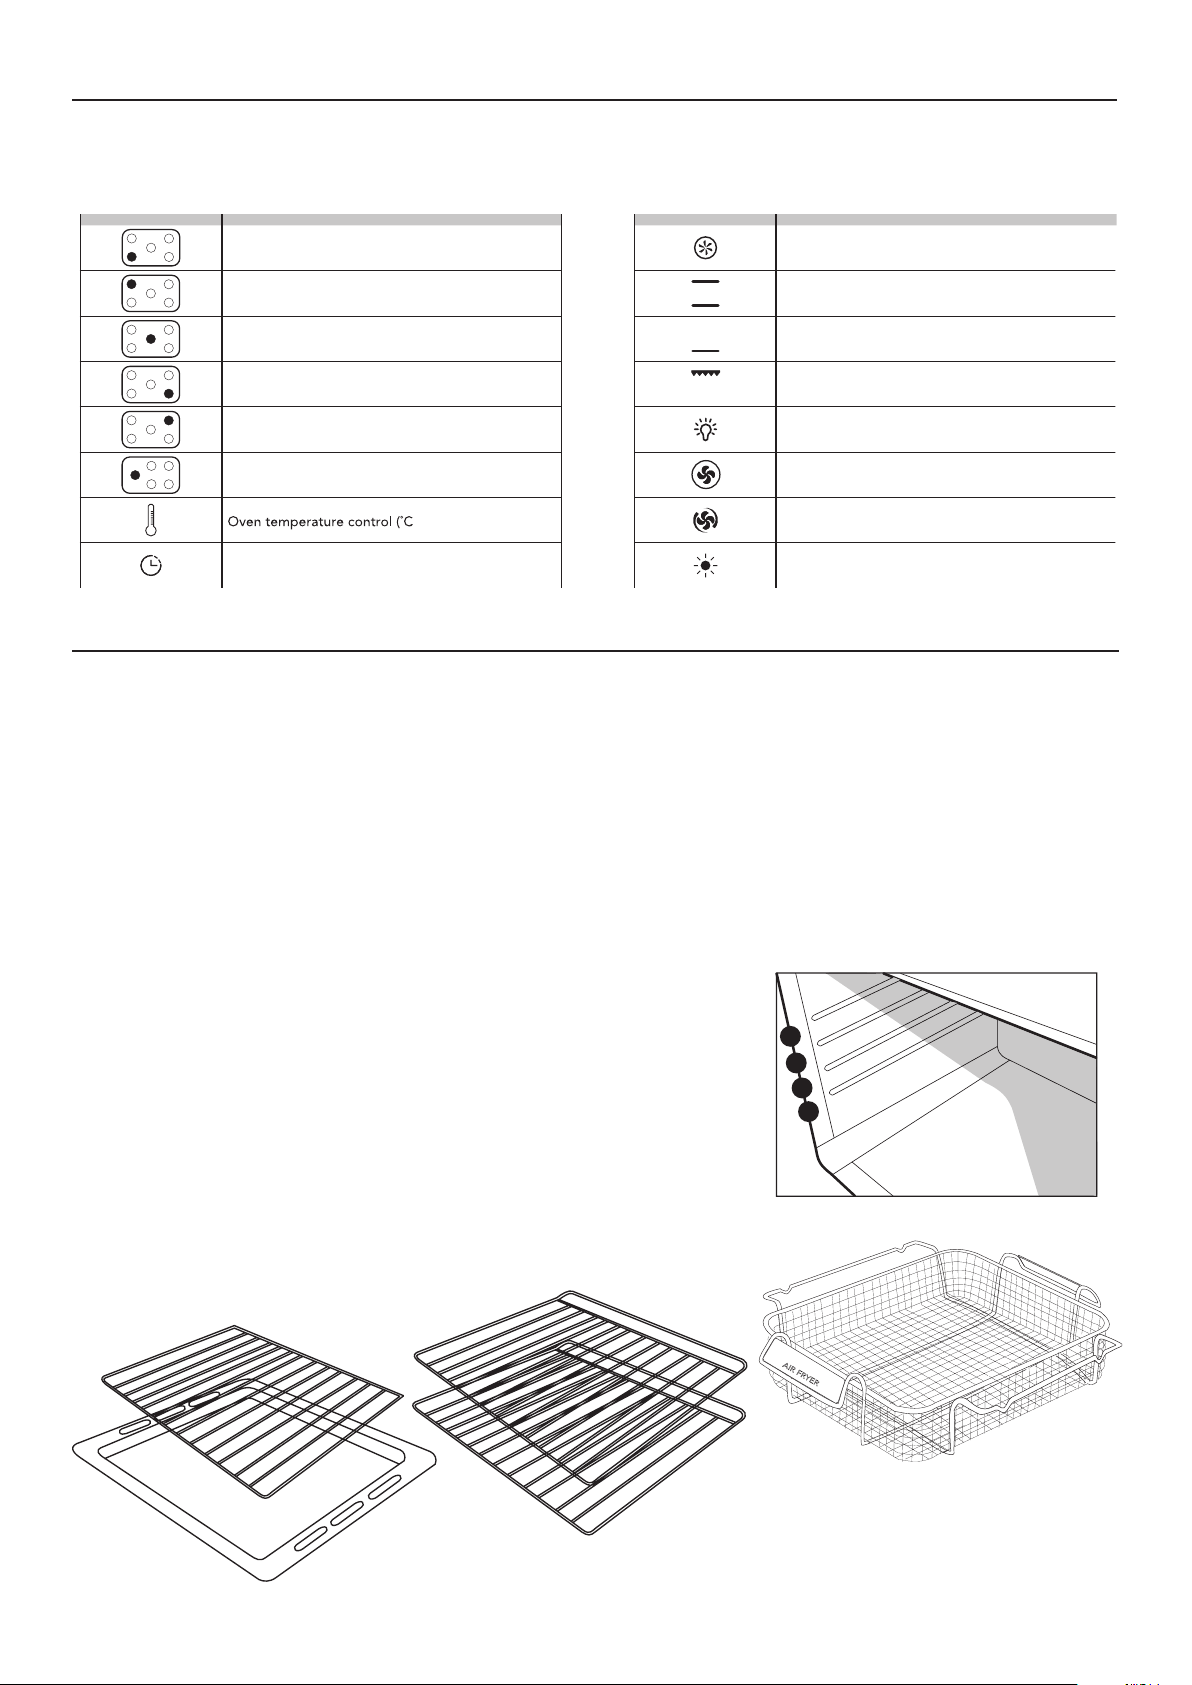
IDENTIFYING THE SYMBOLS ON THE CONTROL PANEL
Symbols printed on the control panel identify the functions controlled by each knob and switch.
The table shows the meaning of each symbol. There may be slight differences in designs.
BEFORE USING FOR THE FIRST TIME
Remove all packing material, plastic film and literature from the oven before connecting the gas
and electricity supplies.
Make sure all plastic has been removed before use. Some models have trays with a protective
coating; make sure that plastic coating has also been removed. Clean the interior of the oven
and all accessories with soap and water and dry them carefully.
Switch on the empty oven on maximum to eliminate grease residues from manufacturing. There
may be a slight odour at this time. Run the oven on maximum for a period of 1 hour and open
the kitchen windows to ventilate. If this odour lingers use the oven and the odour will dissipate.
The oven is fitted with 3 or 4 guides for positioning trays and
racks at different heights. On some models a telescopic runner
is fitted to the middle level.
Included with all cookers are two oven shelves, a grill tray and
a rack insert for the grill tray.
1
2
3
4
10
MEANINGSYMBOL
Burner / front left area
Burner / rear left area
Central burner
Burner / front right area
Burner / rear right area
Burner / left area
)
Timer / minute minder
MEANINGSYMBOL
Multi-function electric oven features
Oven thermostat
Gas oven burner
Grill
Light button
Fan assisted gas oven
Ventilated gas button (MultiChef)
These two pilot lights indicate that the electric oven
is on and/or that the oven is heating up
Some models include an Air Fryer
basket feature. It can be purchased as
an option for other models.
See Page 15 for instructions on use.
Loading ...
Loading ...
Loading ...