
Loading ...
Loading ...
Loading ...
67
Final Installation Procedures
Due to our policy of continuous product innovation, some specifications may change without notification.
©LG Electronics U.S.A., Inc., Englewood Cliffs, NJ. All rights reserved. “LG” is a registered trademark of LG Corp.
FINAL INSTALLATION PROCEDURES
Finishing the Job / Finalizing Wall-Mounted Installation
Finishing the Job
After the Triple Leak and Evacuation (and refrigerant trim charge, if any) procedures have been performed, follow the steps below to open
the refrigerant lines.
1. Verify that the auxiliary service port is removed (if used in the Evacuation procedure) and the original Schrader core was re-installed on
the gas (vapor) suction service port.
2. The service ports are a back-seated type with a right hand thread. Remove the service valve caps on both the gas (vapor) suction and the
liquid service ports.
3. Using an appropriately sized Allen wrench, fully open the valves on both the gas (vapor) suction and the liquid service ports by turning the
valve stem counterclockwise.
4. Turn until the valve stem is out, stops, and the valve is completely backseated.
Do not apply excessive force.
5. Securely replace service port caps on both the gas (vapor) suction and the liquid using an adjustable wrench.
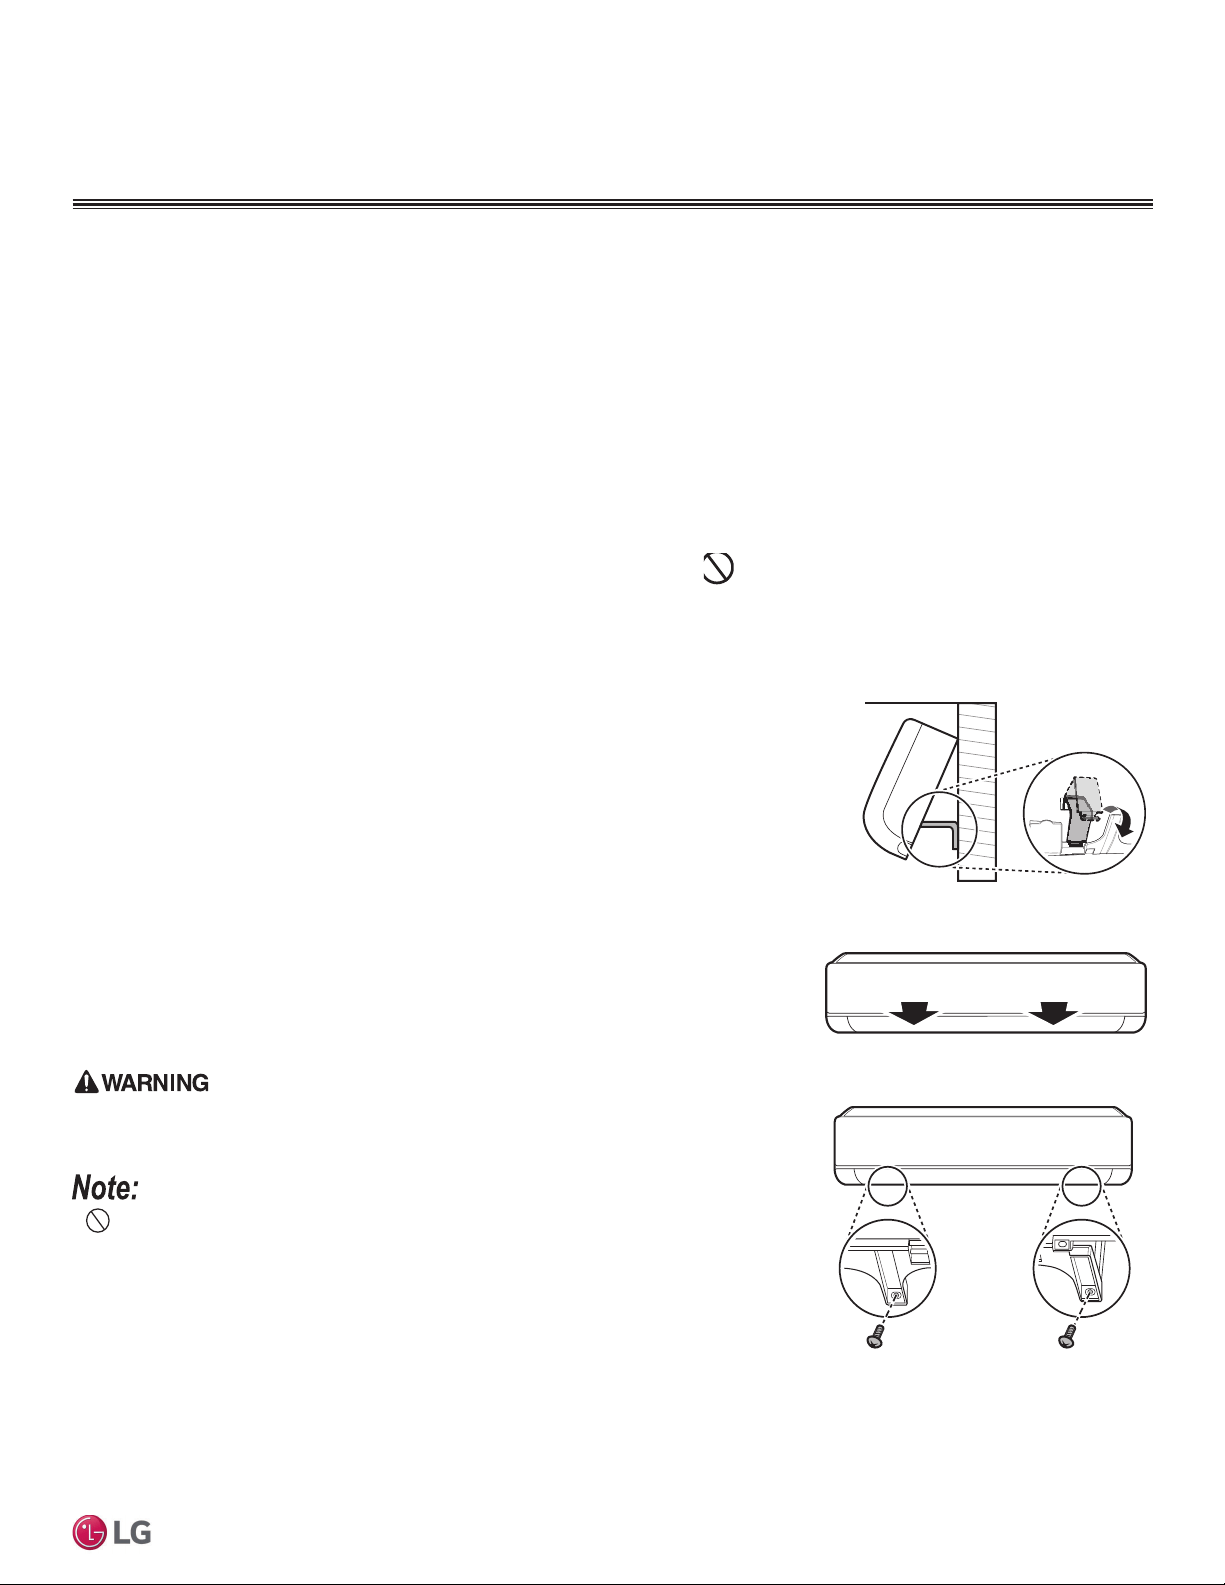
Finalizing Wall-Mounted Installation
1. Close the piping holder by snapping it back into place on the indoor unit.
2. Push the bottom of indoor unit towards the installation plate.
• Press the lower left and right sides of the unit against the installation plate until the clips
engage into their connection points
• Clicking sounds could be heard as the bottom of the indoor unit attaches to the installation
plate successfully.
3. Using the factory-supplied Type C screws, screw the indoor unit onto the installation plate
at the points indicated at right.
4. Tighten the screws so that there is no gap between the indoor unit and the installation
plate.
The indoor unit can fall from the wall if it is not properly installed and secured to the installation
plate. Falling indoor units can cause bodily injury or death.
• To avoid a gap between the installation plate and the wall, ensure the screws are cor-
rectly and fully secured.
• To prevent condensate from forming due to an inflow of outdoor air, before indoor unit instal-
lation is finished, completely seal the piping access hole in the wall.
5. Re-install the bottom panel to the indoor unit.
Figure 114: Closing the Piping Holder.
Figure 115: Seating the Indoor Unit to the
Installation Plate.
Figure 116: Securing the Indoor Unit to the
Installation Plate.
Loading ...
Loading ...
Loading ...