Loading ...
Loading ...
Loading ...
Installation Instructions
13-1LIGHT THE PILOTS Icont.}
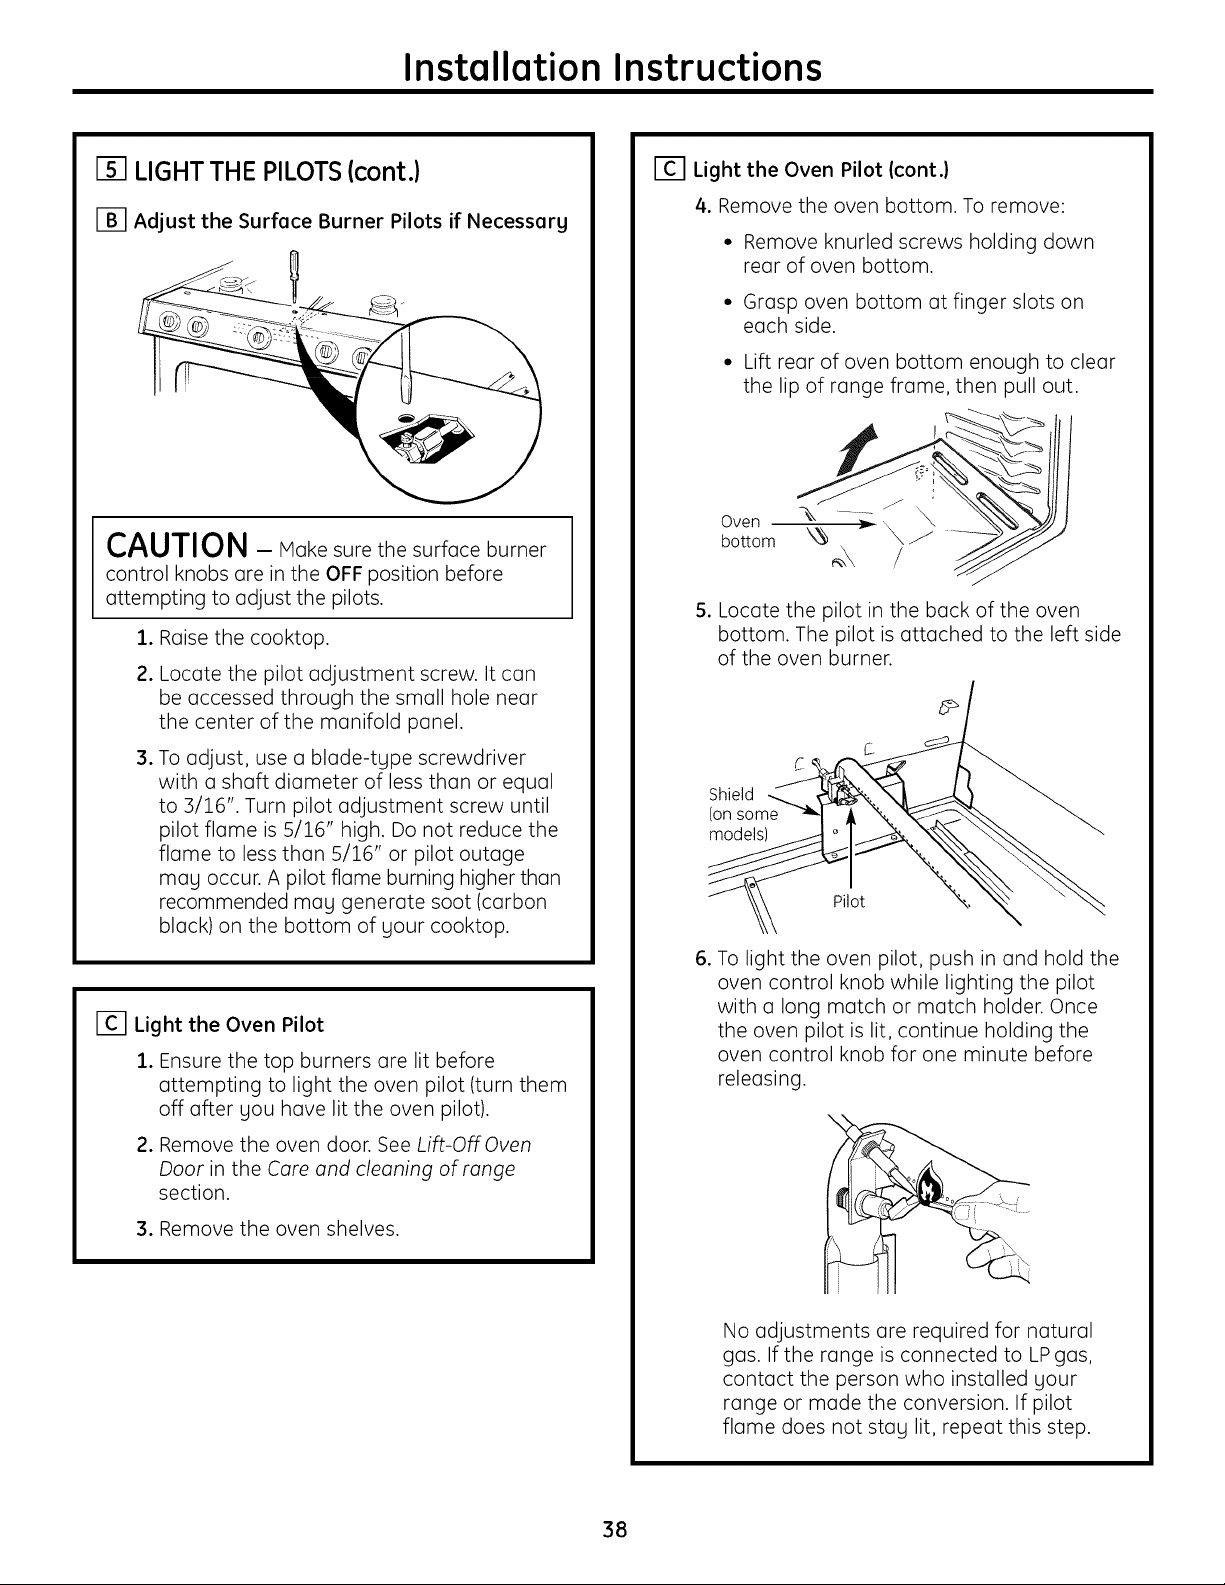
[] Adjust the Surface Burner Pilots if Necessary
CAUTION - Makesurethesurfaceburner
control knobs ore in the OFF position before
attempting to adjust the pilots.
1. Raise the cooktop.
2.
,
Locate the pilot adjustment screw. It can
be accessed through the small hole near
the center of the manifold panel.
To adjust, use a blade-tLlpe screwdriver
with a shaft diameter of less than or equal
to 3/16". Turn pilot adjustment screw until
pilot flame is 5/16" high. Do not reduce the
flame to less than 5/16" or pilot outage
mall occur. A pilot flame burning higher than
recommended mall generate soot (carbon
black) on the bottom of your cooktop.
F-_ Light the Oven Pilot
1. Ensure the top burners are lit before
attempting to light the oven pilot (turn them
off after you have lit the oven pilot).
2. Remove the oven door. See Lift-Off Oven
Door in the Care and cleaning of range
section.
3. Remove the oven shelves.
[] Light the Oven Pilot Icont.}
4. Remove the oven bottom. To remove:
• Remove knurled screws holding down
rear of oven bottom.
• Grasp oven bottom at finger slots on
each side.
• Lift rear of oven bottom enough to clear
the lip of range frame, then pull out.
Oven
bottom
5. Locate the pilot in the back of the oven
bottom. The pilot is attached to the left side
of the oven burner.
Shield
Consome
models)
Pilot
6. To light the oven pilot, push in and hold the
oven control knob while lighting the pilot
with a long match or match holder. Once
the oven pilot is lit, continue holding the
oven control knob for one minute before
releasing.
No adjustments are required for natural
gas. If the range is connected to LP gas,
contact the person who installed your
range or made the conversion. If pilot
flame does not stall lit, repeat this step.
38
Loading ...
Loading ...
Loading ...