Loading ...
Loading ...
Loading ...
14
To turn off heat mode, press and hold the power button for 10 seconds to enter heat lock out
mode. Flame lights will ash 6 times to signal the heat function is turned off and locked out. To
turn on heat mode, press and hold the power button for 10 seconds. The ame lights will ash
6 times and the heat function will be restored. When the heat button is pressed in lock out
mode, the ember bed will ash 6 times until the heating mode is turned on.
OPERATING INSTRUCTIONS (CONTINUED)
CARE AND MAINTENANCE
Heater Locking Function
IMPORTANT: Always unplug the power cord before cleaning the unit. Allow the unit to
cool before cleaning it.
• Wipe the exterior surface of the electric rebox occasionally with a soft, damp cloth (not dripping
wet), and dry the exterior surface before operating.
• Do not immerse the electric replace in water.
• Do not use any cleaning chemicals such as detergents and abrasives.
• Do not allow the interior to get wet, as this could create a hazard.
• Light accumulated dust may be removed from the electric replace with a soft, dry cloth.
• To store the electric replace, put it back into its original packaging and store in a clean, dry place.
• The blower and ame motor are pre-lubricated for a durable using time and need no further
lubrication or maintenance. Dust particles will accumulate on/in the electric replace, so periodic
cleaning/vacuuming of the electric replace is recommended.
• Always turn the heater OFF and unplug the power cord from the outlet before cleaning.
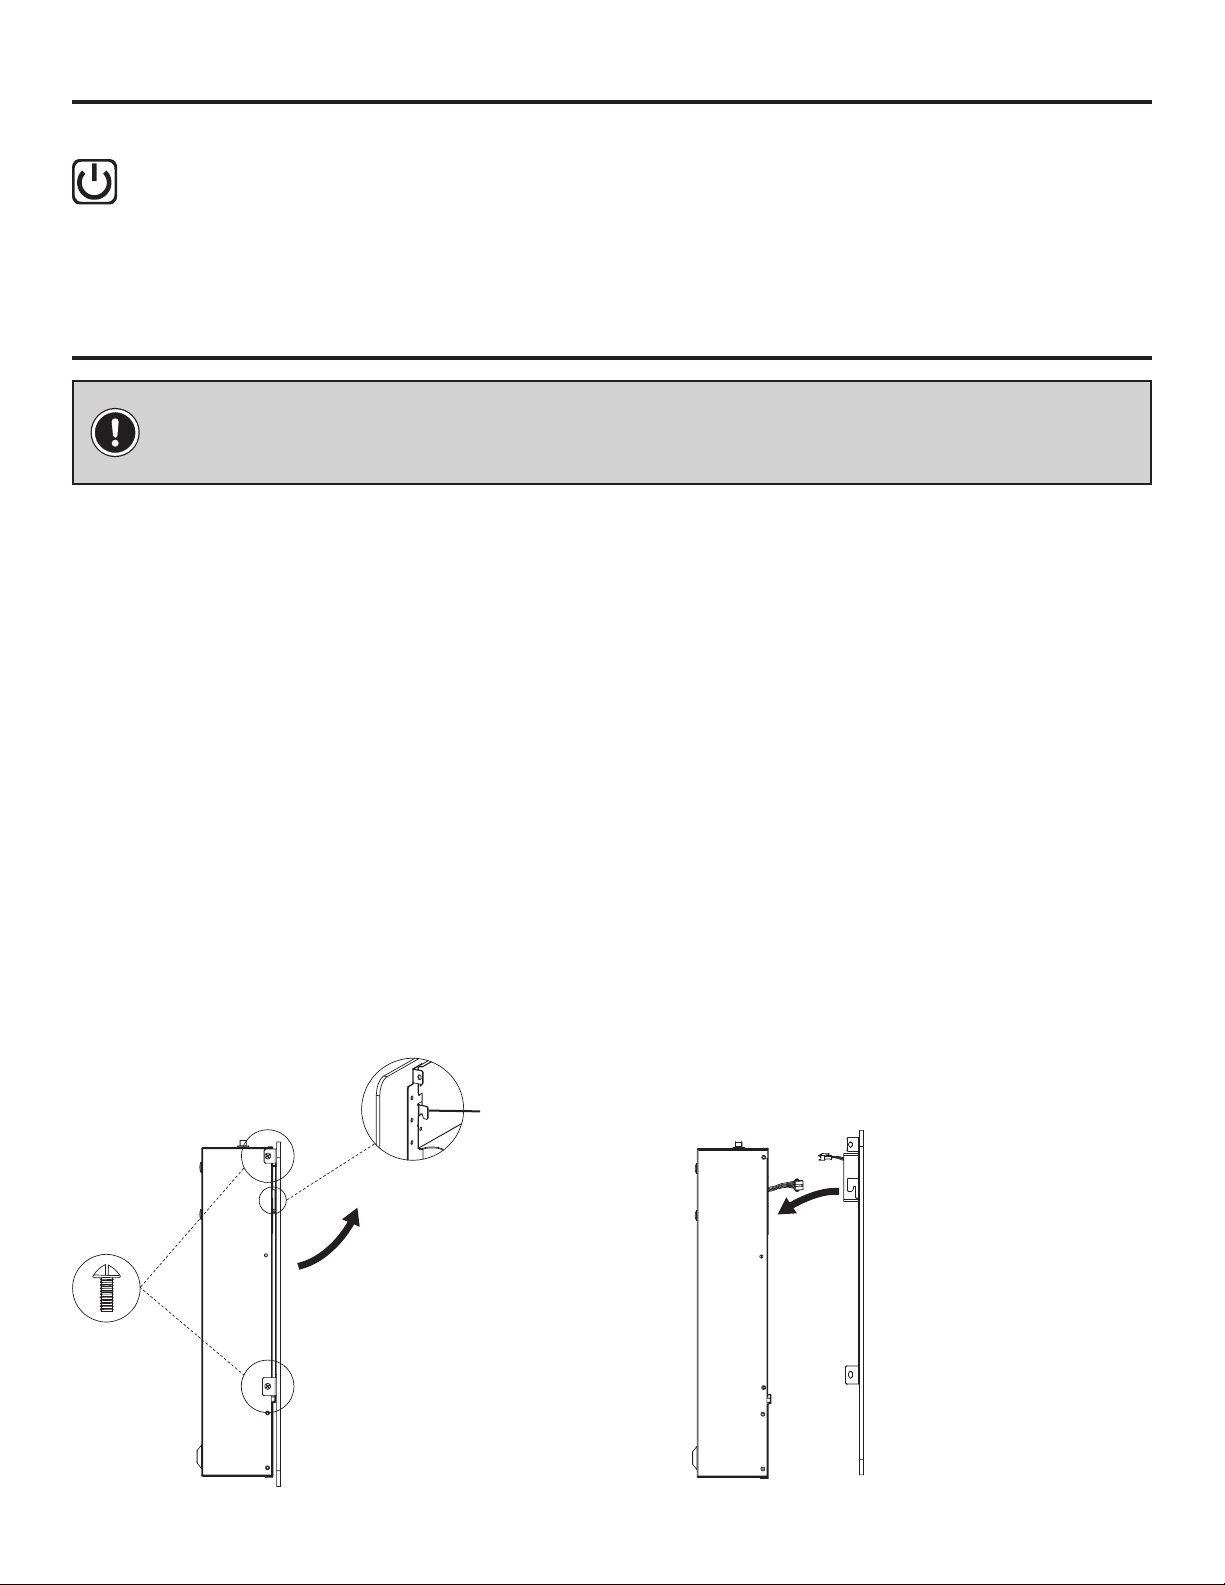
• Cleaning behind the front glass can be done by removing the front glass from the engine assem-
bly. There are two screws on each side of the engine that hold the glass in place. Remove the four
screws that hold the glass and then lift the glass up and away from the engine assembly. While
holding the glass, disconnect the control panel wire harness from the engine assembly. Clean with
a lint free damp cloth. To replace the glass, center the glass over the engine assembly and re-
connect the control panel's wire harness to the engine assembly and lower the glass until it seats.
Install the four screws that you removed into the brackets on each side of the glass. Tighten all the
screws.
Remove the four screws.
Lift the glass up and
away from the rebox.
Disconnect the control
panel wire harness.
Re-connect the control
panel's wire harness.
Lower the glass onto the
rebox.
Install and tighten the
four screws.
Front Glass Removal Front Glass Installation
Hook
Loading ...
Loading ...
Loading ...