Loading ...
Loading ...
Loading ...
14
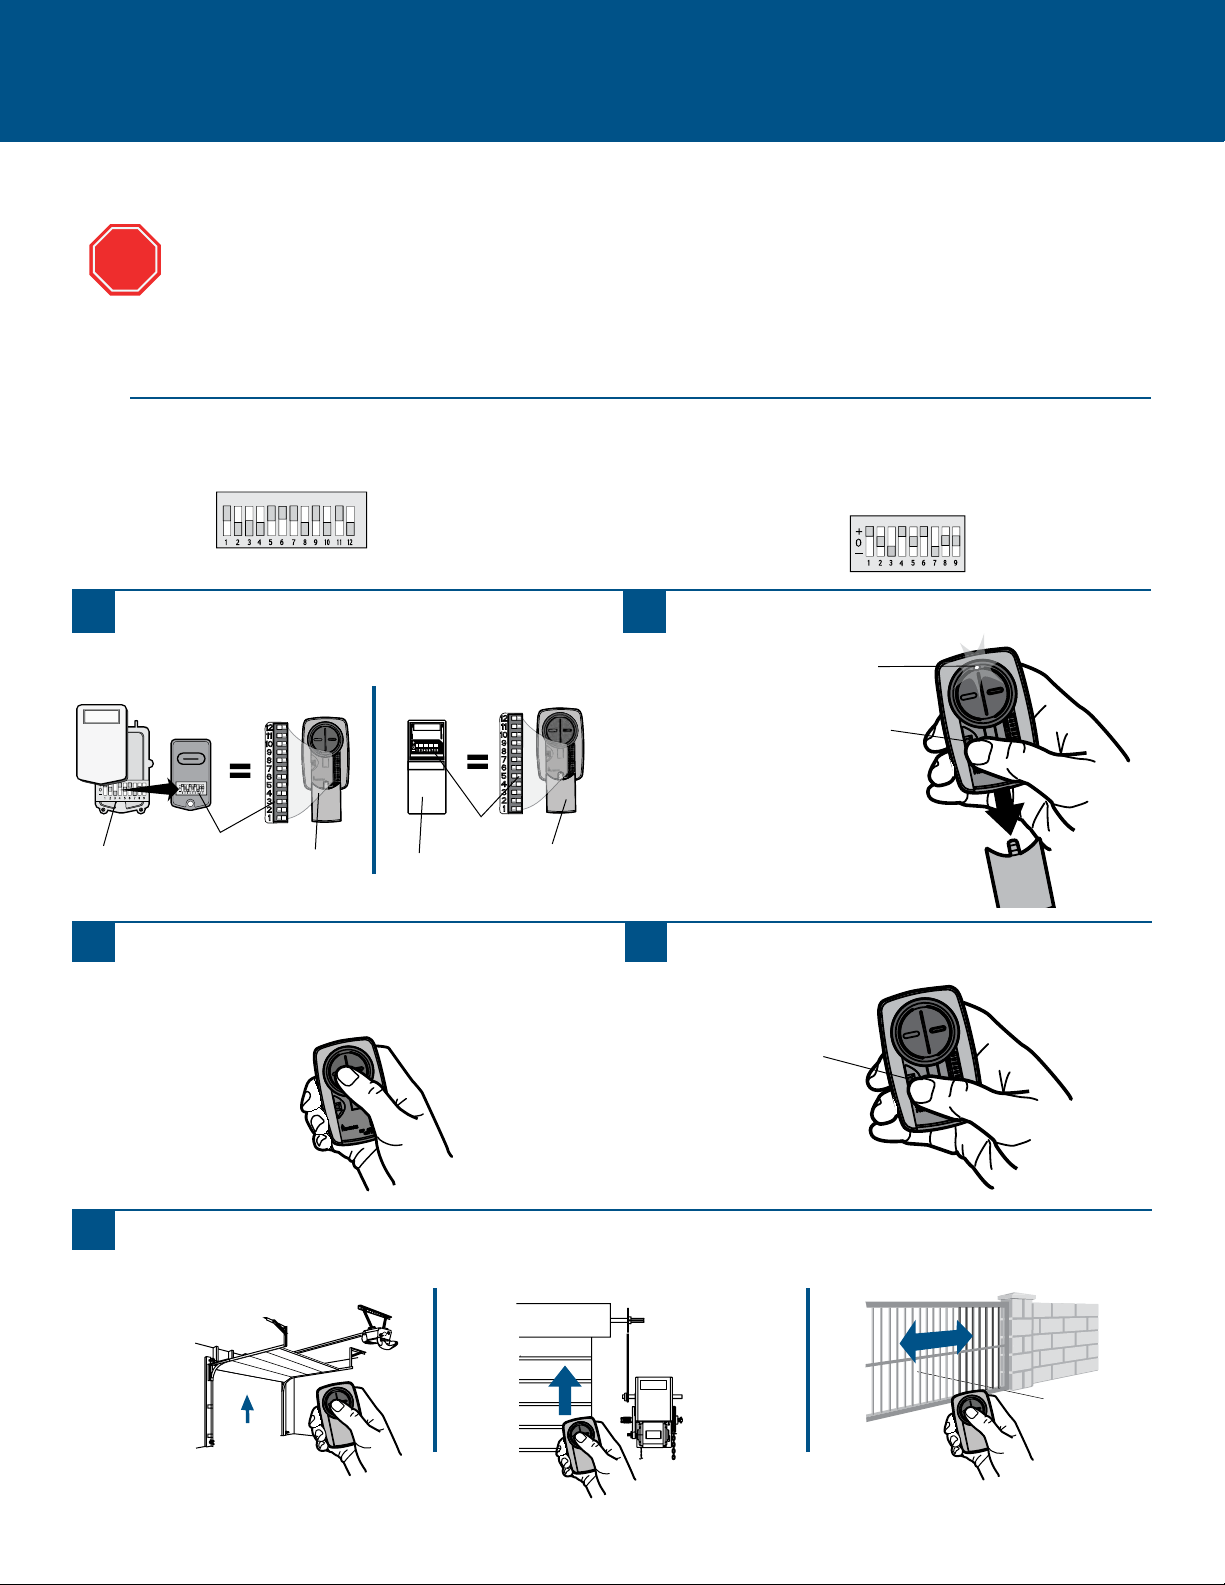
Programming to an External Receiver with DIP Switches
EXTERNAL RECEIVERS
1
PresstheprogrambuttonontheUniversalRemote
ControluntiltheLEDturnson.
2
MatchtheDIPswitchesbetweentheexistingremote
controlorexternalreceiverandtheUniversal Remote
Control.TurnextraswitchesOFF.
3
External
Receiver
DIPSwitches
DIPSwitches
Existing Remote
Universal
Remote
Control
Universal
Remote
Control
If using the Universal Remote Control with residential door openers, the remote control must be used only with door
openers manufactured after 1993 that utilize photoelectric sensors. The photoelectric sensors are always located on or
near the bottom of the door track.
The external receiver is typically located on the product or mounted near the product.
Theimagesthroughoutthismanualareforreferenceonlyandyourproductmaylookdifferent.
PressandreleasetheUniversalRemoteControlbutton,
theLEDwillflash.WhentheLEDstopsflashing,
continuetopressandreleasethebuttonuntilyour
productrespondsbyclicking,blinking,oractivating.
4
PresstheprogrambuttonontheUniversalRemote
Controltosave.
5
TesttheUniversalRemoteControlbypressingthebutton.Iftheproductdoesnotactivate,repeattheprogrammingstepsor
followthealternativeprogrammingoption.
STOP
ProgramButton
ProgramButton
LED
3 Position DIP Switch:
For Chamberlain remotes DO NOT use the “0” position, use “+” or “-”.
If you already have a 3-button remote, DIP switch #1 must be set to “-” if the
large button is to open the door. It may be necessary to reprogram original
remote controls.
2 Position DIP Switch:
If programming fails reverse DIP switches (OFF to ON and ON to OFF).
TIPS
Loading ...
Loading ...
Loading ...