Loading ...
Loading ...
Loading ...
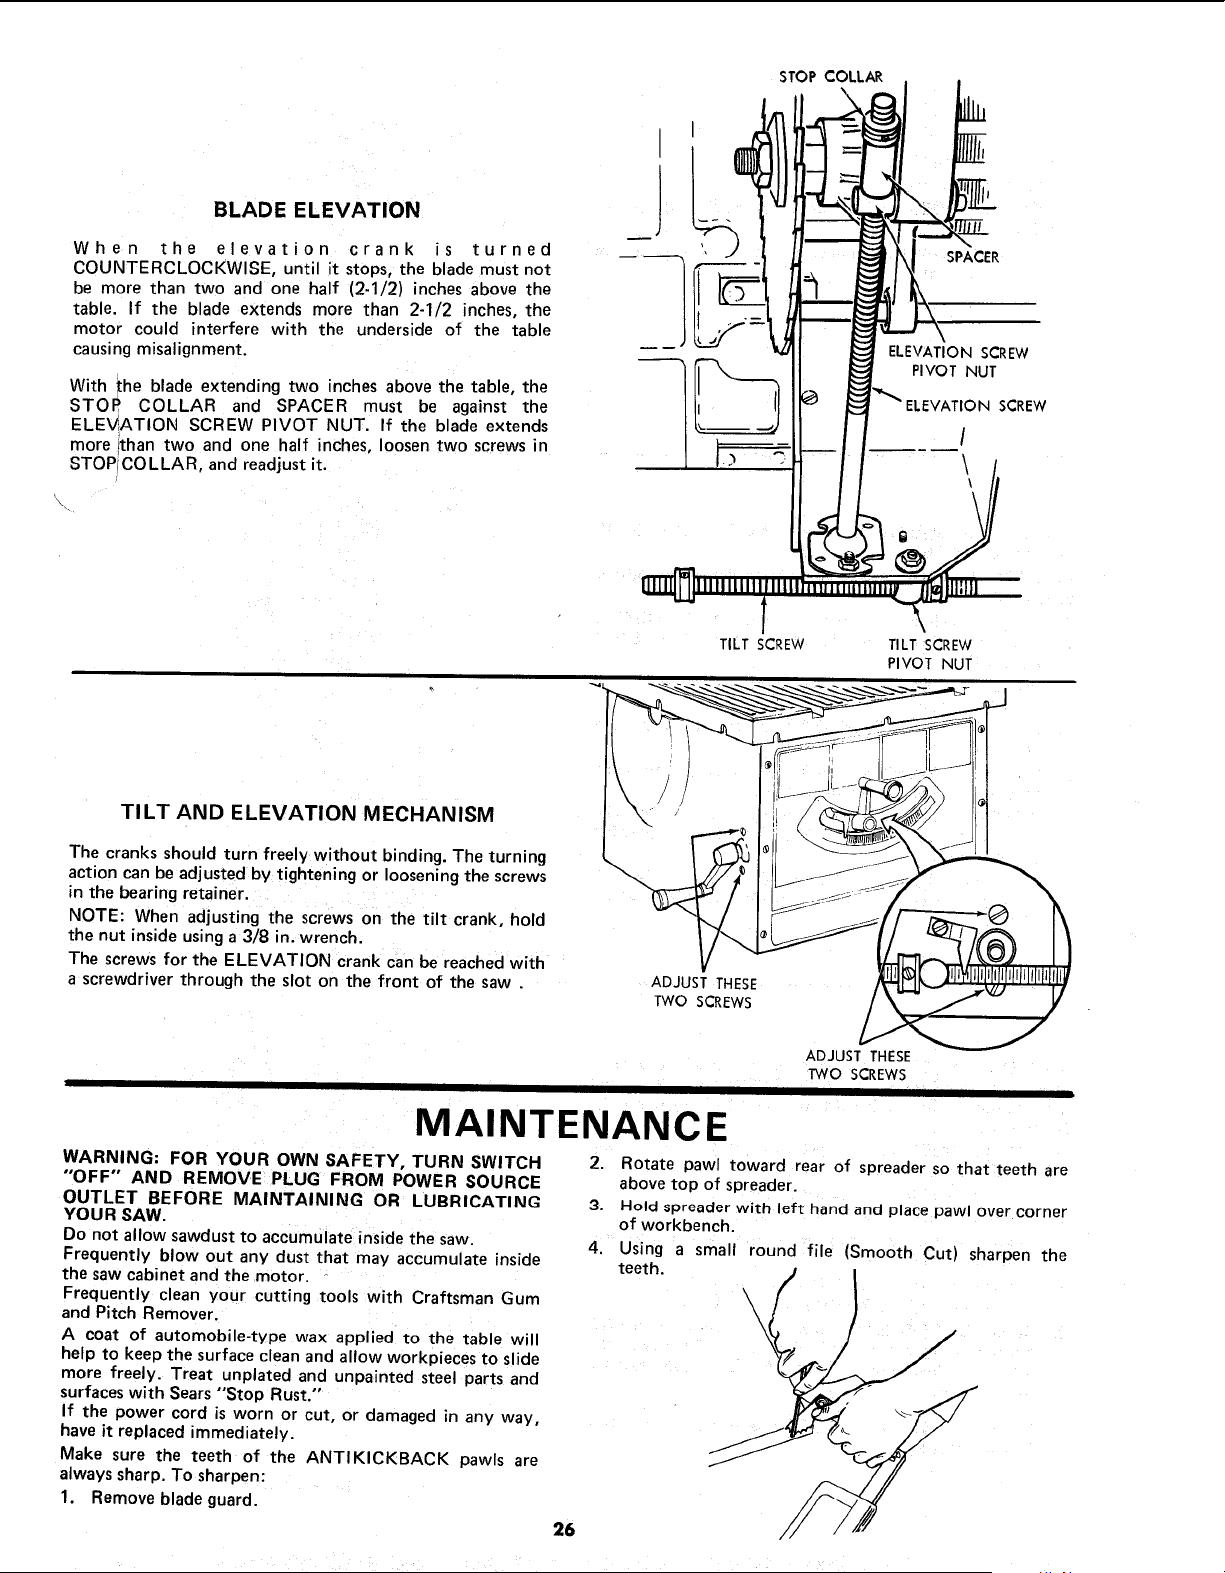
STOP COLLAR
BLADE ELEVATION
When the elevation crank is turned
COUNTERCLOCKWISE, until it stops, the blade must not
be more than two and one half (2-1/2) inches above the
table. If the blade extends more than 2-1/2 inches, the
motor could interfere with the underside of the table
causing misalignment.
With the blade extending two inches above the table, the
STOP COLLAR and SPACER must be against the
ELEV',ATION SCREW PIVOT NUT. If the blade extends
more than two and one half inches, loosen two screws in
STOP COLLAR, and readjust it.
SPACER
ELEVATION SCREW
PIVOT NUT
ELEVATION SCREW
TILT SCREW
\
TILT SCREW
PIVOT NUT
TILT AND ELEVATION MECHANISM
The cranks should turn freely without binding. The turning
action can be adjusted by tightening or loosening the screws
in the bearing retainer.
NOTE: When adjusting the screws on the tilt crank, hold
the nut inside using a 3/8 in. wrench.
The screws for the ELEVATION crank can be reached with
a screwdriver through the slot on the front of the saw . ADJUST THESE
TWO SCREWS
ADJUST THESE
TWO SCREWS
MAINTENANCE
WARNING: FOR YOUR OWN SAFETY, TURN SWITCH
"OFF" AND REMOVE PLUG FROM POWER SOURCE
OUTLET BEFORE MAINTAINING OR LUBRICATING
YOUR SAW.
Do not allow sawdust to accumulate inside the saw.
Frequently blow out any dust that may accumulate inside
the saw cabinet and the motor.
Frequently clean your cutting tools with Craftsman Gum
and Pitch Remover.
A coat of automobile-type wax applied to the table will
help to keel_ the surface clean and allow workpieces to slide
more freely. Treat unplated and unpainted steel parts and
surfaceswith Sears "Stop Rust."
If the power cord is worn or cut, or damaged in any way,
have it replaced immediately.
Make sure the teeth of the ANTIKICKBACK pawls are
always sharp. To sharpen:
1. Remove blade guard.
2. Rotate pawl toward rear of spreader so that teeth are
above top of spreader.
3. Hold spreader with left hand and place pawl over corner
of workbench.
4. Using a small round file (Smooth Cut) sharpen the
teeth.
', )
26
Loading ...
Loading ...
Loading ...