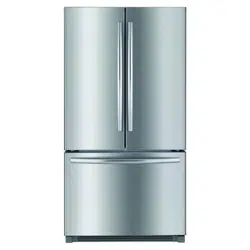
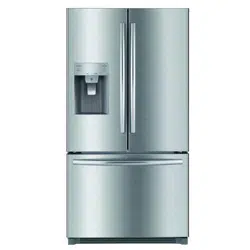
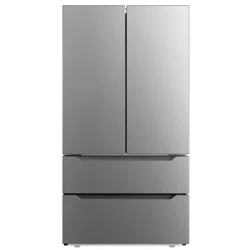
User Guide for Refrigerator
Control Panel

1. Ice Maker button
Press to turn Ice Maker On or Off. If you do not intend to use any ice cubes for longer than one week (e.g. because you are going on holiday), shut down the ice maker. Initial status: Ice Maker On (LED off) Press Ice Maker button: Ice Maker OFF (LED on)
2. Freezer Temp button
Press to adjust freezer compartment temperature.
3. Refrigerator button
Press to adjust refrigerator compartment temperature.
4. Door Alarm
When either the refrigerator or the freezer door is left open for more than one minute, the Door Alarm button LED will illuminate and an audible alarm will sound to alert you that the door is open. To turn off the alarm, press the DOOR ALARM button.
5. Quick Freezer  / Quick Refrigerator (
 )
)
Illuminates when quick function is on.
6. Temperature Mode Switch Function (°F ↔ °C)
If you want to convert from °F to °C or vice versa: Press and hold the Freezer Temp and Refrigerator Temp for 5 seconds until the temperature mode changes.

● Interior lights of the refrigerator turn off when the doors are open for more than 20 minutes.
● In case either the freezer or refrigerator door is left open for more than a minute, door alarm rings for 5 minutes with 1 minute intervals.
Temperature Control
When changing control settings, wait 24 hours before making additional adjustments. The controls are set correctly when milk or juice is as cold as you would like and when ice cream is firm. If the temperature in either compartment is too cold or too warm, change the setting one increment at a time. Wait 24 hours for the change to stabilize before adjusting again.
• The refrigerator temperature control is preset to 37°F and the freezer control is preset to 0°F. These are recommended temperature settings for normal use conditions.

Freezer Compartment
Push the Freezer button and the temperature setting changes in the sequence as shown below:
>>> Sequential Temperature Change <<<

Quick Freezer function :
To activate Quick Freezer, press and hold the Freezer button for 3 seconds. Quick Freezer LED will turn on. Push the button again to cancel.
The Quick Freezer function is useful to help quickly chill the freezer compartment when needed. For example: If a large quantity of warm food is placed inside the freezer, or if loading the freezer with new groceries which may not be as cold as normal freezer temperatures.
Refrigerator Compartment
Push the Refrigerator button and the temperature setting changes in the sequence as shown below:
>>> Sequential Temperature Change <<<

Quick Refrigerator function :
To activate Quick Refrigerator, press and hold the Refrigerator button for 3 seconds. Quick Refrigerator LED will turn on. Push the button again to cancel.
The Quick Refrigerator function is useful to help quickly cool the refrigerator compartment when needed. For example: If a large quantity of warm food is placed inside the refrigerator, or if loading the refrigerator with new groceries which may not be as cold as normal refrigerator temperatures.
Caution Food in the refrigerator can be frozen if the ambient Cautiotenmperature of the refrigerator is below 5°C.
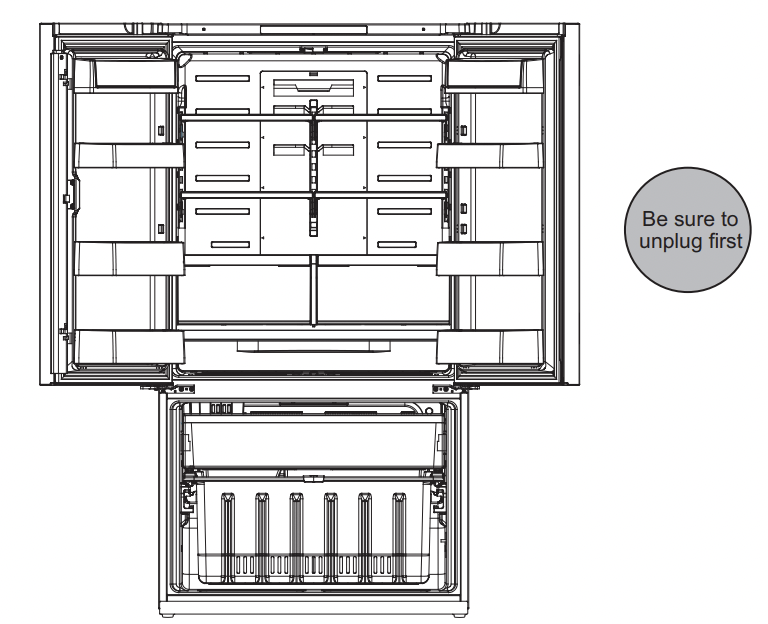
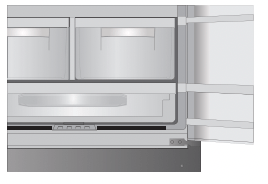
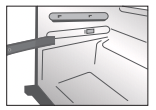
How to use the interior parts
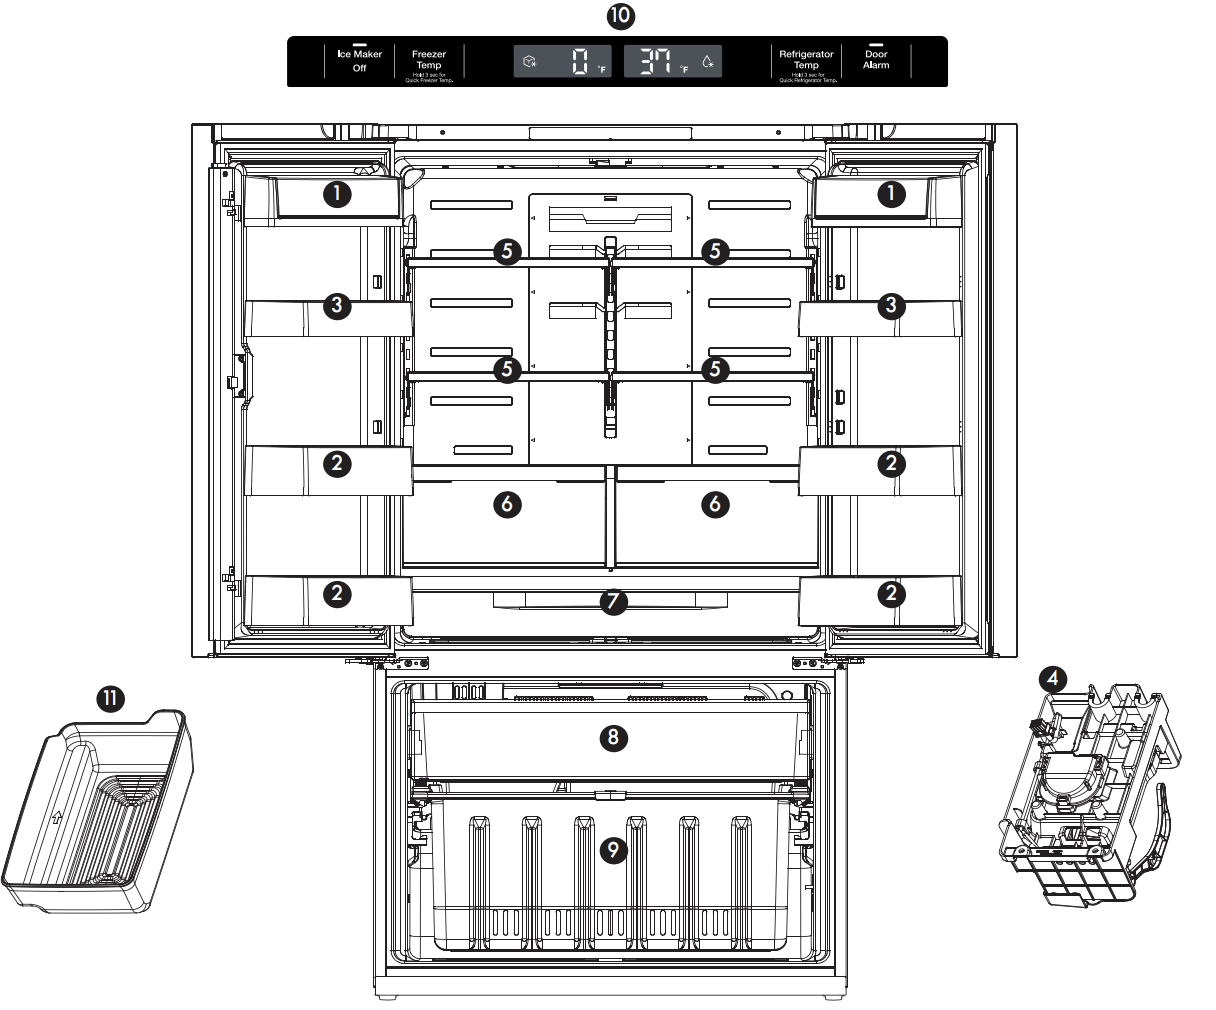
* This instruction manual refers to several models. The real features are model dependent.
1. Covered Dairy Bin or Covered Storage Bin for storing butter and cheese.
2. Gallon door storage bin for items of medium to large size.
3. Low profile door storage bin for items of medium to large size.
4. Ice maker for making ice.
5. Adjustable glass shelf for items of medium to large size.
6. Humidity controlled Crisper Bin for storage of fruits and vegetables
7. Full width pantry drawer for storage of miscellaneous small items
8. Pull out freezer drawer
9. Lower freezer basket for general freezer storage
10. Control and display panel
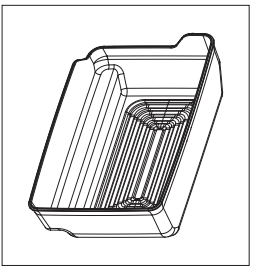
11. Ice storage bin
Caution
● Do not touch or hold food with wet hands (food container) in the freezer compartment ☞There is a risk of chilblains (cold burns).
● Do not store medicine, academic research samples etc. in the refrigerator.
Food Storage Tips
 |
|
Wash food before storing. |
 |
|
Divide and separate food into smaller pieces. |
 |
|
Place watery food or food with a lot of moisture in front shelves (close to door side). If they are placed close to the cold air spout, they can be frozen. |
 |
|
Warm or hot food should be cooled down enough before storing to reduce power consumption and to enhance refrigeration performance. |
 |
|
Be careful in storing tropical fruits such as bananas, pineapples and tomatoes, as they can easily deteriorate in lower temperatures. |
 |
|
Keep enough space between the foods. If too tight or too close, cold air circulation is hindered, resulting in poor refrigeration. |
 |
|
Never forget to cover or wrap food to prevent odours. |
Icemaker
In case the icemaker doesn’t work
If the ice maker doesn’t work, check the following:
● Has it been less than 12 hours since the water supply line installation?
● Is the water line connected and the shut-off valve opened?
● Did you manually stop the ice making function?
● Is the freezer temperature too warm? Try setting the freezer temperature lower.
In case of power failure
In the event of a lengthy power failure, remove ice cubes from the storage bin as the ice may melt.
Shutting down the ice maker
Important! If you do not intend to use any ice cubes for longer than one week (e.g. because you are going on holiday), shut down the ice maker for that period in order to prevent ice cubes from freezing together.
1. Press the On/Off button for 5 seconds to turn the ice maker off (LED on)
2. Empty and clean the ice cube bin.
3. Return the ice cube bin into position.
Reactivating the ice maker:
Press the button for 5 seconds to turn the ice maker on (LED off)
Automatic Icemaker
Caution
● The first ice and water dispensed may include particles or odor from the water supply line or the water tank.
● Throw away the first few batches of ice. This is also necessary if the refrigerator has not been used for a long time.
● Never store beverage cans or other items in the ice bin for the purpose of rapid cooling. Doing so may damage the ice maker if the containers burst.
● If discolored ice is dispensed, check the water filter and water supply. If the problem continues, contact a qualified service center. Do not use the ice or water until the problem is corrected.
● To avoid personal injury, keep hands out of the ice maker.
When to set icemaker to off
● When the water supply will be shut off for several hours.
● When the ice bin is removed for more than one or two minutes.
● When the refrigerator will not be used for several days.
NOTE: The ice bin should be emptied when the icemaker ON/OFF button is turned to the OFF mode.
Preparing for vacation
Set the icemaker ON/OFF button to OFF and shut off the water supply to the refrigerator.
NOTE: The ice bin should be emptied any time the icemaker ON/OFF button is turned OFF.
If the ambient temperature will drop below freezing, have a qualified technician drain the water supply system to prevent serious property damage due to flooding caused by ruptured water lines or connections.
How to use the automatic icemaker
The ice maker will produce 10 cubes per cycle approximately 60 to 100 cubes in a 24-hour period, depending on freezer compartment temperature, room temperature, number of times freezer door is opened, and other use conditions.
Throw away the first few batches of ice to allow the water line to clear.
Be sure nothing interferes with the sweep of the ice maker feeler arm.
When the bin fills to the level of the feeler arm, the ice maker will stop producing ice.
After the ice maker has been turned on again, there will be a time delay before the ice maker resumes operation.
When ice dispenses, it is normal for several cubes to be joined together.
If ice is not dispensed on a regular basis, old ice cubes will discolor and shrink. If you won’t be using ice on a regular basis, turn the ice maker off.
Care & Cleaning
* Features may vary according to model.
❶ Ice Storage Bin Cleaning:
Empty the ice cube bin and clean with lukewarm water. Thoroughly dry the bin and screw conveyor to prevent new ice cubes from sticking together.

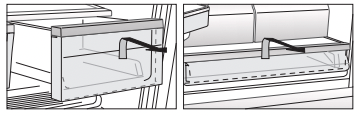
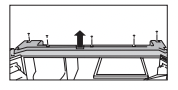
❷ Freezer & Refrigerator Bins
Hold both ends and pull up.
❷ Refrigerator Shelves
To remove a shelf: Lift up on front of shelf with one hand and with other hand push up on back of shelf to release attachment hooks from attachment slots. Pull the shelf out.
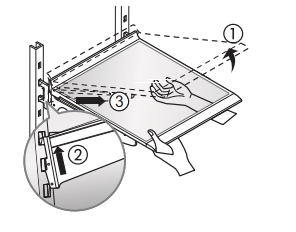
To reinstall a shelf: With front of shelf angled slightly up, engage hooks on back of shelf into attachment slots, and then lower front of shelf into place.
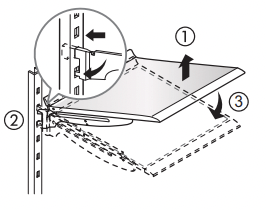
Caution Make sure that shelves are level from one side to the other. Failure to do so may result in the shelf falling or spilling food.
❺ Vegetable case & Wide case
● Pull out the cases as far as possible. Lift up the front of the cases and pull them out.
● Insert the cases into the rail and aapush towards the back.
❻ Freezer case
● Pull out the case as far as possible. Pull out the clips on both sides and lift up the front of the freezer case.
❼ Freezer drawer
●Lift the freezer drawer up and out.
How to Clean
Interior Parts
● Use cloth with water and mild detergent to clean.
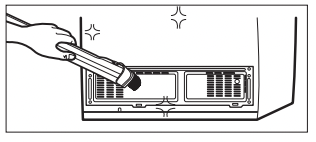
Back (Machine section)
● Remove dust on the grill with a vacuum cleaner at least once a year.
Caution
Never use petrol, benzene, thinners, scouring pads or harsh abrasives, for they can damage the surfaces.
Before You Call for Service...
Please check the following troubleshooting tips before you call for service!
 |
|
Problem It never gets cold inside. Freezing & refrigerating is not so good.
|
Checkup Point
❶ Is the refrigerator unplugged?
❷ Is the temperature set to [Low Mode]?
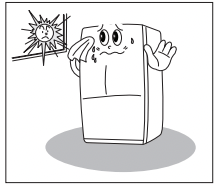
❸ Is the refrigerator under direct sunlight or is a heat appliance placed near it?
❹ Is the space between the refrigerator back and the wall too close?
Action
❶ Plug in the refrigerator.
❷ Set the temperature mode to Middle or High.
❸ Move to a place where there is no direct sunlight, no heat appliances around.
❹ Keep sufficient space (more than 2inches) between the back of the refrigerator and the wall.
 |
|
Problem Foods in the refrigerator get frozen. |
Checkup Point
❶ Is temperature set to [High]?
❷ Is the room temperature too low?
❸ Is food with moisture stored close to the cold air spout?
Action
❶ Set the temperature to [Middle] or [Low].
❷ Food can be frozen if ambient temperature is below 5 . ℃ Move to a place where the temperature is over 5 .℃
❸ Place food with moisture on the shelves close to the doors.
 |
|
Problem Strange sounds from the refrigerator. |
Checkup Point
❶ Is the floor beneath the refrigerator uneven?
❷ Is the space between refrigerator back and the wall too close?
❸ Do any objects or other stuff touch the refrigerator?
Action
❶ Move the refrigerator to a level and even floor.
❷ Keep sufficient space.
❸ Remove any object which touches the refrigerator.
 |
|
Problem Odour or unpleasant smell from the inside. |
Checkup Point
❶ Is the food stored uncovered or unwrapped?
❷ Are the shelves and pockets stained with food stuff?
❸ Is the food stored too long?
Action
❶ Be sure to cover and wrap the food.
❷ Clean them regularly. Once smell gets soaked into those parts, it is not easy to remove.
❸ Do not store food for too long. A refrigerator is neither a perfect nor a permanent food keeper.
Something strange? Don’t worry. Here is the answer.
| |
Case |
Explanation |
| Heat |
Front and side of refrigerator feels warm or hot. |
 |
● Pipes (refrigerant vessel) are placed beneath the surface to prevent moisture forming on it. |
| Door is sticky |
Doors do not open easily. |
 |
● When you close the door and then open again immediately, the door is not easy to open because warm air rushes in and creates the pressure difference. In this case wait for a minute, then it will open easily. |
Strange Sound
|
It sounds like water is flowing from the refrigerator. |
 |
● When the compressor starts to run or stop, refrigerant which makes the inside cold flowing in the pipes can make such a sound.
● Defrosted water can also make such a sound. (This refrigerator adopts an automatic defrosting system.)
|
| Cracking or clicking sounds. |
 |
● Inside parts shrink and/or expand due to temperature change --- When the inside gets cold or when the door is open, such sounds can be made. |
| Humming or buzzing sounds. |
● Compressor or fans for cold air circulation can make such working sound. (If the refrigerator is not level, the sound can be louder.) |
| Frost & Dew |
Dew or frost on the wall and/or food container surface in the freezer and refrigerator compartment. |
 |
Frost and/or dew can be made in the following cases;
● High temperature and/or high humidity around the refrigerator.
● When doors are open too long.
● Food with much moisture are stored uncovered or unwrapped.
※You can see the same appearance when cold water is poured in a glass cup and dew is forming on the surface of it.
|
| Dew on the cabinet surface. |
● If it is highly humid around the refrigerator, moisture in the air sticks to the surface to form dew. |
Installation Preparation
Check if the refrigerator can pass a doorway or enter a door first.
Dimensions (including Door Handles)
(Width*Depth*Height) 906 mm x 735 mm x 1,770 mm
Find a suitable place to install
Sufficient space from the back of the refrigerator to the wall for free air ventilation.
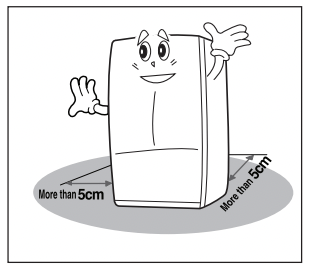
Avoid direct sunlight.
● Once the installation place is ready, follow the installation instructions. If the surrounding temperature of refrigerator is low (below 5℃), food can be frozen or the refrigerator can function abnormally.
If the refrigerator can not pass through a door during installation, follow these steps.
※This instruction manual refers to several models. The real features are model dependent.
Removing left refrigerator door
1 Unscrew top hinge cover with a screw driver and remove the hinge cover.
2 Unscrew the earth and disconnect the harness wires.
3 Turn top hinge fastener counterclockwise and remove the top hinge. (After the hinge is removed, the door can fall down forward. Be careful!)
Caution
※ Risk of electric shock! Before removing top hinge cover:
• Shut off the water supply to the appliance.
• sUnplug the appliance or switch off the fuse.
Removing right refrigerator door
1. Turn top hinge fastener counterclockwise and remove the top hinge. (After the hinge is removed the door can fall down forward. Be careful!)
2. Lift up the door and remove it. (The same as step 4, step 5 in removing the left refrigerator door.)
Removing freezer door
1 Open freezer door as far as possible, pull up freezer case and freezer drawer
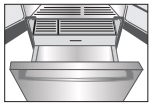
2 Push locks (on both sides) and pull the freezer door forward and remove.
Replacing refrigerator doors
- Replace the left door, right door, then replace the top hinge cover.
- Replacing steps are the reverse of the steps of removing the doors.
Replacing freezer door
1 Align the end of rails (both sides) with supporter of freezer drawer rail.
2 Fully push and close freezer door, check the locking of the rail with the lock of supporter.
3 Open the freezer as far as possible, assemble one gear rail in supporter of rail gear.

4 Push and assemble another gear rail on opposite side of the rail.
Refrigerator Leveling & Door Adjustment (If needed)
The refrigerator must be level in order to maintain optimal performance and desirable front appearance. (If the floor beneath the refrigerator is uneven, the freezer and refrigerator doors look unbalanced.)
Leveling and door adjustment
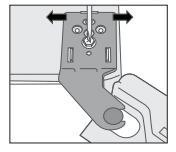
Leveling the appliance.
- Pull open the freezer compartment and remove the upper drawer and lower drawer basket to gain access.
- Use a hexagonal wrench to align the front of the appliance.
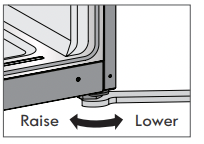
Adjusting a refrigerator door
If the height of the refrigerator doors is uneven, turn the screw nut on the lower hinge to adjust the refrigerator door.
- To raise a refrigerator door turn the screw counterclockwise.
- To lower a refrigerator door turn the screw clockwise.
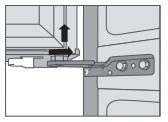
Aligning the refrigerator doors
Caution
※ Risk of electric shock! Before removing top hinge cover
1. Shut off the water supply to the appliance.
2. Unplug the appliance or switch off the fuse. If the refrigerator doors are not properly aligned.
- Unscrew the top hinge cover and raise the panel Do not disconnect any harness wire.
2. Loosen the fastener counterclockwise, move the hinge sideway to adjust the refrigerator door. Do not remove the fastener!
3. Tighten the fastener and replace the top hinge cover.
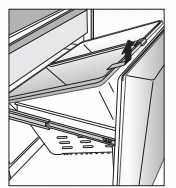
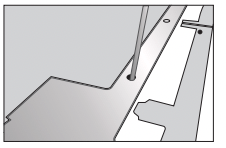
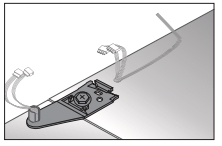
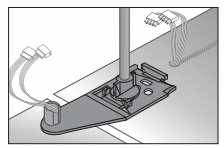
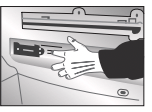
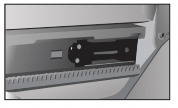
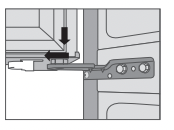
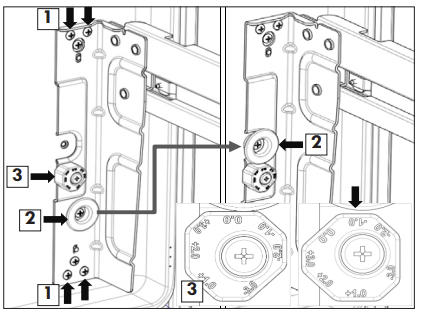
Adjusting the freezer drawer
If the freezer drawer is higher on one side than the other (not even):
1. Loosen the four side screws on the side where adjustment is needed.
2. Move the Stopper from ‘left picture position’ to ‘right picture position’.
3. Adjust the leveling by rotating the Position Knob. (Pull and rotate the Position Knob)
4. After adjusting the leveling, tighten the four side screws.
Front Cover
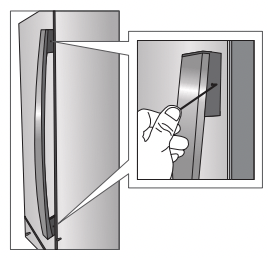
After installation and/or door leveling, fasten front cover with screws. (Remove the screws on the front bottom panel first. Click and screw the cover.)
Caution
● The front of refrigerator needs to be just a little higher than the back for easy door closing, but if the wheel is raised too much for door balance, i.e. the front of refrigerator is much higher than the back, it can be difficult to open the door.
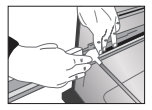
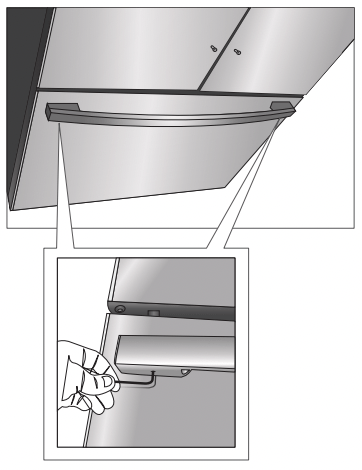
Installing the handles
- After installation and/or door leveling, install the handles.
- All the handles are identical.
1 Insert refrigerator door handles into guide. Fix the handle with screw (supplied).
2 Insert freezer door handle into guide. Fix the handle with screw (suppled).
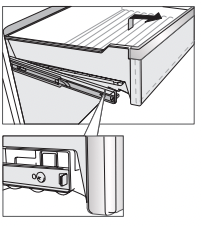
Foldaway door bar (mullion bar)
- When closing the left refrigerator door, the mullion bar folds behind the right refrigerator door, forming a seal between the refrigerator doors.
- When opening the left refrigerator door, the mullion bar folds back to the left door automatically
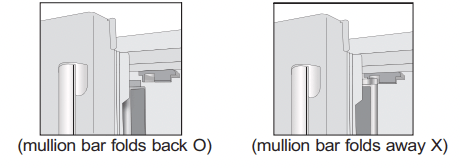
- The mullion bar may become damaged if you attempt to close the left refrigerator door with mullion bar folded out. When closing the left refrigerator door, make sure the mullion bar is folded back.
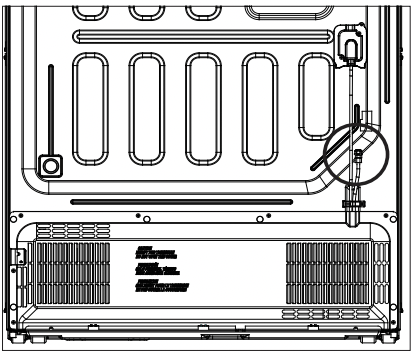
How to install water line
Before you begin
This water line installation is not covered by the refrigerator warranty. Follow these instructions carefully to minimize the risk of expensive water damage. Water hammer (water banging in the pipes) in house plumbing can cause damage to refrigerator parts and can lead to water leakage or flooding. Call a qualified plumber to correct water hamme
Caution To prevent burns and product damage, only connect the refrigerator water line to a cold water supply
If you use your refrigerator before connecting the water line, make sure the icemaker is turned OFF at the control panel.
Caution Do not install the icemaker tubing in areas where temperatures fall below freezing.
Water pressure
The water pressure must be from 30 to 125 psi or 207-862 kPa or 2.1-8.8 kgf/cm2. If the refrigerator is installed in an area with low water pressure “below 30 psi”, you can install a booster pump to compensate for the low pressure.
Water Connector