Loading ...
Loading ...
Loading ...
34
PLEASE NOTE: EL22 IS FOR OUTDOOR PERMANENT INSTALLATIONS ONLY AND EL22-I IS FOR INDOOR PERMANENT INSTALLATIONS ONLY. THIS MANUAL
AND ALL ECCOTEMP CONTENT IS SUBJECT TO CHANGE WITHOUT NOTICE. PLEASE VISIT WWW.ECCOTEMP.COM/SUPPORT FOR MORE INFORMATION.
Phone: 866-356-1992 | Email: [email protected] | Address: 315 - A Industrial RD Summerville, SC 29483
English
Support: Eccotemp.com/help-desk Shop Online: Eccotemp.com/products Store Locator: Eccotemp.com/locator
WARNING : Field wiring connections and electrical grounding must comply with local
codes, or in the absence of local codes, with the latest edition of the National Electrical
Code, ANSI/NFPA 70, or in Canada, Canadian Electrical Code, CSA C22.1 Part 1
Remote Control Installation (Not included, sold separately)
The following are considerations for determining the location of the remote control(s):
• Avoid areas where the remote control(s) may
be subjected to oil and/or steam from
cooking.
• Avoid areas where chemical agents (such as
thinner, benzine and alkaline) are used.
• Avoid areas of direct sunlight.
• The MAXIMUM distance between the water
heater and the remote control(s) installation
location is limited to 50 feet.
• No other manufacturer’s controls are
suitable for use with this water heater.
• DO NOT attempt to disassemble the
remote control.
• DO NOT install any remote control outdoors.
• Place remote control(s) out of children’s reach.
• The remote control(s) can be installed in
convenient locations such as the kitchen,
laundry room, or utility room.
• The included remote control can be placed in
a convenient location in a bathroom,
however, AVOID areas where water may come
into contact with the control(s).
• Avoid areas where the remote control(s
may be exposed to heat, e.g. stove ranges or
heaters.
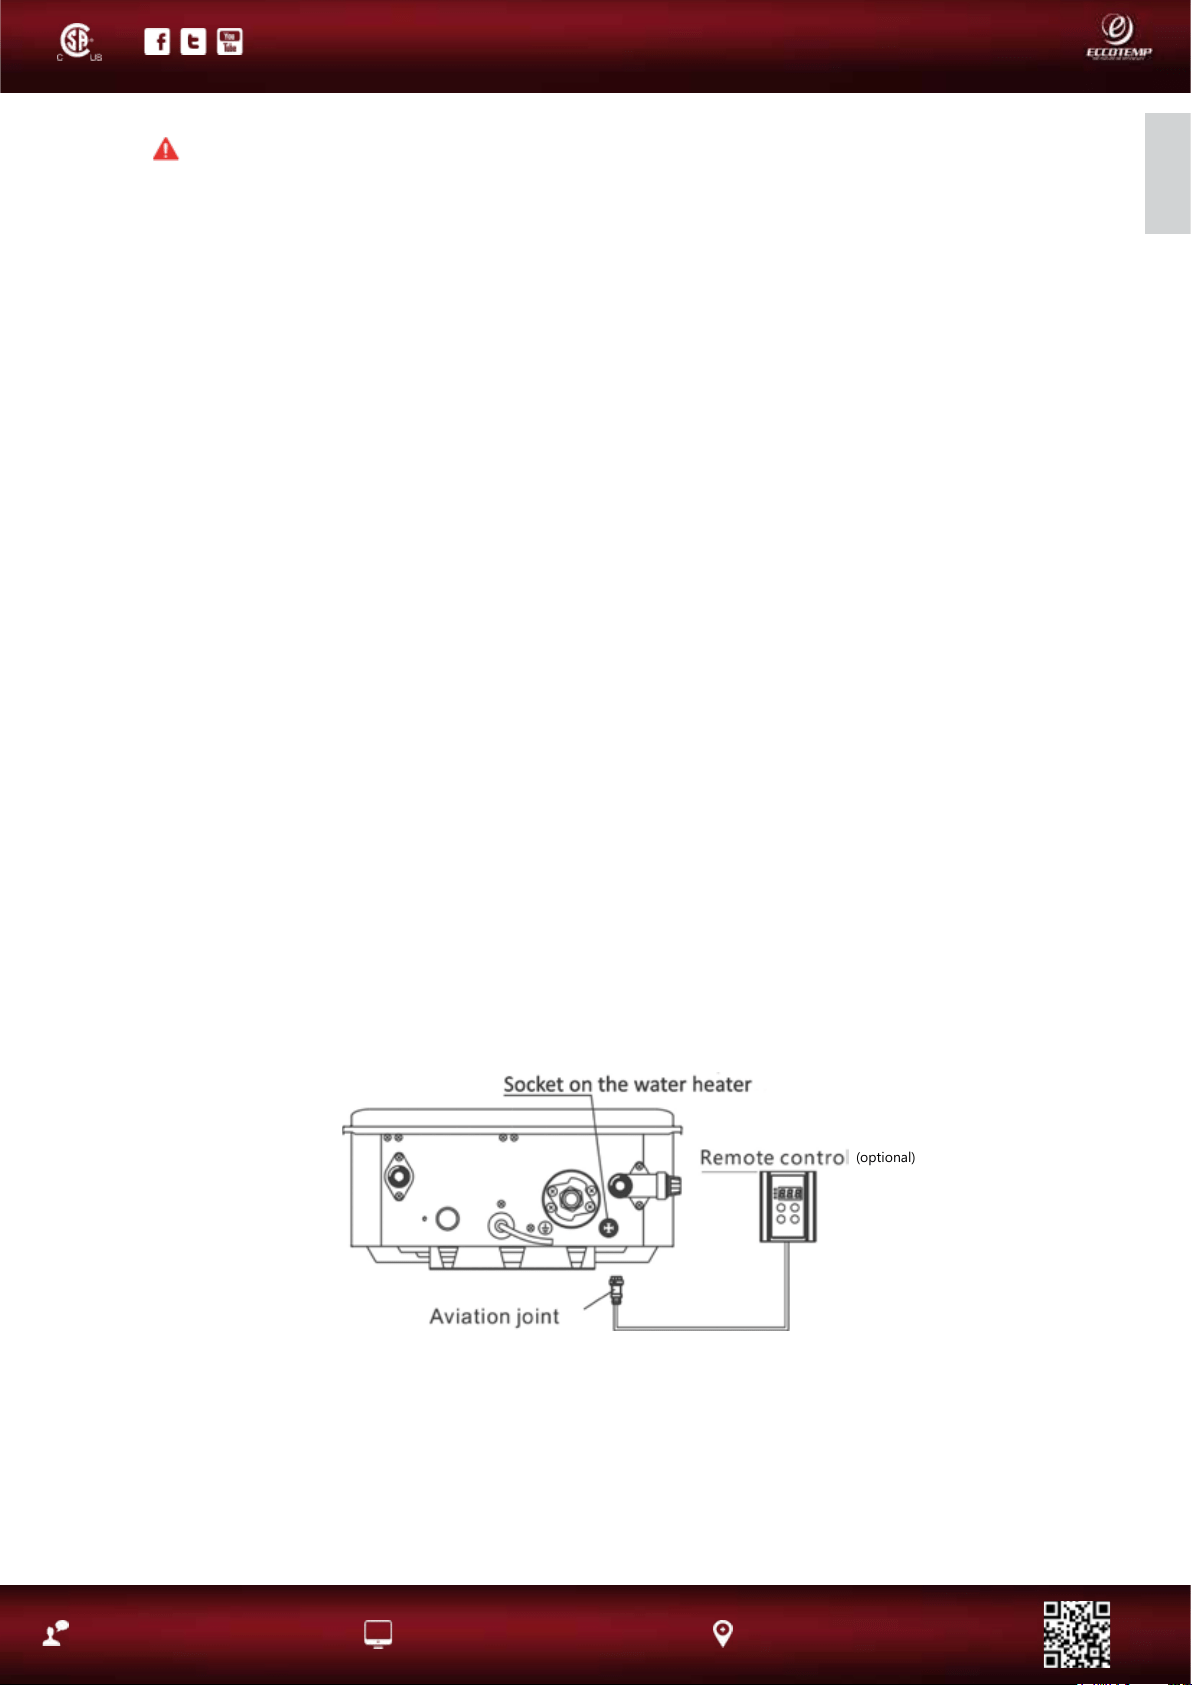
(Optional) Eccotemp Remote control -
Connection, Installation and Set
(For Panel Control/Remote Control and Remote Control units)
Panel Control/Remote Control and Remote Control units will work with either one or two
remote controls. If two remotes are desired, a wire connector will need to be provided. To
connect the remote control:
1. For one control: Plug the aviation joint into the socket directly on the water heater
(see illustration below)
2. For two controls: First, cut o the aviation joints on the two controllers, plug one into the
socket on the water heater (length is dependent on your requirements), and throw away the
other. Then connect the wires of the aviation joint to the inlet wire of the connector, and
connect the two remote control to the outlet wires of connector.
(optional)
EL22-I
Loading ...
Loading ...
Loading ...