Loading ...
Loading ...
Loading ...
Converting to Point-of-Use (POU) (continued)
6. Close the newly installed Shut-O Valve (Figure A and Figure B) and slowly re-open the cold water
supply line and check for leaks. If leaks are detected, immediately turn o the water supply and repair
any leaks. If no leaks are detected, proceed to step 7.
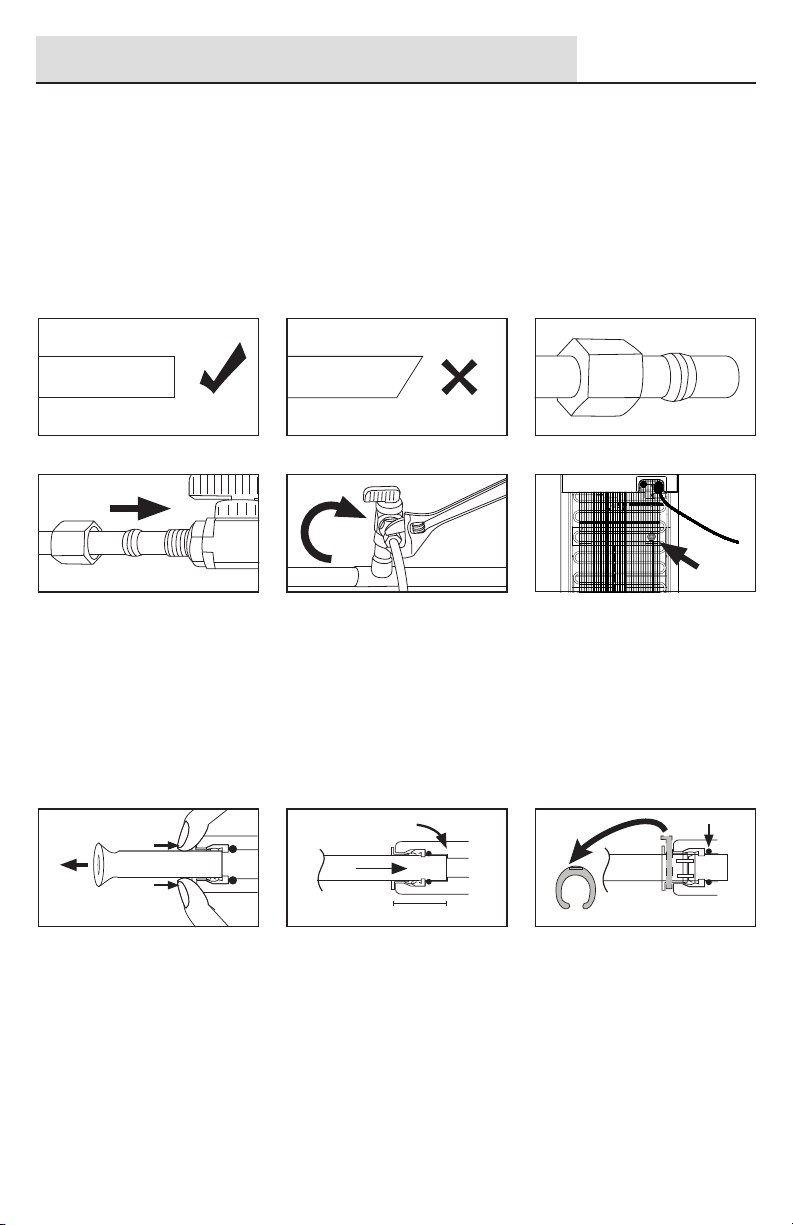
7. Cut the desired length to suit your installation requirements, making sure both ends of the Tubing are
cut straight/square (Figure 1 & Figure 2). Remove the Compression Nut and Ferrule from the Valve
and install them onto the Tubing (Figure 3). Insert the Tubing into the Valve until it stops (Figure 4).
Slide both the Compression Nut and Ferrule toward the Valve and tighten the Compression Nut firmly
using a wrench (Figure 5). DO NOT OVERTIGHTEN.
8. The Water Dispenser is equipped with a 1/4” Quick-connect Fitting as inlet port installed at the rear
of the unit (Figure 6). Remove sanitation plug from the filling port before installing the water line
(Figure 7).
9. Connect the incoming water line into the open side of the inlet port (Figure 6). This port utilizes
Quick-Connect Fittings, for which no tools are required. Simply insert the end of the Tubing firmly
into the fitting until it comes to a complete stop (approx. 1/4”) (Figure 8).
Figure 3
Figure 9
Figure 2
Figure 8
Figure 5
Figure 1
Figure 7
Figure 4
Figure 6
WARNING: DO NOT OPEN THE COLD WATER SUPPLY VALVE AT THIS STAGE.
Sanitation Plug
Backstop
Full engagement length
O-Ring
Horseshoe Clip
Collet
Loading ...
Loading ...
Loading ...