Sku Number: 356-9420
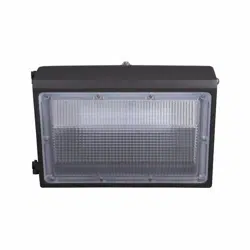
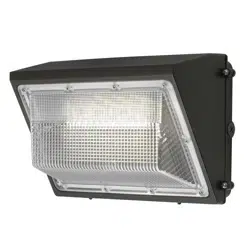
LED Wall Light
Model Number: ES00896G
Read all instructions before installation, then store in a safe place for future reference.
Failure to do so may result in faulty assembly and potential injury.
SAFETY INFORMATION
• WARNING: Failure to install and wire fixture in accordance with the National Electrical Codes (NEC), all applicable Federal, State
and Local electrical codes, as well as specific U.L. safety standards for the intended working environment (location/application),
may cause serious personal injury, death and/or property damage. This product must be installed by a person familiar with the
construction and operation of the product and the hazards involved.
• WARNING: Risk of fire and electrical shock. The lights installation requires knowledge of luminaires electrical systems. If not
qualified, do not attempt installation.Contact a qualified electrician.
• WARNING: Risk of fire or electric shock. Do not alter, relocate or remove wiring, power supply or any other electrical components.
• WARNING: To prevent electrical shock, please wear rubber shoes and work gloves when installing the lights.
• WARNING: Risk of electric shock. Disconnect power at fuse or circuit breaker before installing or servicing.
• WARNING: Risk of fire. Keep the lamp heads at least 3 in. (76mm) from combustible materials.
• CAUTION: Burn hazard. Allow the light fixture to cool before touching.
• CAUTION: For wall mount installation only.
• CAUTION: Suitable for wet locations.
• CAUTION: Do not use this fixture with a dimmer switch.
• CAUTION: Minimum 90°C supply conductors.
• CAUTION: Fixture designed for wall mount above 4 ft. only. Mount fixture to a grounded standard junction box marked for use in
wet locations. Suggest to install the light fixture between 9 ft. and 20 ft.above the ground.
Important Note: The safeguards and instructions are not meant to cover all possible conditions and situations that may occur. It may
be understood that common sense, cautions and care, are factors which cannot be built into any product. The person(s) installing,
operating and responsible for the light fixture must execute these factors.
CAUTION: This device complies with Part 15 of the FCC Rules. Operation is subject to the following two conditions: (1) This
device may not cause harmful interference, and (2) this device must accept any interference received, including interference
that may cause undesired operation.
WARNING: Changes or modifications to this unit not expressly approved by the party
responsible for compliance could void the user's authority to operate the equipment.
NOTE: This equipment has been tested and found to comply with the limited for Class B digital device, pursuant to Part 15 of the
FCC Rules. Their limits are designed to provide reasonable protection against harmful interference in a residential installation.
This equipment generates, uses and can radiate radio frequency energy and, if not installed and used in accordance with the
instructions, may cause harmful interference to radio communications. However, there is no guarantee that interference will not
occur in a particular installation. If the equipment does cause harmful interference to radio or television reception, which can be
determined by turning the equipment off and on, the user is encouraged to try to correct the interference by one or more of the
following measures:
* Reorient or relocate the receiving antenna.
* Increase the separation between the equipment and the receiver.
* Connect the equipment into an outlet on a circuit different from that to which the receiver is connected.
* Consult the dealer or an experienced radio/TV technician for help.
CLEANING AND MAINTENANCE
• CAUTION: Before attempting to clean the fixture, disconnect the power to the fixture by turning the breaker off or removing
the fuse from the fuse box.
• Clean the fixture with a soft, dry cloth.
• Do not use any cleaners with chemicals, volatile solvent or harsh abrasives.
• Non-professional Do not attempt to take apart and repair the fixture .
• Please use the constant-current driver exclusively adaptive to the troffer, do not change the driver without permission .
LOCATION: Fixture can be wall mounted.
Fixture designed for wall mount above 4 ft. only. Mount fixture to a grounded standard junction box marked for use in wet locations.
Suggest to install the light fixture between 5 ft. and 8 ft.above the ground.
FEATURES:
Photocell control: At night,turns light ON automatically and turns light OFF automatically when the sun rises.
Lumens output: 2,500 lumens / 3,000K .
Note: Photocell may have a few minute delay, to reduce it's sensitivity to sudden light changes. When testing shine a light/cover
the photocell for a few minutes to check if fixture functions properly.
PREPARATION: Tools required for assembly (not included): philips screwdriver, hammer, safety goggles, power drill,
silicone sealant and ladder.
Questions, problems, missing parts?
Before returning to your retailer, call our customer service at 855-232-6423
Monday – Friday 8:00 a.m. – 8:00 p.m. (EST)
Read all instructions before installation, then store in a safe place for future reference.
Failure to do so may result in faulty assembly and potential injury.
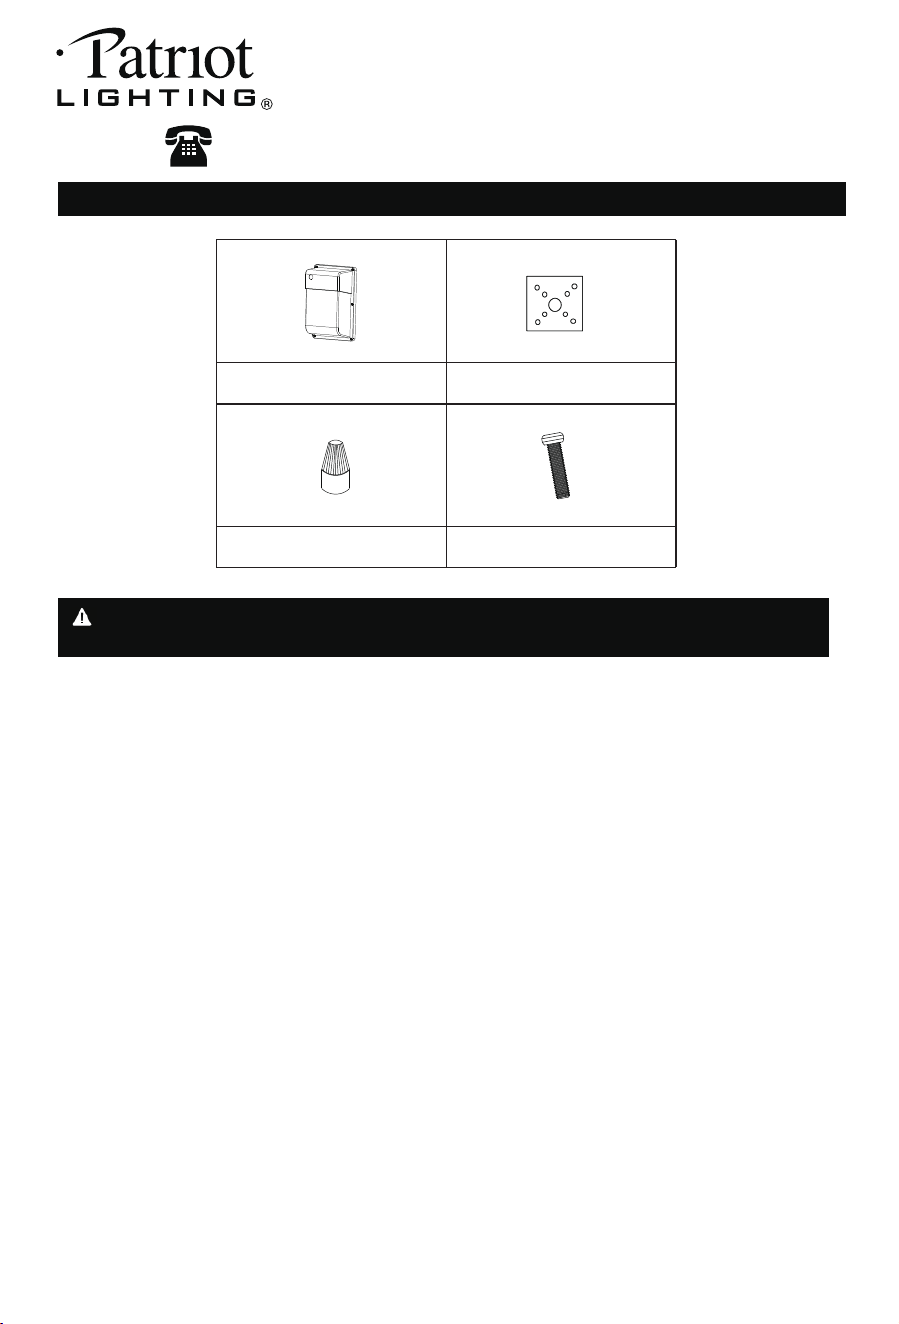
PACKAGE CONTENTS
C D
Screw x 2Wire Nut x 3
A B
Gasket x 1Light Fixture x 1
1 2

Sku Number: 356-9420
LED Wall Light
Model Number: ES00896G
Read all instructions before installation, then store in a safe place for future reference.
Failure to do so may result in faulty assembly and potential injury.
SAFETY INFORMATION
• WARNING: Failure to install and wire fixture in accordance with the National Electrical Codes (NEC), all applicable Federal, State
and Local electrical codes, as well as specific U.L. safety standards for the intended working environment (location/application),
may cause serious personal injury, death and/or property damage. This product must be installed by a person familiar with the
construction and operation of the product and the hazards involved.
• WARNING: Risk of fire and electrical shock. The lights installation requires knowledge of luminaires electrical systems. If not
qualified, do not attempt installation.Contact a qualified electrician.
• WARNING: Risk of fire or electric shock. Do not alter, relocate or remove wiring, power supply or any other electrical components.
• WARNING: To prevent electrical shock, please wear rubber shoes and work gloves when installing the lights.
• WARNING: Risk of electric shock. Disconnect power at fuse or circuit breaker before installing or servicing.
• WARNING: Risk of fire. Keep the lamp heads at least 3 in. (76mm) from combustible materials.
• CAUTION: Burn hazard. Allow the light fixture to cool before touching.
• CAUTION: For wall mount installation only.
• CAUTION: Suitable for wet locations.
• CAUTION: Do not use this fixture with a dimmer switch.
• CAUTION: Minimum 90°C supply conductors.
• CAUTION: Fixture designed for wall mount above 4 ft. only. Mount fixture to a grounded standard junction box marked for use in
wet locations. Suggest to install the light fixture between 9 ft. and 20 ft.above the ground.
Important Note: The safeguards and instructions are not meant to cover all possible conditions and situations that may occur. It may
be understood that common sense, cautions and care, are factors which cannot be built into any product. The person(s) installing,
operating and responsible for the light fixture must execute these factors.
CAUTION: This device complies with Part 15 of the FCC Rules. Operation is subject to the following two conditions: (1) This
device may not cause harmful interference, and (2) this device must accept any interference received, including interference
that may cause undesired operation.
WARNING: Changes or modifications to this unit not expressly approved by the party
responsible for compliance could void the user's authority to operate the equipment.
NOTE: This equipment has been tested and found to comply with the limited for Class B digital device, pursuant to Part 15 of the
FCC Rules. Their limits are designed to provide reasonable protection against harmful interference in a residential installation.
This equipment generates, uses and can radiate radio frequency energy and, if not installed and used in accordance with the
instructions, may cause harmful interference to radio communications. However, there is no guarantee that interference will not
occur in a particular installation. If the equipment does cause harmful interference to radio or television reception, which can be
determined by turning the equipment off and on, the user is encouraged to try to correct the interference by one or more of the
following measures:
* Reorient or relocate the receiving antenna.
* Increase the separation between the equipment and the receiver.
* Connect the equipment into an outlet on a circuit different from that to which the receiver is connected.
* Consult the dealer or an experienced radio/TV technician for help.
CLEANING AND MAINTENANCE
• CAUTION: Before attempting to clean the fixture, disconnect the power to the fixture by turning the breaker off or removing
the fuse from the fuse box.
• Clean the fixture with a soft, dry cloth.
• Do not use any cleaners with chemicals, volatile solvent or harsh abrasives.
• Non-professional Do not attempt to take apart and repair the fixture .
• Please use the constant-current driver exclusively adaptive to the troffer, do not change the driver without permission .
LOCATION: Fixture can be wall mounted.
Fixture designed for wall mount above 4 ft. only. Mount fixture to a grounded standard junction box marked for use in wet locations.
Suggest to install the light fixture between 5 ft. and 8 ft.above the ground.
FEATURES:
Photocell control: At night,turns light ON automatically and turns light OFF automatically when the sun rises.
Lumens output: 2,500 lumens / 3,000K .
Note: Photocell may have a few minute delay, to reduce it's sensitivity to sudden light changes. When testing shine a light/cover
the photocell for a few minutes to check if fixture functions properly.
PREPARATION: Tools required for assembly (not included): philips screwdriver, hammer, safety goggles, power drill,
silicone sealant and ladder.
Questions, problems, missing parts?
Before returning to your retailer, call our customer service at 855-232-6423
Monday – Friday 8:00 a.m. – 8:00 p.m. (EST)
Read all instructions before installation, then store in a safe place for future reference.
Failure to do so may result in faulty assembly and potential injury.
PACKAGE CONTENTS
C D
Screw x 2Wire Nut x 3
A B
Gasket x 1Light Fixture x 1
1 2
INSTALLATION
• Before installing the light fixture, ensure that all parts are present. Compare parts with the Hardware Included and Package
Contents sections. If any part is missing or damaged, do not attempt to assemble, install, or operate this light fixture.
• Turn off the power before installation,remove the old light fixture if necessary.Open the hole on the mounting surface according
to the size of fixture.
• When mounting fixture, for Dusk to Dawn operation, make sure the photocell orientation is at the top for wall mount, in an area
that receives daylight and not too close to reflective surfaces.
Estimated installation time: 20 minutes.
OPERATIONAL INSTRUCTIONS
Dusk-to-dawn operation enables the light fixture to automatically turn ON when dark outside and turn OFF when the sun rises,
thus saving you energy.
FIVE -YEAR LIMITED WARRANTY:
If, during normal use, this PATRIOT LIGHTING
®
lighting fixture breaks or fails
due to a defect in material and workmanship within five (5) year from the date of original purchase, simply bring this lighting
fixture with the original sales receipt back to your nearest MENARDS
®
retail store. At its discretion, PATRIOTLIGHTING
®
agrees to have the product or any defective part(s) repaired or replaced with the same or similar PATRIOTLIGHTING
®
product or part free of charge, within the stated warranty period, when returned by the original purchaser with original sales
receipt. This warranty; (1) excludes expendable parts including but not limited to light bulbs and batteries; (2) does not cover
damage that has resulted from abuse or misuse; and (3) does not cover any losses,labor, injuries to persons/property or costs.
This warranty does give you specific legal rights and you may have other rights, which vary from state to state.
TIP: To test if the light fixture and photocell works properly run power to the fixture and cover the photocell to turn fixture ON.
Shine a light into thephotocell to see if fixture turns OFF.
Note: If photocell on the top of the light fixture is located in an area under heavy shade the photocell may not detect enough
light and may turn the light fixture on.
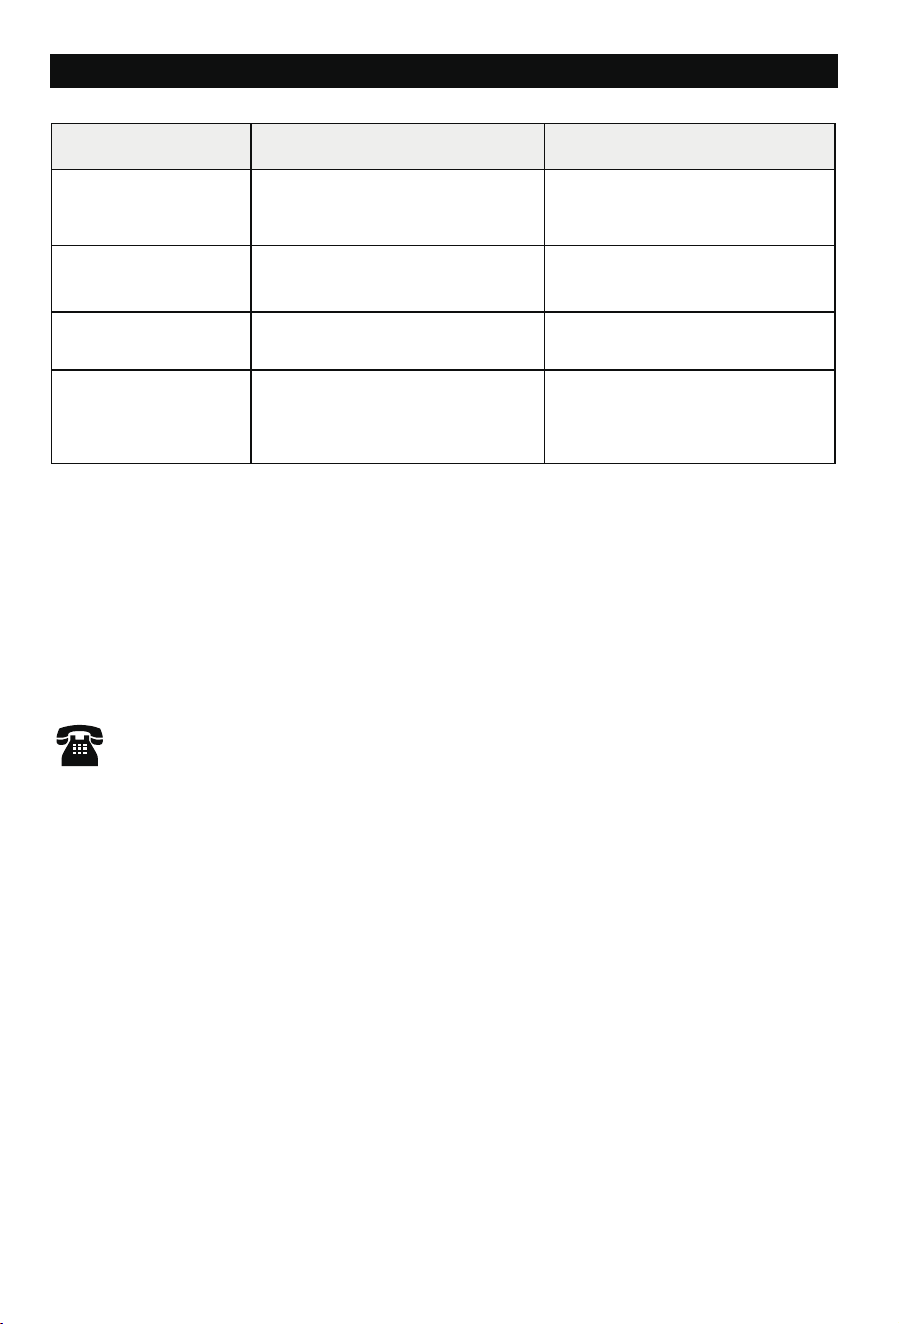
TROUBLESHOOTINGINSTALLATION AND OPERATION INSTRUCTIONS
Relocate light fixture to a location where there
is no reflected light.
Light FLICKERS
Problem Possible Cause Solution
Light does not
turn ON
No power to the fixture.
Check if circuit breaker is tripped and confirm
wall switch is ON.
Verify wiring to fixture is correct (turn power
off to fixture beforehand).
Light stays ON
The light fixture is wired through an unsuitable
dimmer.
Light sensor is in a shaded area.
R
eplace the dimmer switch to a standard
ON/OFF wall switch.
Shine a flashlight into the light sensor and wait
a couple minutes. If the light turns OFF, the
fixture should be moved to a location with
enough light in the daylight hours for the light
sensor to work.
Light cycles ON and OFF
continuously
Photocell light sensor is sensing reflected light.
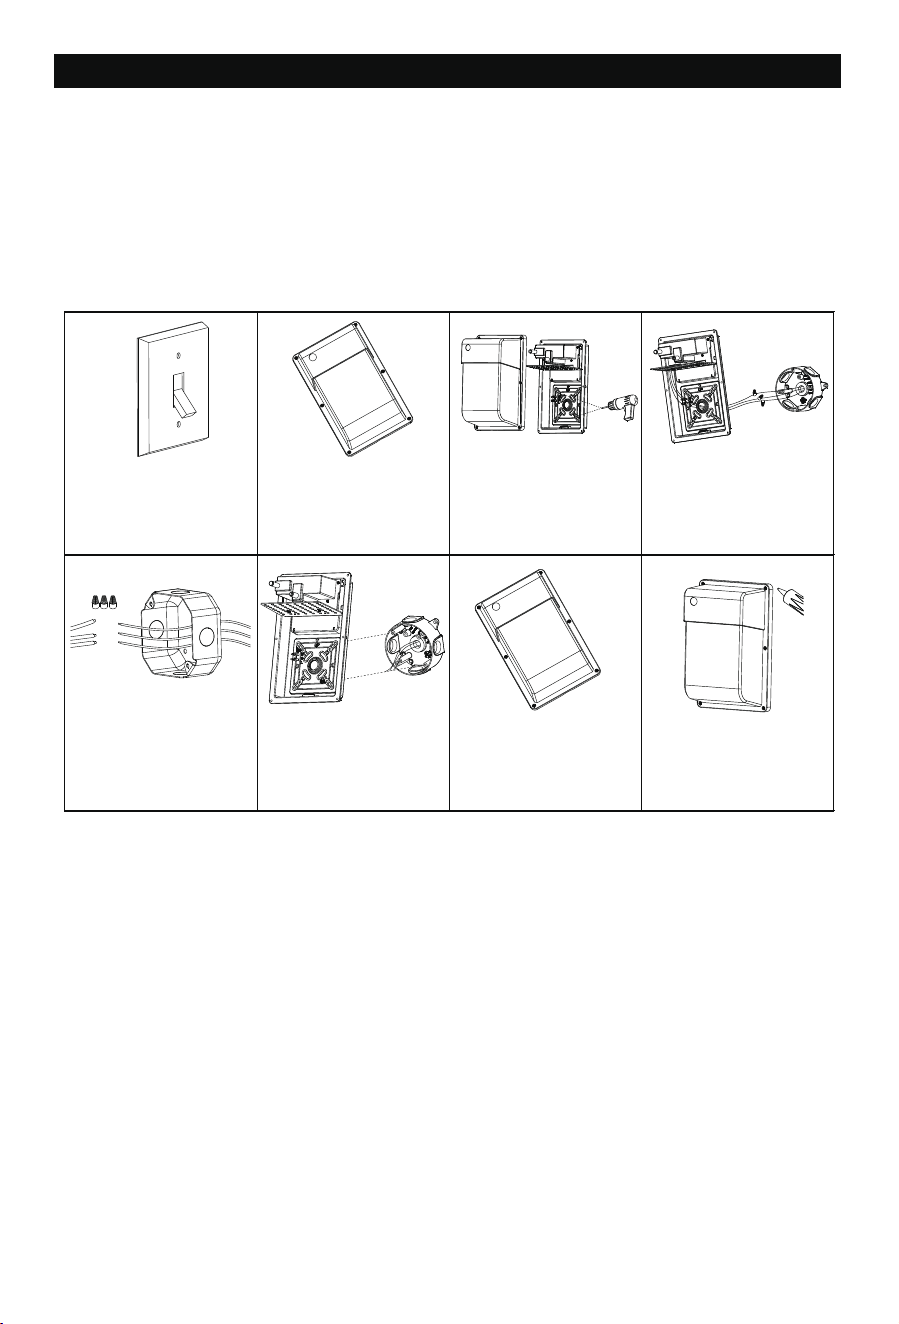
1. Turn off the power and take off
the original light fixture.
2. Loosen the six diffuser mounting
screws using a philips screwdriver
to open the fixture.
3. Drill installation holes at the
back of the light with Dia.11/64
inch bit. Measure the size of your
junction box to match the fixed
screw hole and mark the hole
position to drill out by power drill.
4. Set attached gasket (B)
between the light and the junction
box. Pass the wire from junction
box through the hole of Gasket (B)
into the light fixture.Then Making
the electrical connections using
attached three Wire Nuts (C).
5. Make sure the wire connection
polarity is correct.
* White to white
* Black to black
* Green ground to house ground
6. Fixing the light base on the
junction box at the wall by two
attached screws (D).
7. Close the fixture by tightening
the six diffuser mounting screws
using a philips screwdriver.
8. Caulk around the light base
and surface with silicone
sealant (not included).
Questions, problems, missing parts?
Before returning to your retailer, call our customer service at 855-232-6423
Monday – Friday 8:00 a.m. – 8:00 p.m. (EST)
3 4
INSTALLATION
• Before installing the light fixture, ensure that all parts are present. Compare parts with the Hardware Included and Package
Contents sections. If any part is missing or damaged, do not attempt to assemble, install, or operate this light fixture.
• Turn off the power before installation,remove the old light fixture if necessary.Open the hole on the mounting surface according
to the size of fixture.
• When mounting fixture, for Dusk to Dawn operation, make sure the photocell orientation is at the top for wall mount, in an area
that receives daylight and not too close to reflective surfaces.
Estimated installation time: 20 minutes.
OPERATIONAL INSTRUCTIONS
Dusk-to-dawn operation enables the light fixture to automatically turn ON when dark outside and turn OFF when the sun rises,
thus saving you energy.
FIVE -YEAR LIMITED WARRANTY:
If, during normal use, this PATRIOT LIGHTING
®
lighting fixture breaks or fails
due to a defect in material and workmanship within five (5) year from the date of original purchase, simply bring this lighting
fixture with the original sales receipt back to your nearest MENARDS
®
retail store. At its discretion, PATRIOTLIGHTING
®
agrees to have the product or any defective part(s) repaired or replaced with the same or similar PATRIOTLIGHTING
®
product or part free of charge, within the stated warranty period, when returned by the original purchaser with original sales
receipt. This warranty; (1) excludes expendable parts including but not limited to light bulbs and batteries; (2) does not cover
damage that has resulted from abuse or misuse; and (3) does not cover any losses,labor, injuries to persons/property or costs.
This warranty does give you specific legal rights and you may have other rights, which vary from state to state.
TIP: To test if the light fixture and photocell works properly run power to the fixture and cover the photocell to turn fixture ON.
Shine a light into thephotocell to see if fixture turns OFF.
Note: If photocell on the top of the light fixture is located in an area under heavy shade the photocell may not detect enough
light and may turn the light fixture on.
TROUBLESHOOTINGINSTALLATION AND OPERATION INSTRUCTIONS
Relocate light fixture to a location where there
is no reflected light.
Light FLICKERS
Problem Possible Cause Solution
Light does not
turn ON
No power to the fixture.
Check if circuit breaker is tripped and confirm
wall switch is ON.
Verify wiring to fixture is correct (turn power
off to fixture beforehand).
Light stays ON
The light fixture is wired through an unsuitable
dimmer.
Light sensor is in a shaded area.
R
eplace the dimmer switch to a standard
ON/OFF wall switch.
Shine a flashlight into the light sensor and wait
a couple minutes. If the light turns OFF, the
fixture should be moved to a location with
enough light in the daylight hours for the light
sensor to work.
Light cycles ON and OFF
continuously
Photocell light sensor is sensing reflected light.
1. Turn off the power and take off
the original light fixture.
2. Loosen the six diffuser mounting
screws using a philips screwdriver
to open the fixture.
3. Drill installation holes at the
back of the light with Dia.11/64
inch bit. Measure the size of your
junction box to match the fixed
screw hole and mark the hole
position to drill out by power drill.
4. Set attached gasket (B)
between the light and the junction
box. Pass the wire from junction
box through the hole of Gasket (B)
into the light fixture.Then Making
the electrical connections using
attached three Wire Nuts (C).
5. Make sure the wire connection
polarity is correct.
* White to white
* Black to black
* Green ground to house ground
6. Fixing the light base on the
junction box at the wall by two
attached screws (D).
7. Close the fixture by tightening
the six diffuser mounting screws
using a philips screwdriver.
8. Caulk around the light base
and surface with silicone
sealant (not included).
Questions, problems, missing parts?
Before returning to your retailer, call our customer service at 855-232-6423
Monday – Friday 8:00 a.m. – 8:00 p.m. (EST)
3 4