Loading ...
Loading ...
Loading ...
Page 24
Installation and Operation Manual - Legend III
ENGLISH
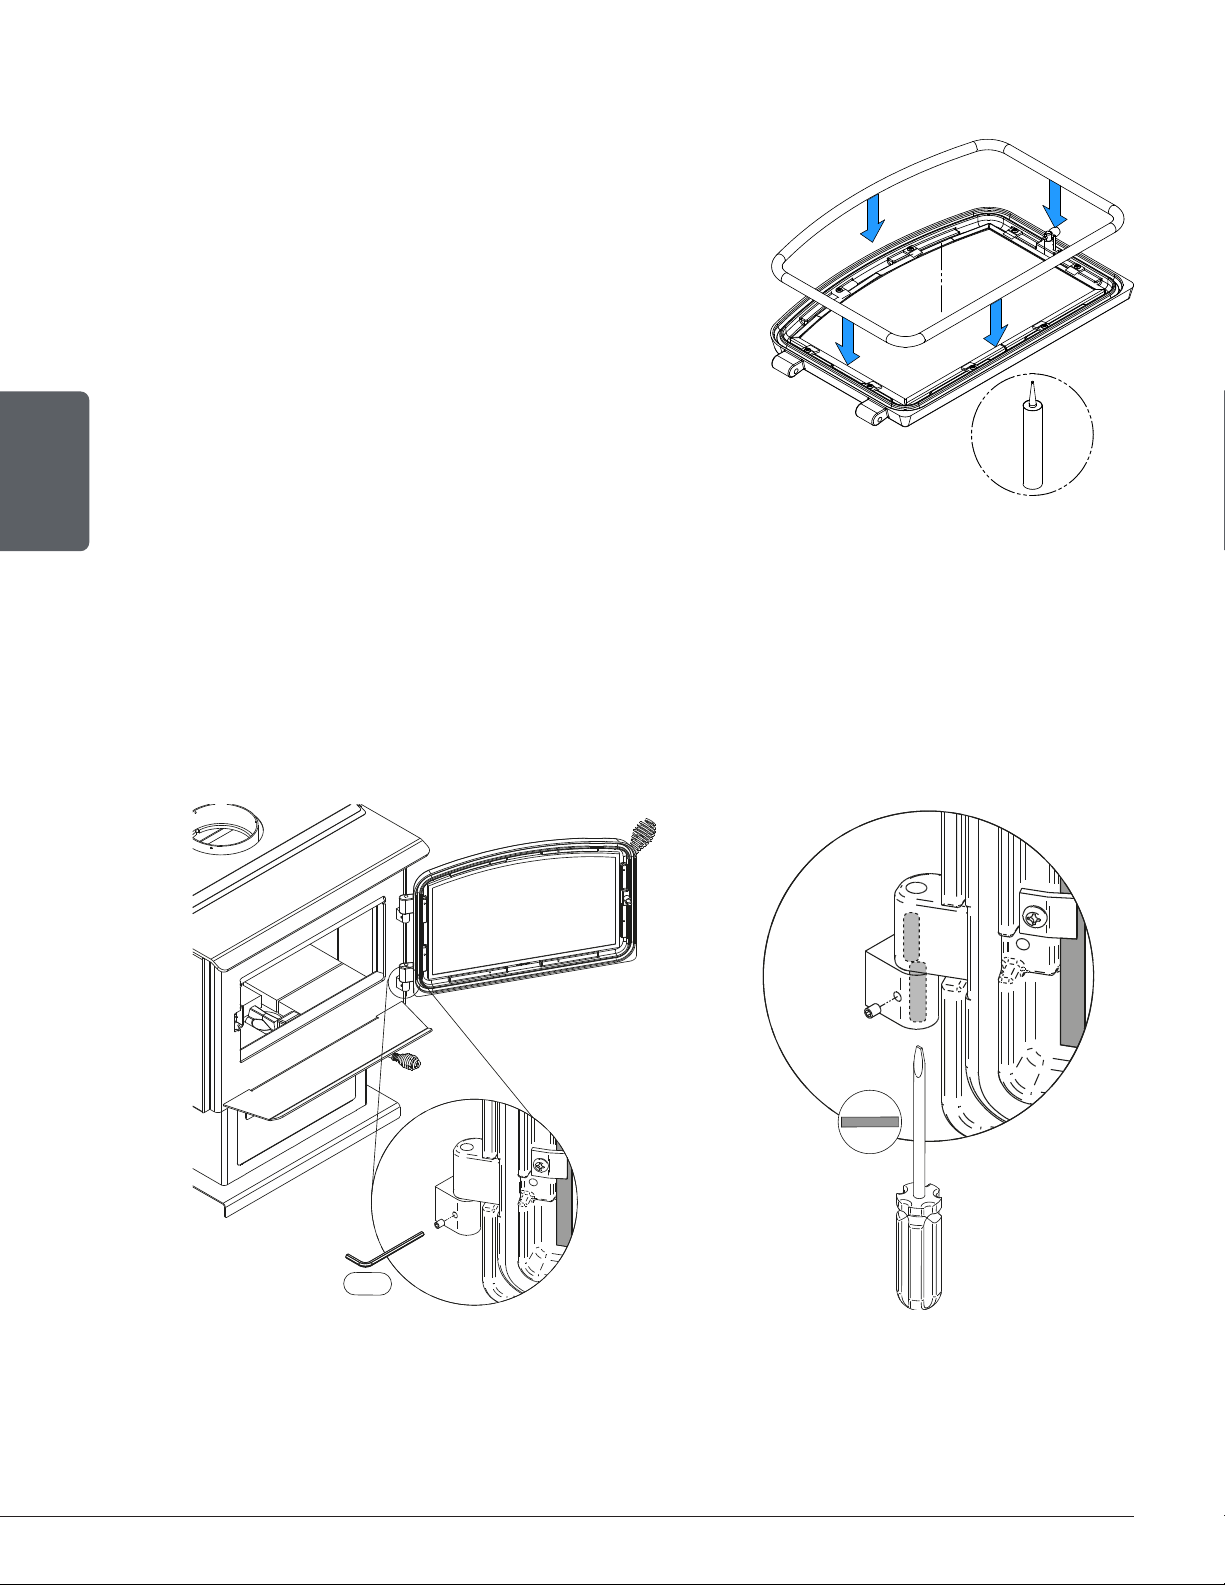
6.4.2 Gasket
It is important to replace the gasket with another having the
same diameter and density to maintain a good seal.
1. Remove the door and place it face-down on something soft
like a cushion of rags or a piece of carpet.
2. Remove the old gasket from the door. Use a screwdriver to
scrape the old gasket adhesive from the door gasket groove.
3. Apply a bead of approximately 3/16" (5 mm) of high
temperature silicone in the door gasket groove. Starting from
the middle, hinges side, press the gasket into the groove.
The gasket must not be stretched during installation.
4. Leave about ½" (13 mm) long of the gasket when cutting and
press the end into the groove. Tuck any loose fibers under
the gasket and into the silicone.
5. Close the door. Do not use the stove for 24 hours.
6.4.3 Door Alignment
To align, open the door and loosen the pressures screws located on the lower and upper hinges of the
door using a 3/32” Allen key to free the adjustable hinge rods.
DOOR ALIGNMENT
To align, open the door and loosen the pressures screws located on the lower and upper hinges of the
door using a 3/32” Allen key to free the adjustable hinge rods.
3/32"
Using a flat screwdriver, turn the adjustable hinge rods in the direction shown to adjust the doors. Tighten
all door hinge pressure screws when they are at the desired positions. Configurations 1-2-3-4-5-6, show
in which direction these act on the adjustment of the door
4
2
A
B
1
3
5
6
Using a flat screwdriver, turn the adjustable hinge rods in the direction shown to adjust the doors.
Tighten all door hinge pressure screws when they are at the desired positions. Configurations 1-2-3-
4-5-6, show in which direction these act on the adjustment of the door.
Loading ...
Loading ...
Loading ...