User Manual for Oven
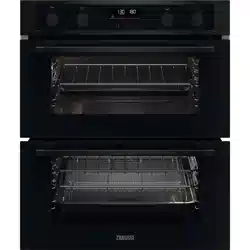
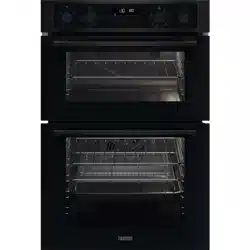
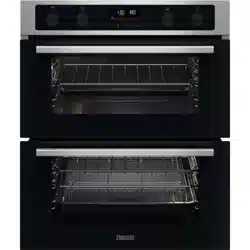
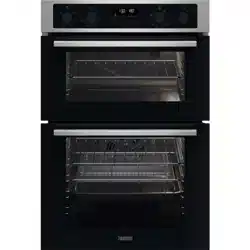
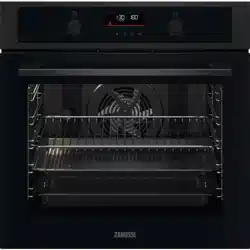
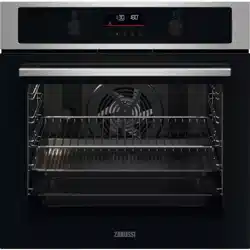
PRODUCT DESCRIPTION
GENERAL OVERVIEW

ACCESSORIES
• Wire shelf
For cookware, cake tins, roasts.
• Grill- / Roasting pan
To bake and roast or as pan to collect fat.
• AirFry
To fry food with less oil or without baking paper.
• Trivet
For roasting and grilling.
 Use the trivet only with the Grill- / roasting pan.
CONTROL PANEL
RETRACTABLE KNOBS
To use the appliance press the knob. The knob comes out.
SENSOR FIELDS / BUTTONS
 |
To set the MINUTE MINDER. Hold it for more than 3 seconds to turn on or turn off the oven lamp. |
 |
To set a clock function. |
 |
To check the oven temperature or the temperature of the core temperature sensor (if applicable). Use only while a heating function operates. |
DISPLAY

A. Timer / Temperature
B. Heat-up and residual heat indicator
C. Food Sensor (selected models only)
D. Door lock (selected models only)
E. Hours / minutes
F. Demo Mode
G. Clock functions
BEFORE FIRST USE
WARNING! Refer to Safety chapters.
Set the time before you use the oven.
INITIAL CLEANING
|
Step 1
|
Step 2
|
Step 3
|
|
Remove all accessories and re- movable shelf supports from the oven.
|
Clean the oven and the accessories with a soft cloth, warm water and a mild detergent.
|
Place the accessories and the removable shelf supports in the oven.
|
INITIAL PREHEATING
Preheat the empty oven before the first use.
| Step 1 |
Remove all accessories and removable shelf supports from the oven. |
| Step 2 |
Set the maximum temperature for the function:
Let the oven operate for 1 h.
|
| Step 3 |
Set the maximum temperature for the function:
Let the oven operate for 15 min.
|
The oven can emit an odour and smoke during preheating. Make sure that the room is ventilated.
DAILY USE
WARNING! Refer to Safety chapters.
HOW TO SET: HEATING FUNCTION
Step 1
Turn the knob for the heating functions to select a heating function.
Step 2
Turn the control knob to select the temperature.
Step 3
When the cooking ends, turn the knobs to the off position to turn off the oven.
HEAT-UP INDICATOR
When the oven function operates, the bars in the display  appear one by one when the temperature in the oven increases, and disappear when it decreases.
HEATING FUNCTIONS
NOTES ON: MOIST FAN BAKING
This function was used to comply with the energy efficiency class and ecodesign requirements according to EU 65/2014 and EU 66/2014. Tests according to EN 60350-1.
The oven door should be closed during cooking so that the function is not interrupted and the oven operates with the highest energy efficiency possible.
When you use this function the lamp automatically turns off after 30 sec.
For the cooking instructions refer to "Hints and tips" chapter, Moist Fan Baking. For general energy saving recommendations refer to "Energy Efficiency" chapter, Energy Saving.
CLOCK FUNCTIONS
CLOCK FUNCTIONS TABLE
HOW TO SET: TIME OF DAY
After the first connection to the mains, wait until the display shows: hr, 12:00. 12 - flashes.
| Step 1 |
Turn the knob for the temperature to set the hour. |
| Step 2 |
 - press to confirm. - press to confirm.
The display shows the set hour and: min. 00 - flashes.
|
| Step 3 |
Turn the knob for the temperature to set the minutes. |
| Step 4 |
- press to confirm.
The display shows the set time.
|
- press repeatedly to change the time of day.
 - flashes in the display.
HOW TO SET FUNCTION: DURATION
| Step 1 |
Set a heating function. |
| Step 2 |
- press repeatedly.  - starts to flash. - starts to flash.
|
| Step 3 |
Turn the control knob to set the minutes. - press to confirm.
|
| Step 4 |
Turn the knob for the temperature to set the hour. - press to confirm.
When the set time ends the signal sounds for 2 min. Time setting flashes in the display. The oven turns off automatically.
|
| Step 5 |
Press any button to stop the signal. |
| Step 6 |
Turn the knobs to the off position. |
HOW TO SET FUNCTION: END TIME
| Step 1 |
Set a heating function. |
| Step 2 |
- press repeatedly.  - starts to flash. - starts to flash.
|
| Step 3 |
Turn the knob for the temperature to set the hour.- press to confirm.
|
| Step 4 |
Turn the knob for the temperature to set the minutes. - press to confirm.
At the set end time the signal sounds for 2 min. The time setting flashes in the display. The oven turns off automatically.
|
| Step 5 |
Press any button to stop the signal. |
| Step 6 |
Turn the knobs to the off position. |
HOW TO SET FUNCTION: TIME DELAY
The display shows: the set temperature, , .
Oven turns on automatically later on, works for the set Duration time and stops at the set End Time. At the set End Time the signal sounds for 2 min. The time setting flashes in the display. The oven turns off.
| Step 7 |
Press any button to stop the signal. |
| Step 8 |
Turn the knobs to the off position. |
HOW TO SET FUNCTION: MINUTE MINDER
Minute minder can be both set when the oven is turned on and off.
| Step 1 |
 - press repeatedly. - press repeatedly.  , 00 - flash. , 00 - flash.
|
| Step 2 |
Turn the knob for the temperature to set the seconds and then the minutes. When the time you set is longer than 60 min, hr flashes. |
| Step 3 |
Set the hours.
Minute Minder - starts automatically after 5 sec.
After 90% of the set time the signal sounds.
|
| Step 4 |
When the set time ends the signal sounds for 2 min. 00:00- flash. Press any button to stop the signal. |
USING THE ACCESSORIES
WARNING! Refer to Safety chapters.
INSERTING ACCESSORIES
A small indentation at the top increases safety. The indentations are also anti-tip devices. The high rim around the shelf prevents cookware from slipping of the shelf.
Wire shelf:
Push the shelf between the guide bars of the shelf support and make sure that the feet point down.

Deep pan:
Push the tray between the guide bars of the shelf support.

Wire shelf, Deep pan:
Push the tray between the guide bars of the shelf support and the wire shelf on the guide bars above.

AirFry:
Place the tray on the third shelf position. Place the baking tray on the first shelf position.

TRIVET AND GRILL- / ROASTING PAN
Step 1
Put the trivet into a deep pan.
Step 2
Put the deep pan on the recommended shelf position.
| Roasting larger pieces of meat or poultry on one shelf position. |
Grilling and toasting thin pieces of food in large quantities. |
|
Make sure the supports of the wire shelf point up.

|
Make sure the supports of the wire shelf point down.

|
ADDITIONAL FUNCTIONS
HOW TO USE: CHILD LOCK
When the function is on the oven cannot be turned on accidentally.
| Step 1 |
Ensure the knob for the heating functions is in the off position. |
| Step 2 |
, - press and hold at the same time for 2 sec. |
The signal sounds. SAFE ,  - appear on the display. The door is locked.
To turn off the Child Lock, repeat the step 2.
HOW TO USE: FUNCTION LOCK
You can turn on the function only when the oven works. When the function is on the temperature and time settings cannot be changed accidentally.
| Step 1 |
Set an oven function. |
| Step 2 |
, - press and hold at the same time for 2 sec.
The signal sounds. Loc appears on the display for 5 sec.
|
To turn off the Function Lock, repeat step 2.
Loc appears on the display when you turn the control knob or press any button when the Function lock is on. When you turn the knob for the oven functions, the oven stops.
When you turn off the oven while the Function Lock is on, the Function Lock switches automatically to the Child Lock. Refer to "Additional functions" chapter, Using the Child Lock.
RESIDUAL HEAT INDICATOR
When you turn off the oven, the display shows the residual heat indicator if the temperature in the oven is more than 40 °C.Turn the knob for the temperature left or right to check the oven temperature.
AUTOMATIC SWITCH-OFF
For safety reasons the oven turns off after some time, if a heating function works and you do not change any settings.


After an automatic switch-off, turn the knobs to the off position.
The Automatic switch-off does not work with the functions: Light, Duration, End Time.
COOLING FAN
When the oven operates, the cooling fan turns on automatically to keep the surfaces of the oven cool. If you turn off the oven, the cooling fan can continue to operate until the oven cools down.
SAFETY THERMOSTAT
Incorrect operation of the oven or defective components can cause dangerous overheating. To prevent this, the oven has a safety thermostat which interrupts the power supply. The oven turns on again automatically when the temperature drops.
HINTS AND TIPS
Refer to Safety chapters.
COOKING RECOMMENDATIONS
The oven has five shelf positions.
Count the shelf positions from the bottom of the oven floor.
Your oven may bake or roast differently to the oven you had before. The below tables provide you with the standard settings for temperature, cooking time and shelf position.
If you cannot find the settings for a special recipe, look for the similar one.
The oven has a special system which circulates the air and constantly recycles the steam. With this system you can cook in a steamy environment and keep the food soft inside and crusty outside. It decreases the cooking time and energy consumption.
Baking cakes
Do not open the oven door before 3/4 of the set cooking time is up.
If you use two baking trays at the same time, keep one empty level between them.
Cooking meat and fish
Use a deep pan for very fatty food to prevent the oven from stains that can be permanent.
Leave the meat for approximately 15 minutes before carving so that the juice does not seep out.
To prevent too much smoke in the oven during roasting, add some water into the deep pan. To prevent the smoke condensation, add water each time after it dries up.
Cooking times
Cooking times depend on the type of food, its consistency, and volume.
Initially, monitor the performance when you cook. Find the best settings (heat setting, cooking time, etc.) for your cookware, recipes and quantities when you use this appliance.
BAKING AND ROASTING


Preheat the empty oven.

Preheat the empty oven. Use the cake mould.

Use the second shelf position.
Use the wire shelf.


Use the second shelf position.

GRILL
Preheat the empty oven.
Use the fourth shelf position.
Grill with the maximum temperature setting.

TURBO GRILLING
Preheat the empty oven.
Use the first or the second shelf position.
To calculate the roasting time multiple the time given in the table below by the centimetres of thickness of the fillet.


AIRFRY
Put the food directly on the tray.
Set the temperature to 180 - 220°C.
Use the function: Pizza Function / AirFry. The food does not have to be turned during cooking.

DEFROST

DEHYDRATING - TRUE FAN COOKING
Cover trays with grease proof paper or baking parchment.
For a better result, stop the oven halfway through the drying time, open the door and let it cool down for one night to complete the drying.
For 1 tray use the third shelf position.
For 2 trays use the first and fourth shelf position.


MOIST FAN BAKING - RECOMMENDED ACCESSORIES
Use the dark and non-reflective tins and containers. They have better heat absorption than the light colour and reflective dishes.

MOIST FAN BAKING
For the best results follow suggestions listed in the table below.


INFORMATION FOR TEST INSTITUTES
Tests according to IEC 60350-1.


CARE AND CLEANING
WARNING! Refer to Safety chapters.
NOTES ON CLEANING
 |
Clean the front of the oven with a soft cloth with warm water and a mild detergent. |
| Use a cleaning solution to clean metal surfaces. |
| Clean stains with a mild detergent. |
 |
Clean the cavity after each use. Fat accumulation or other residue may cause fire. |
| Moisture can condense in the oven or on the door glass panels. To decrease the condensation, let the oven work for 10 minutes before cooking. Do not store the food in the oven for longer than 20 minutes. Dry the cavity with a soft cloth after each use. |
 |
Clean all accessories after each use and let them dry. Use a soft cloth with warm water and a mild detergent. Do not clean the accessories in a dishwasher. |
| Do not clean the non-stick accessories using abrasive cleaner or sharp-edged objects. |
HOW TO REMOVE: SHELF SUPPORTS
Remove the shelf supports to clean the oven.
Step 1 Turn off the oven and wait until it is cold.
Step 2 Pull the front of the shelf support away from the side wall.

Step 3 Pull the rear end of the shelf support away from the side wall and remove it.
Step 4 Install the shelf supports in the opposite sequence.

HOW TO USE: PYROLYTIC CLEANING
Clean the oven with pyrolytic cleaning.
WARNING! There is a risk of burns.
CAUTION! If there are other appliances installed in the same cabinet, do not use them at the same time as this function. It can cause damage to the oven.
Before the pyrolytic cleaning:
| Turn off the oven and wait until it is cold. |
Remove all accessories. |
Clean the oven floor and the inner door glass with warm water, a soft cloth and a mild detergent. |
Step 1 Set the function: - flashes.
Step 2 Turn the control knob (for the temperature) to set the cleaning mode.
| Option |
Cleaning mode |
Duration |
| P1 |
Light cleaning |
1 h 30 min |
| P2 |
Normal cleaning |
2 h 30 min |
Step 3 - press to start the cleaning.
Step 4 After cleaning, turn the knob for the heating functions to the off position.
During the cleaning the oven lamp is off. The oven door stays locked. When the oven is cold, the door unlocks.
When the oven is at the set temperature, the door locks. Until the door unlocks the display shows: the bars of the heat indicator,To stop cleaning before it is completed, turn the knob for the oven functions to the off position.
When the cleaning ends:
| Turn off the oven and wait until it is cold. |
Clean the cavity with a soft cloth. |
Remove the residue from the bottom of the cavity. |
CLEANING REMINDER
The oven reminds you when to clean the oven with: pyrolytic cleaning.
PYR - flashes in the display for 10 sec after each activation and deactivation of the oven.
 , - press at the same time to turn off the reminder.
HOW TO REMOVE AND INSTALL: DOOR
The oven door has three glass panels. You can remove the oven door and the internal glass panels to clean them. Read the whole "Removing and installing door" instruction before you remove the glass panels.
CAUTION! Do not use the oven without the glass panels.
| Step 1. |
Open the door fully and hold both hinges. |
 |
| Step 2 |
Lift and turn the levers fully on both hinges. |
| Step 3 |
Close the oven door halfway to the first opening position. Then lift and pull forward and remove the door from its seat. |
 |
| Step 4 |
Put the door on a soft cloth on a stable surface. |
| Step 5 |
Hold the door trim (B) on the top edge of the door at the two sides and push inwards to release the clip seal. |
 |
| Step 6 |
Pull the door trim to the front to remove it. |
 |
| Step 7 |
Hold the door glass panels by their top edge and carefully pull them out one by one. Start from the top panel. Make sure the glass slides out of the supports completely. |
| Step 8 |
Clean the glass panels with water and soap. Dry the glass panels carefully. Do not clean the glass panels in the dishwasher. |
 |
| Step 9 |
After cleaning, install the glass panels and the oven door. |
Make sure that you put the glass panels (A and B) back in the correct sequence. Check for the symbol / printing on the side of the glass panel, each of the glass panels looks different to make the disassembly and assembly easier.
When installed correctly the door trim clicks. Make sure that you install the middle panel of glass in the seats correctly.

HOW TO REPLACE: LAMP
WARNING! Risk of electric shock. The lamp can be hot.
Always hold the halogen lamp with a cloth to prevent grease residue from burning on the lamp.
Before you replace the lamp:
Step 1
Turn off the oven. Wait until the oven is cold.
Step 2
Disconnect the oven from the mains.
Step 3
Put a cloth on the bottom of the cavity.
Back lamp
Step 1 Turn the glass cover to remove it.
Step 2 Clean the glass cover.
Step 3 Replace the lamp with a suitable 300 °C heat-resistant lamp.
Step 4 Install the glass cover.
TROUBLESHOOTING
WARNING! Refer to Safety chapters.
WHAT TO DO IF...
In any cases not included in this table please contact with an Authorised Service Centre.
The oven does not turn on or does not heat up
| Problem |
Check if... |
| You cannot activate or operate the oven. |
The oven is correctly connected to an electrical supply. |
| The oven does not heat up. |
The automatic switch-off is deactivated. |
| The oven door is closed. |
| The fuse is blown. |
| The Child Lock is off. |
Components
| Problem |
Check if... |
| The lamp is turned off. |
Moist Fan Baking - is turned on. |
| The lamp does not work. |
The lamp is burnt out. |
Error codes
| The display shows... |
Check if... |
| C3 |
The oven door is closed or the door lock is not broken. |
| F102 |
The oven door is closed. |
| The door lock is not broken. |
| 12:00 |
There was a power cut. Set the time of day. |
If the display shows an error code that is not in this table turn the house fuse off and on to restart the oven. If the error code recurs contact an Authorised Service Centre.
Other problems
| Problem |
Check if... |
| The appliance is activated and does not heat up. The fan does not operate. The display shows "Demo". |
The Demo Mode is deactivated:
1. Turn off the oven.
2. ,,- press and hold at the same time.
3. The first digit on the display and Demo flash.
4. Turn the knob for temperature to enter the code: 2468. Press: The next digit flashes.
|