Loading ...
Loading ...
Loading ...
E25
OVEN CARE
3 Holding the door rmly, close the oven door completely.
4 Grasping both sides lift up on the oven door while pushing it
closed, and then pull it away from the door frame.
5 Place the door in a protected location.
TO REPLACE THE OVEN DOOR:
1 Holding the door rmly, insert the upper arms of both hinges
into the slots. The recesses must hook on the lips.
C
D
A
B
A - Upper Arm
B - Recess
C - Slots
D - Lip
2 Open the oven door.
NOTE: You should hear a “click” sound when the door is
correctly in place.
3 Move the hinge latch on each side back into the locked
position.
4 Open and close the door to test that it operates freely. If it
does not, repeat the door removal and replacement process.
5 Close and open the door slowly to assure that it is correctly
and securely in place.
REPLACING AN OVEN LIGHT
WARNING
Make sure the oven and lights are cool and power to the
oven has been turned off before replacing the light bulb(s).
The lenses must be in place when using the oven. The
lenses serve to protect the light bulb from breaking.
The lenses are made of glass. Handle carefully
to avoid breakage.
Failure to do so could result in death, electric shock,
cuts or burns.
The oven light is a standard 25 watt (G9) appliance bulb.
IMPORTANT: Before replacing the bulb, make sure the oven
is cool and the controls are turned off.
1 Disconnect power at the main power supply (fuse or breaker
box).
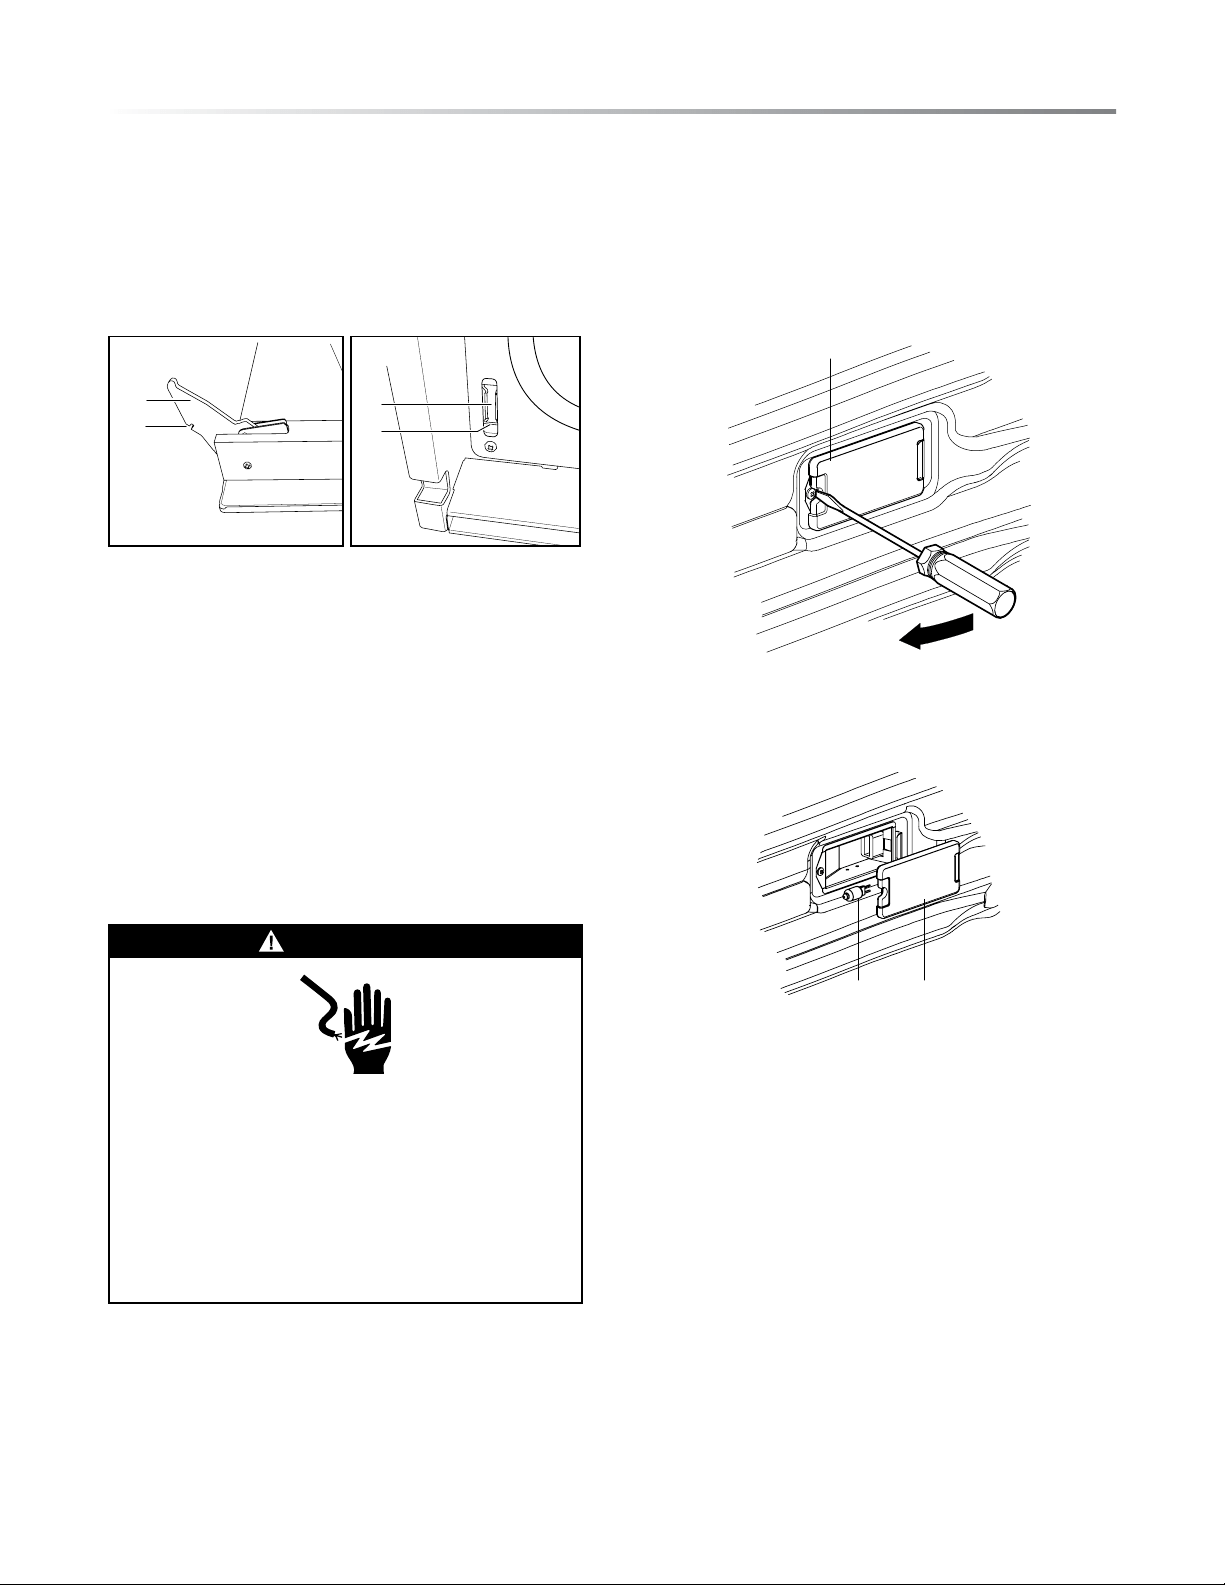
2 Using a Phillips-head screwdriver, remove the screw, and
then remove the cover.
A
A - Light Cover
3 Remove the burned out bulb from the socket.
A B
A - Light Bulb
B - Light Cover
NOTE: To avoid damage or decreasing the life of the new bulb,
do not touch bulb with bare ngers. Wear cotton gloves or use
a tissue when replacing the light bulb.
4 Replace the bulb, and then replace the bulb cover.
5 Reconnect power at the main power supply (fuse or breaker
box).
Loading ...
Loading ...