Loading ...
Loading ...
Loading ...
31
en
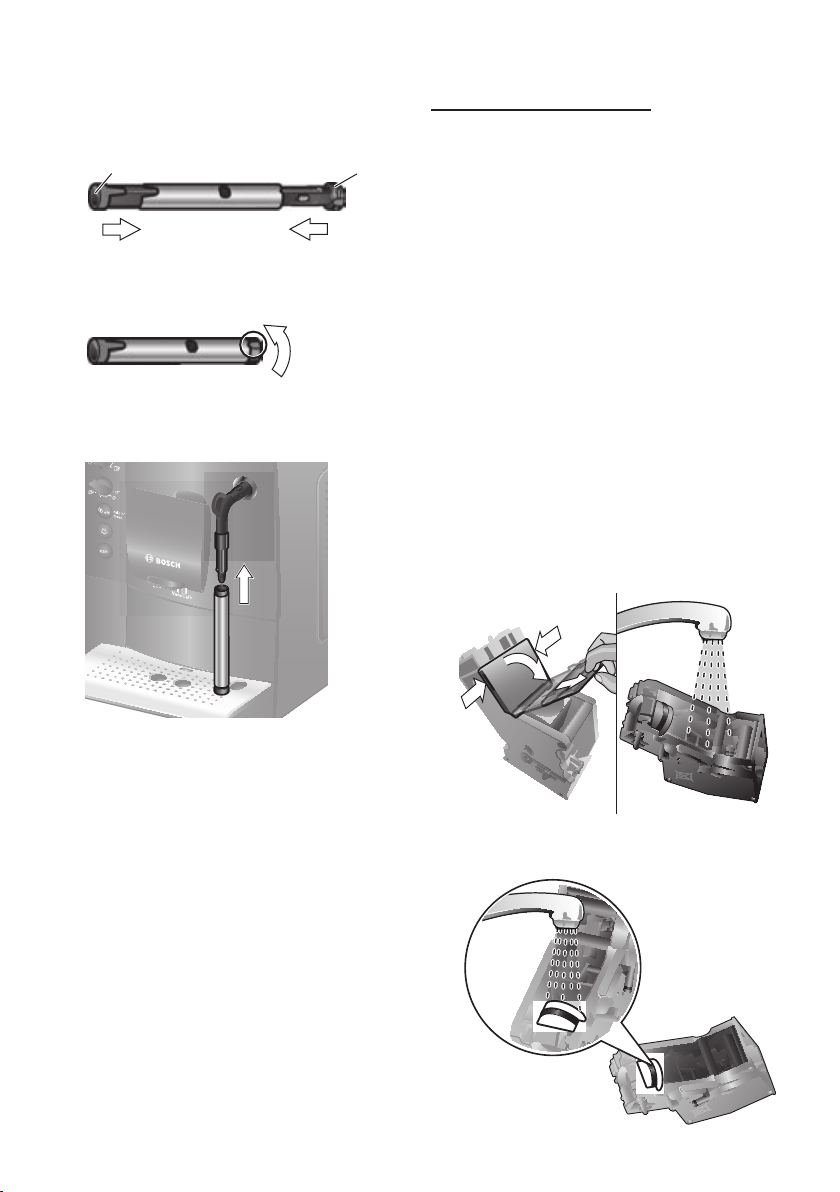
5. Rinse all parts with clean water and dry.
6. Fit the steam nozzle (6d) and frothing
tube
(6c) back into the metal sleeve.
1 2
6d6c
7. Twist the steam nozzle clockwise until
the marks are aligned.
8. Attach the milk frother to the steam
valve. Check that the red mark on the
steam valve is covered.
¡
Risk of scalding!
Only use the appliance when the milk
frother (6) is completely assembled and
tted.
Cleaning the brewing unit
Clean the brewing unit regularly.
To pre-clean the brewing unit automatically:
Press the service button (12) briey. The
appliance will rinse if coffee was dispensed
previously. It then switches off.
In addition to the automatic cleaning pro-
gramme, the brewing unit (5a) should be
removed regularly for cleaning (Figure E
at the beginning of the instructions).
1. Press the power on/off switch O / I (9) to
switch off the appliance. All lights go off.
2. Open the door (5b) to the brewing unit.
3. Slide the red lock (5d) on the brewing
unit (5a) completely to the left.
4. Press the eject lever (5c) down fully. The
brewing unit is released.
5. Grasp the brewing unit (5a) by the
recessed grips and remove carefully.
6. Remove the cover (5e) of the brewing
unit and rinse the brewing unit (5a)
thoroughly under running water.
7. Thoroughly clean the brewing unit sieve
under the running water.
Loading ...
Loading ...
Loading ...