Loading ...
Loading ...
Loading ...
25
en
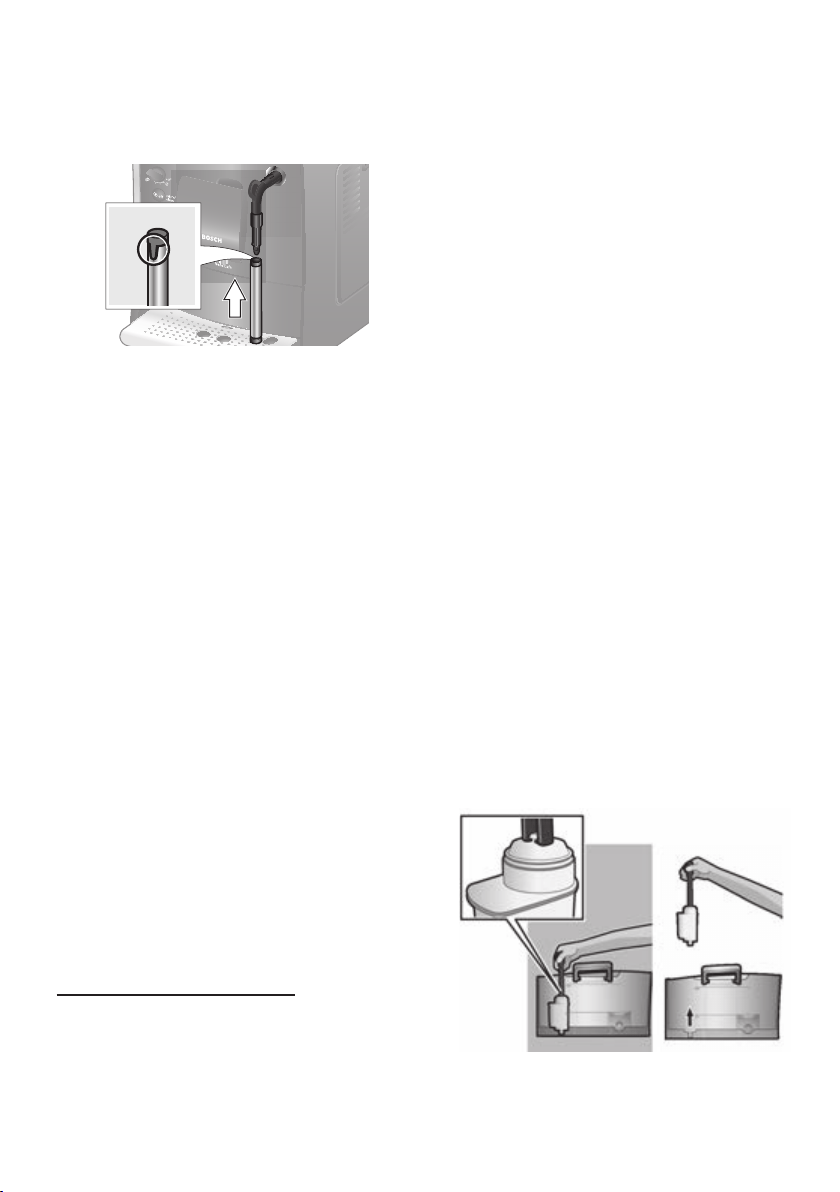
4. Assemble the milk frother. Only use the
appliance when the milk frother (6) is
completely assembled and tted.
5. Lift the water tank lid (17).
6. Remove and rinse the water tank (16)
and ll it with fresh cold water. Do not ll
above the max mark.
7. Replace the water tank (16) and push it
rmly downwards into place.
8. Close the water tank lid (17).
9. Fill the bean container (1) with
coffee beans (for preparation using
ground coffee see “Preparation using
ground coffee”).
10. Press the power on/off switch O / I (9) to
switch on the appliance. LED
D ashes
and LED F lights up.
11. Place a container under the milk frother
outlet (6).
12. Carefully pull out the milk frother (6)
to open it. The appliance rinses out
the milk frother (6) with water. LED F
ashes.
13. When LED F lights up constantly,
press in the milk frother (6) to close it.
The appliance heats up and rinses. Some
water will run out of the coffee outlet. When
buttons A (12), B (11) and C (10) light
up, the appliance is ready for use.
Switching off the appliance
The factory settings of the fully automatic
espresso machine are programmed for
optimal performance. The appliance
switches off automatically after a specic
time (the length of time can be adjusted,
see “ Settings” – “Automatic switch-off”).
Exception: The appliance switches off
without rinsing if only hot water or steam
was dispensed.
To switch the appliance off manually before
this, press the service button (12).
The appliance rinses and switches off.
Note: If the appliance is being used for the
rst time, the service programme has been
run, or the appliance has not been operated
for a long period, the rst beverage will
not have the full aroma and should not be
consumed.
When the fully automatic espresso machine
is rst used, you will achieve a suitably thick
and stable “crema” only after the rst few
cups have been dispensed.
If the appliance is in use for a long period
of time, water droplets will form on the
venti lation slits. This is normal.
Water lter
Using a water lter can prevent a buildup
of limescale deposits.
A new water lter must be rinsed before it
can be used. To do this, proceed as follows:
1. Press the water lter rmly into the empty
water tank with the aid of the measuring
spoon (18).
2. Fill the water tank (16) with water up to
the max mark.
Loading ...
Loading ...
Loading ...