Loading ...
Loading ...
Loading ...
10
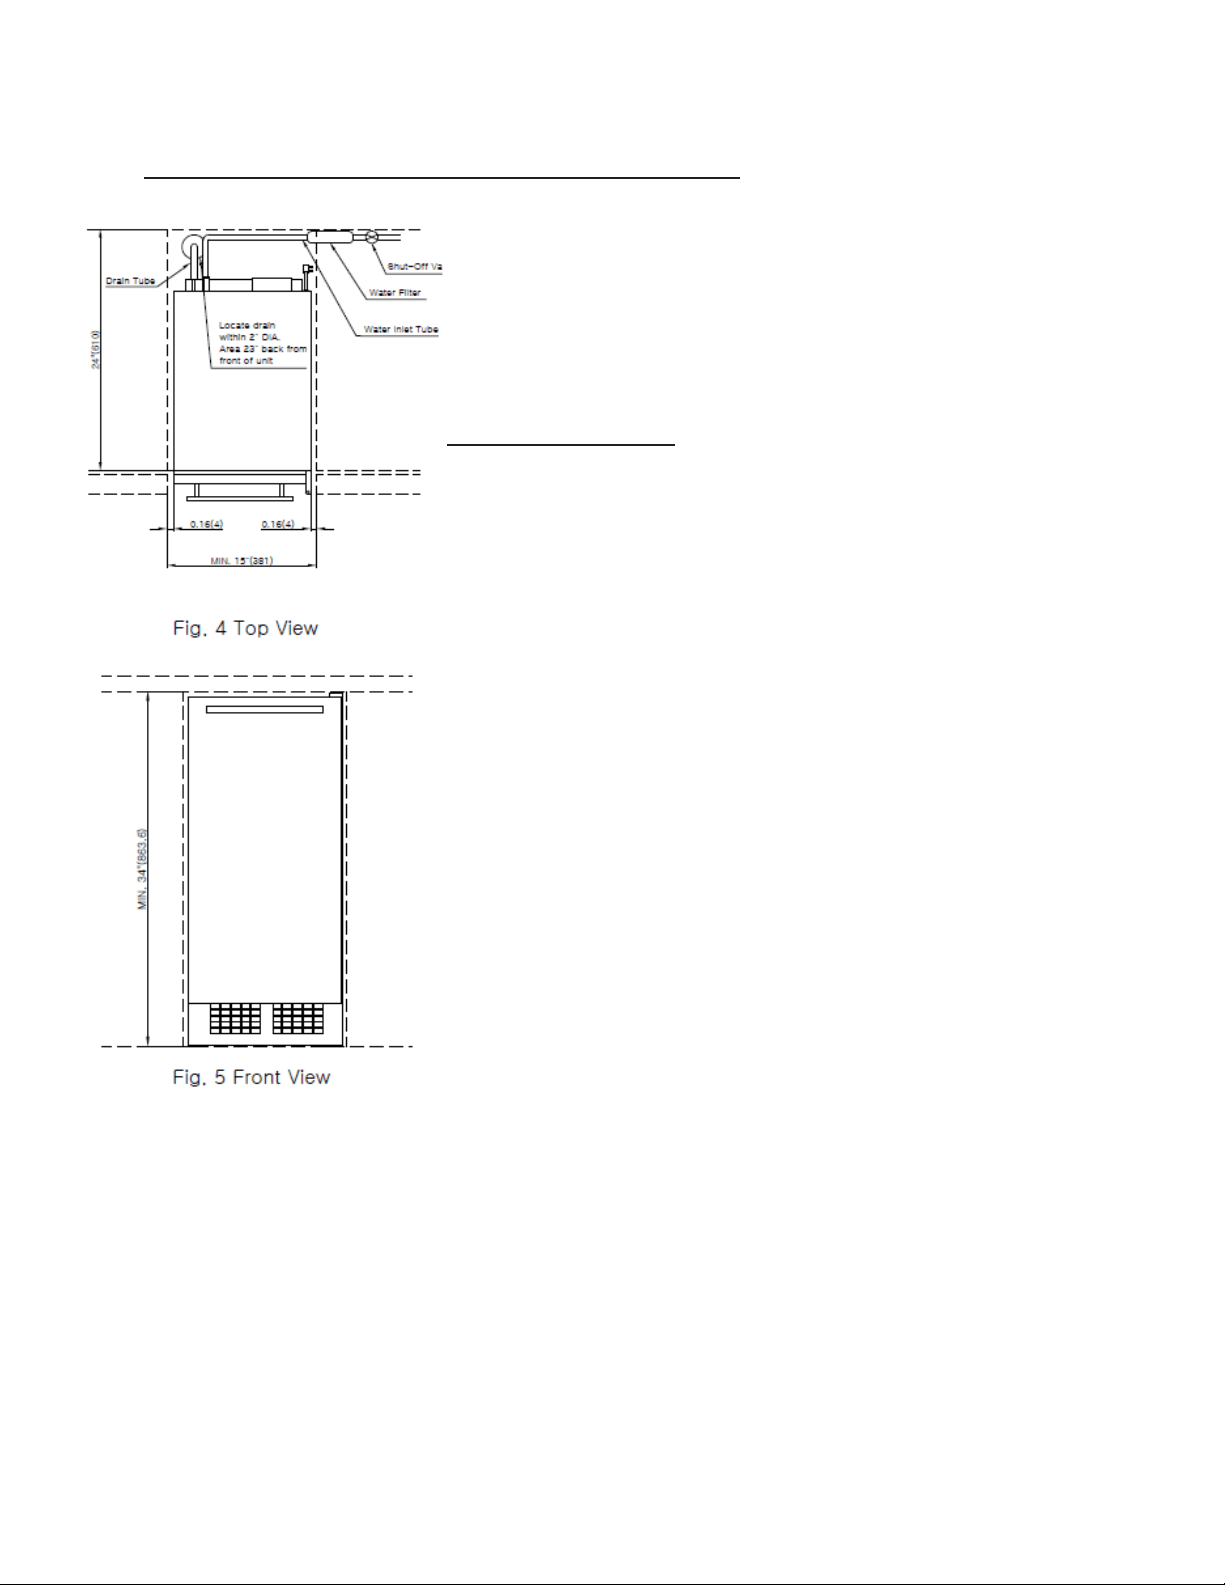
Gravity Drain Pipe Model (BIM68OSGDR)
Before connecting the drain tube and the water supply pipe
with the ice maker, pipes should be arranged as follows.
The horizontal distance of the drain tube should be 1/4" for
every 12" (305 mm) distance.
An air gap is required between the drainage tube of the ice
maker and the drain pipe or sewage container. A stand
pipe fitted with a trap at the lower part may be used as a
drain pipe or sewage container.
Important Information:
Installation of an incorrect
drainage
pipe causes the ice in the ice container to melt rapidly.
1)
Arrange the ice maker at the front of the opening of the
installation area.
2)
Adjust the leveling legs to the correct height.
3)
Install the inlet pipe (1/4" diameter copper pipe) on the
wall and connect the water supply valve.
4)
Connect the drain pipe from the wall to the ice maker.
If the horizontal distance is 5' (1.5m) or longer, the drain
pipe should be arranged by drilling the wall at the rear of
the ice maker.
5)
If the electric outlet is at the back of the product, insert
the plug in the electric outlet.
6)
Install the product so that the front of the product is
facing forward.
7)
Use the inlet pipe after cutting it to the required length.
8)
Wash the inlet pipe. Connect the inlet pipe with the
copper pipe using the flare nut.
9)
Connect the inlet pipe with the water-supply valve of
the product using the flare nut.
10) Cut the required length of drain tube.
11) Connect the drain nipple (with a diameter of 3/4” FPT
(NPT))
The drain tube should be placed on the upside passing
the drain fitting.
12) Turn on the tap and check for any leakage.
13) Be sure the ice maker is level.
Loading ...
Loading ...
Loading ...