Loading ...
Loading ...
Loading ...
14
49-80778
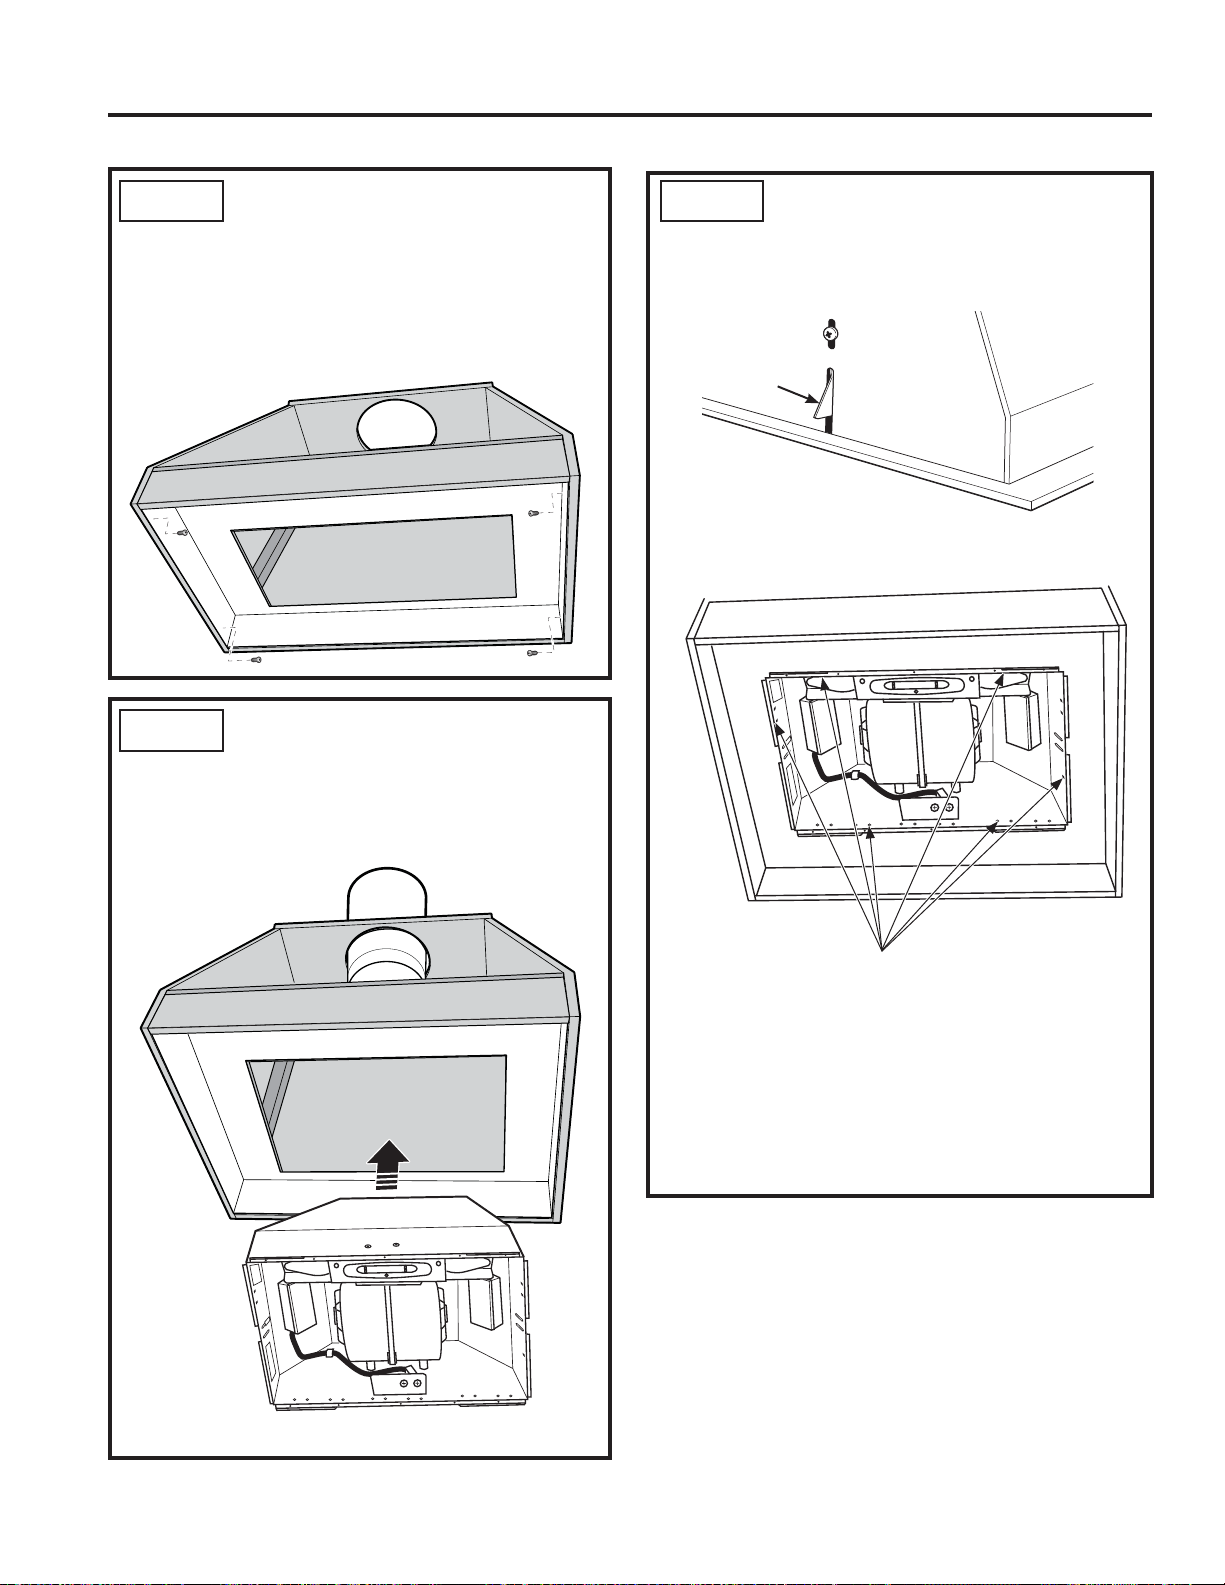
STEP 2 INSTALL THE HOOD (Cont)
3. Fasten with 4 screws. There is a spring locking
clip on one side of the hood to assist with holding
one side up while installing the screws.
NOTE: 4 screws can be installed into the sides or
into the front and back holes in the hood.
4. If the liner is used, an alternate mounting method
is to assemble the hood to the liner using the 4
machine screws, washers, and nuts provided.
Then assemble the liner to the framing or custom
cabinet using the 4 screws provided with the liner.
5. Once the hood is in place, seal the duct to the
hood with duct tape.
Installation
INSTALLATION
STEP 1 INSTALL HOOD LINER (If Used)
1. The rectangular opening in framing or custom
cabinet must be sized for the liner outside and
inside dimensions. Refer to Product Dimensions
section.
2. Secure the liner with the 4 screws that are
provided with the liner.
STEP 2 INSTALL THE HOOD
1. Confirm the damper is in place in the hood
exhaust opening.
2. Insert the hood and power cord into the cabinet
opening or into the liner opening.
Spring
Locking
Clip
Possible screw
locations
Loading ...
Loading ...
Loading ...