Loading ...
Loading ...
Loading ...
49-80778
11
INSTALLATION PREPARATION
Installation Preparation
ADVANCE PLANNING
Duct Install Planning
• This hood is designed to be vented vertically
through the ceiling. Use a 6" round duct. Use
locally supplied elbows to vent horizontally
through the rear wall.
• Use metal ductwork only.
• Determine the exact location of the vent hood.
• Plan the route for venting exhaust to the outdoors.
To maximize the ventilation performance of the
vent system:
1. Minimize the duct run length and number of
transitions and elbows.
2. Maintain a constant duct size.
3. Seal all joints with duct tape to prevent any
leaks.
4. Do not use any type of flexible ducting.
• Install a wall cap or roof cap with damper at the
exterior opening. Purchase the wall or roof cap
and any transition and length of duct needed in
advance.
• When applicable, install any makeup
(replacement) air system in accordance with local
building code requirements. Visit GEAppliances.
com for available makeup air solutions.
Wall and Ceiling Framing for Adequate
Support
This vent hood is heavy and the cabinet structure
needs to support the weight of the loaded insert
sleeve. Adequate structural support must be
provided in all types of installations.
• Installation will be easier if the vent hood is
installed before the cooktop is installed.
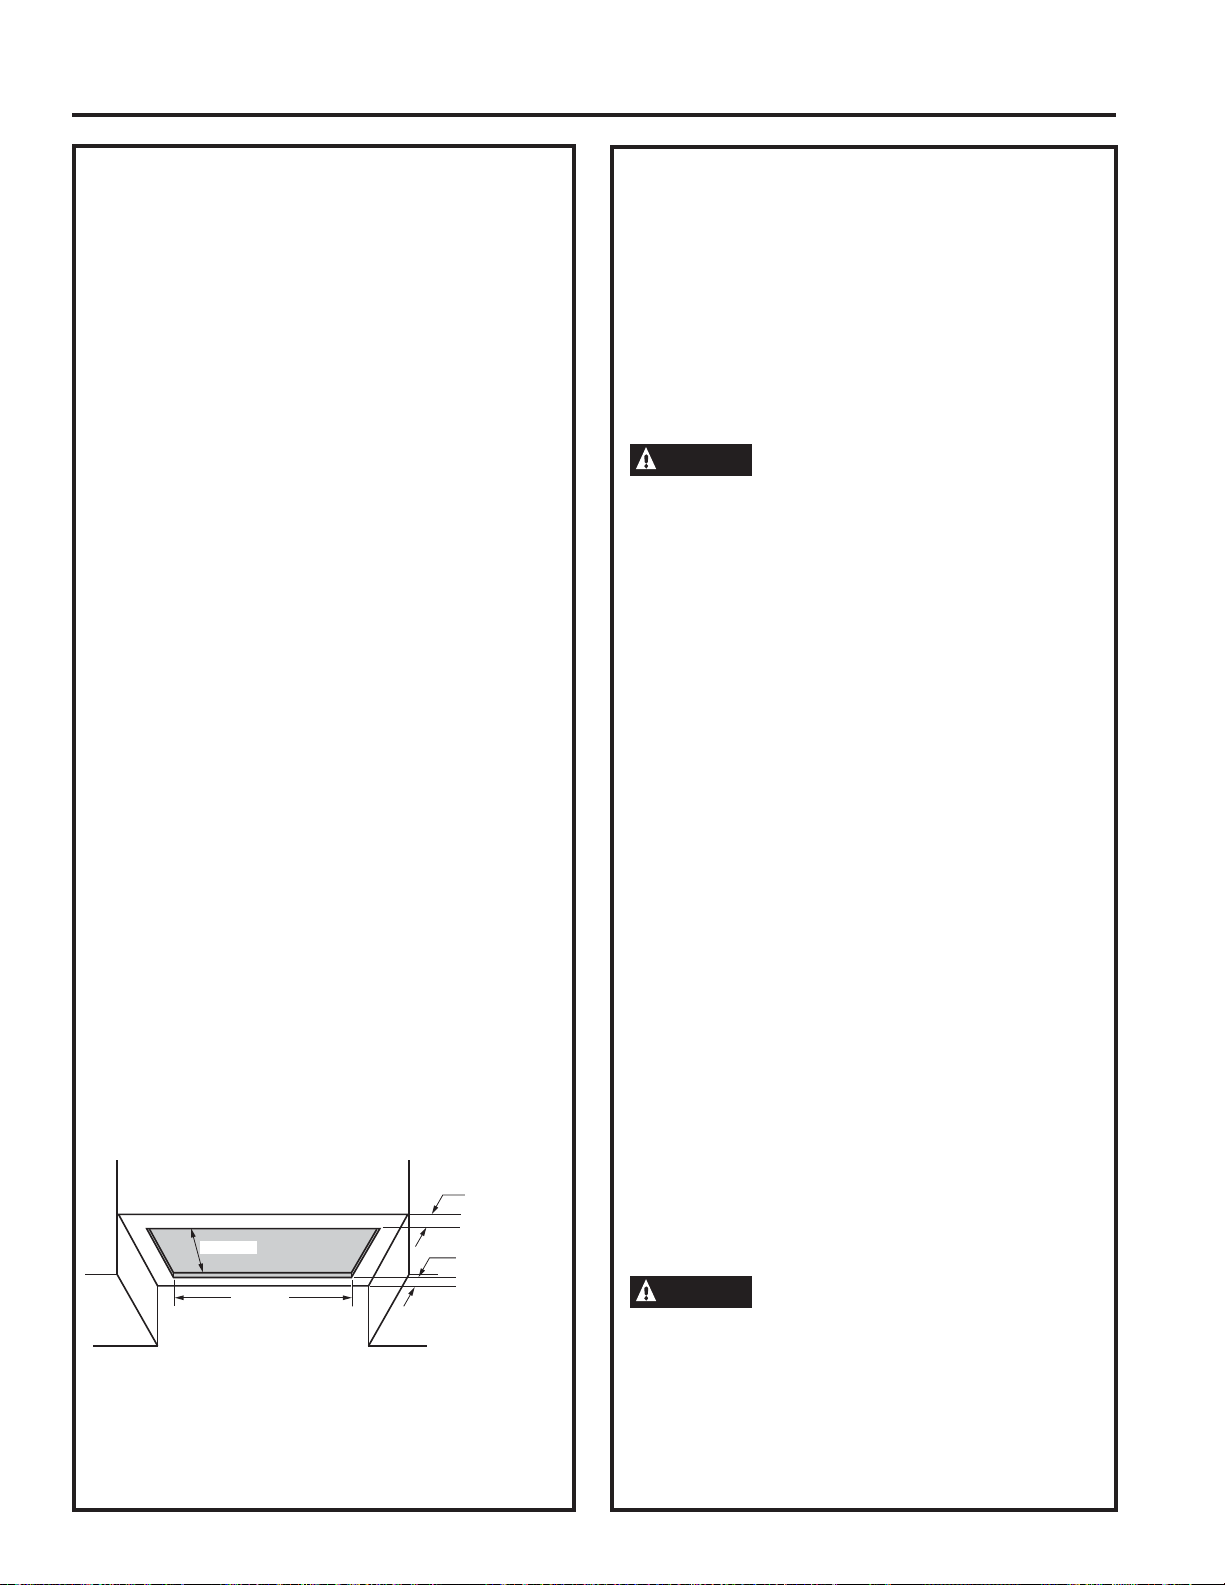
Custom Cabinet Frame Planning
• The custom canopy or cabinet should have a
rectangular hole to accommodate the custom hood
insert by itself, or with the liner. This hole is the
same size for both a wall installation and an island
installation.
Metal Liners
• Metal liners (30" width JXL30 and 36" width JXL36)
are optional but are recommended for installation
heights below 30" for cabinetry protection. You can
construct a custom metal (or non-combustible) liner
when a larger liner is needed.
Recirculation Install Planning
A recirculation duct kit JXN30 is available for
recirculation installation.
Power Supply Planning
The location of the power supply connection
is called out in the Wall Installation and Island
Installation sections on page 13.
POWER SUPPLY
IMPORTANT – (Please read carefully)
WARNING
FOR PERSONAL SAFETY, THIS APPLIANCE
MUST BE PROPERLY GROUNDED.
In the event of an electrical short circuit, grounding
reduces the risk of electric shock by providing an
escape wire for the electric current. This appliance
is equipped with a cord having a grounding wire with
a grounding plug. The plug must be plugged into an
outlet that is properly installed and grounded.
Remove house fuse or open circuit breaker before
beginning installation.
Do not use an extension cord or adapter plug with
this appliance. If the power supply cord is too short,
have a qualified electrician install an outlet near the
appliance. Do not operate any fan with a damaged
cord or plug. Discard fan or return to an authorized
service facility for examination and/or repair. Follow
National Electrical Codes or prevailing local codes
and ordinances.
Electrical supply
These vent hoods must be supplied with 120V,
60Hz, and connected to an individual, properly
grounded branch circuit, and protected by a 15 or
20 amp circuit breaker or time delay fuse.
• Wiring must be 2 wire with ground.
• If the electrical supply does not meet the above
requirements, call a licensed electrician before
proceeding.
• Route house wiring as close to the installation
location as possible in the ceiling or wall.
• Connect the wiring to the house wiring in
accordance with local codes.
WARNING
The improper connection of the
equipment-grounding conductor can result
in a risk of electric shock. Consult a qualified
electrician if the grounding instructions are
not completely understood, or if doubt exists
as to whether the appliance is properly
grounded.
10-1/4"
19-1/2"
Front of hole
must be 3"
minimum from
cabinet front
Back of hole
must be 1"
minimum from
back wall
Loading ...
Loading ...
Loading ...