Loading ...
Loading ...
Loading ...
12
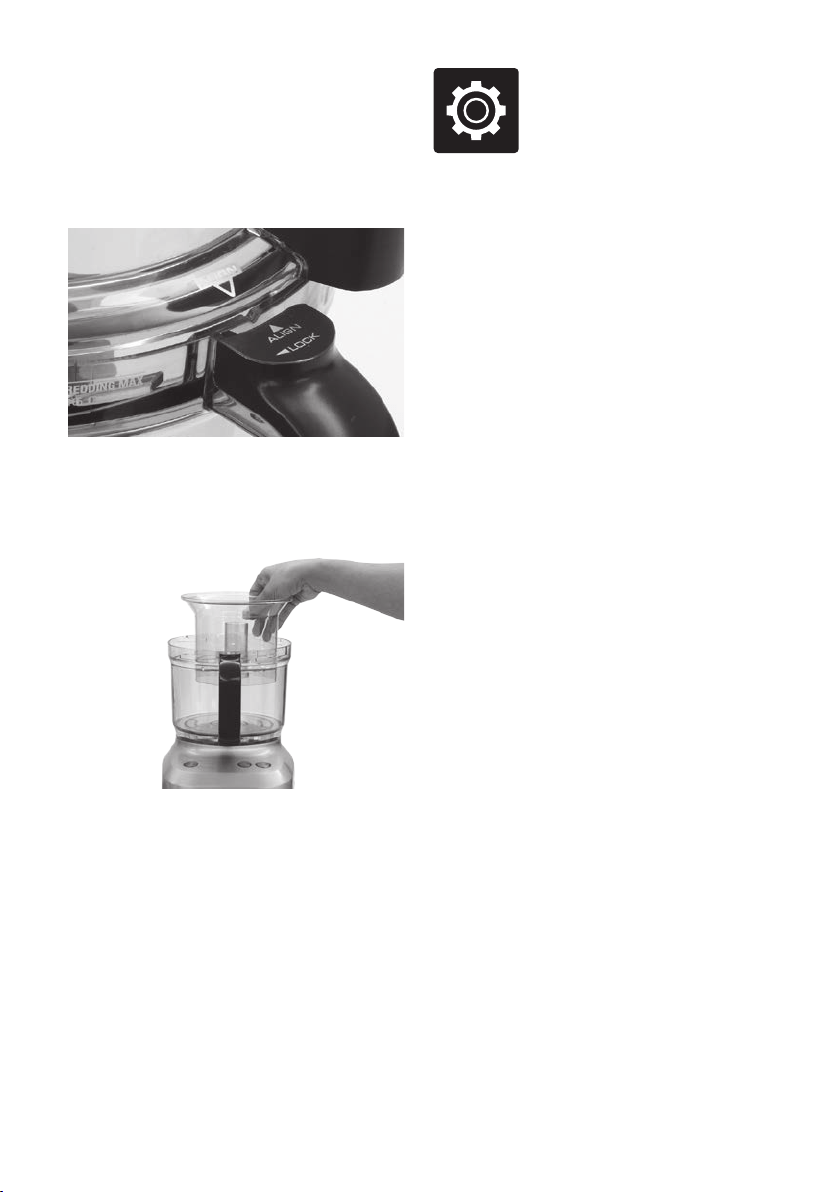
5. Place lid onto the processing bowl so that
the ALIGN | LOCK graphics on the lid and
handle align. To LOCK the lid, hold the chute
and turn clockwise so that the handle parts
align. Locking the lid correctly will engage
the interlocking safety catch on the handle,
and allow the motor to run.
MINI PROCESSING BOWL
• The mini processing bowl fits inside the
main bowl.
• The mini processing blades give you
maximum control for small quantities.
• Do not use the spindle, or the processing discs.
• The mini blades cannot be used in the main
processing bowl.
Functions
OPERATION
• The food processor will only operate when
the processing bowl, lid and large pusher are
correctly assembled. This engages the safety
interlock, and allows the motor to run.
• The POWER button illuminates red when the
machine is connected to power and is ready
to run.
• The START button allows the motor to run
continuously until pressed again. If the lid,
bowl or large pusher are removed while the
motor is running, the button will flash. The
motor will resume running when the bowl, lid
and large pusher are assembled and the safety
interlock is engaged, the button light will be
solid (no longer flashing).
• The momentary PULSE button is ideal for
processing foods that need sudden bursts of
power. It also encourages ingredients to move
around the bowl. PULSE is also best when
processing foods that only require processing
for a short period of time.
• Use a combination of the START and PULSE
buttons for control when processing food.
• The chute has a MAX CHUTE FILL graphic to
indicate the maximum volume of food that can
be placed in the chute for the pusher to activate
the safety locking catch.
• After processing, wait until the blades/discs
have stopped moving before unlocking the
lid. To ensure safe handling, turn off at the
POWER button and unplug at the power
outlet before handling the blades.
• When removing blades/discs, lift carefully by
gripping the plastic hub in the center.
Loading ...
Loading ...
Loading ...