Loading ...
Loading ...
Loading ...
en Cleaning function
24
■ The appliance will become very hot on the outside
during the cleaning function. Never hang
combustible objects, e.g. tea towels, on the door
handle. Do not place anything against the front of
the appliance. Keep children away from the
appliance.
Risk of fire!
■ If the door seal is damaged, a large amount of heat
will be generated around the door. Do not scrub or
remove the seal. Never operate the appliance if the
seal is damaged or missing.
:Warning – Risk of serious damage to health!
The appliance will become very hot during the cleaning
function. The non-stick coating on baking trays and tins
is destroyed and noxious gases are released. Never
clean non-stick baking trays and baking tins using the
cleaning function. Only clean enamelled accessories
using the cleaning function.
Note: If the cooking compartment is very dirty, it is best
to clean it without any accessories inside. This will
achieve an optimal result.
If you would like to clean accessories at the same time,
start the cleaning function again.
Caution!
Shelf supports and pull-out rails tend to discolour if they
are left in the cooking compartment when it is cleaned.
Before you start the cleaning function, remove the shelf
supports and pull-out rails from the cooking
compartment.
1. Remove the shelf supports and pull-out rails from the
cooking compartment. ~ "Rails" on page 26
2. Remove the worst of the food residues from the
cooking compartment and accessories.
3. Clean the inside of the appliance door and along the
edges of the cooking compartment in the area
around the seal. Do not scrub the seal. ~ "Cleaning
agent" on page 22
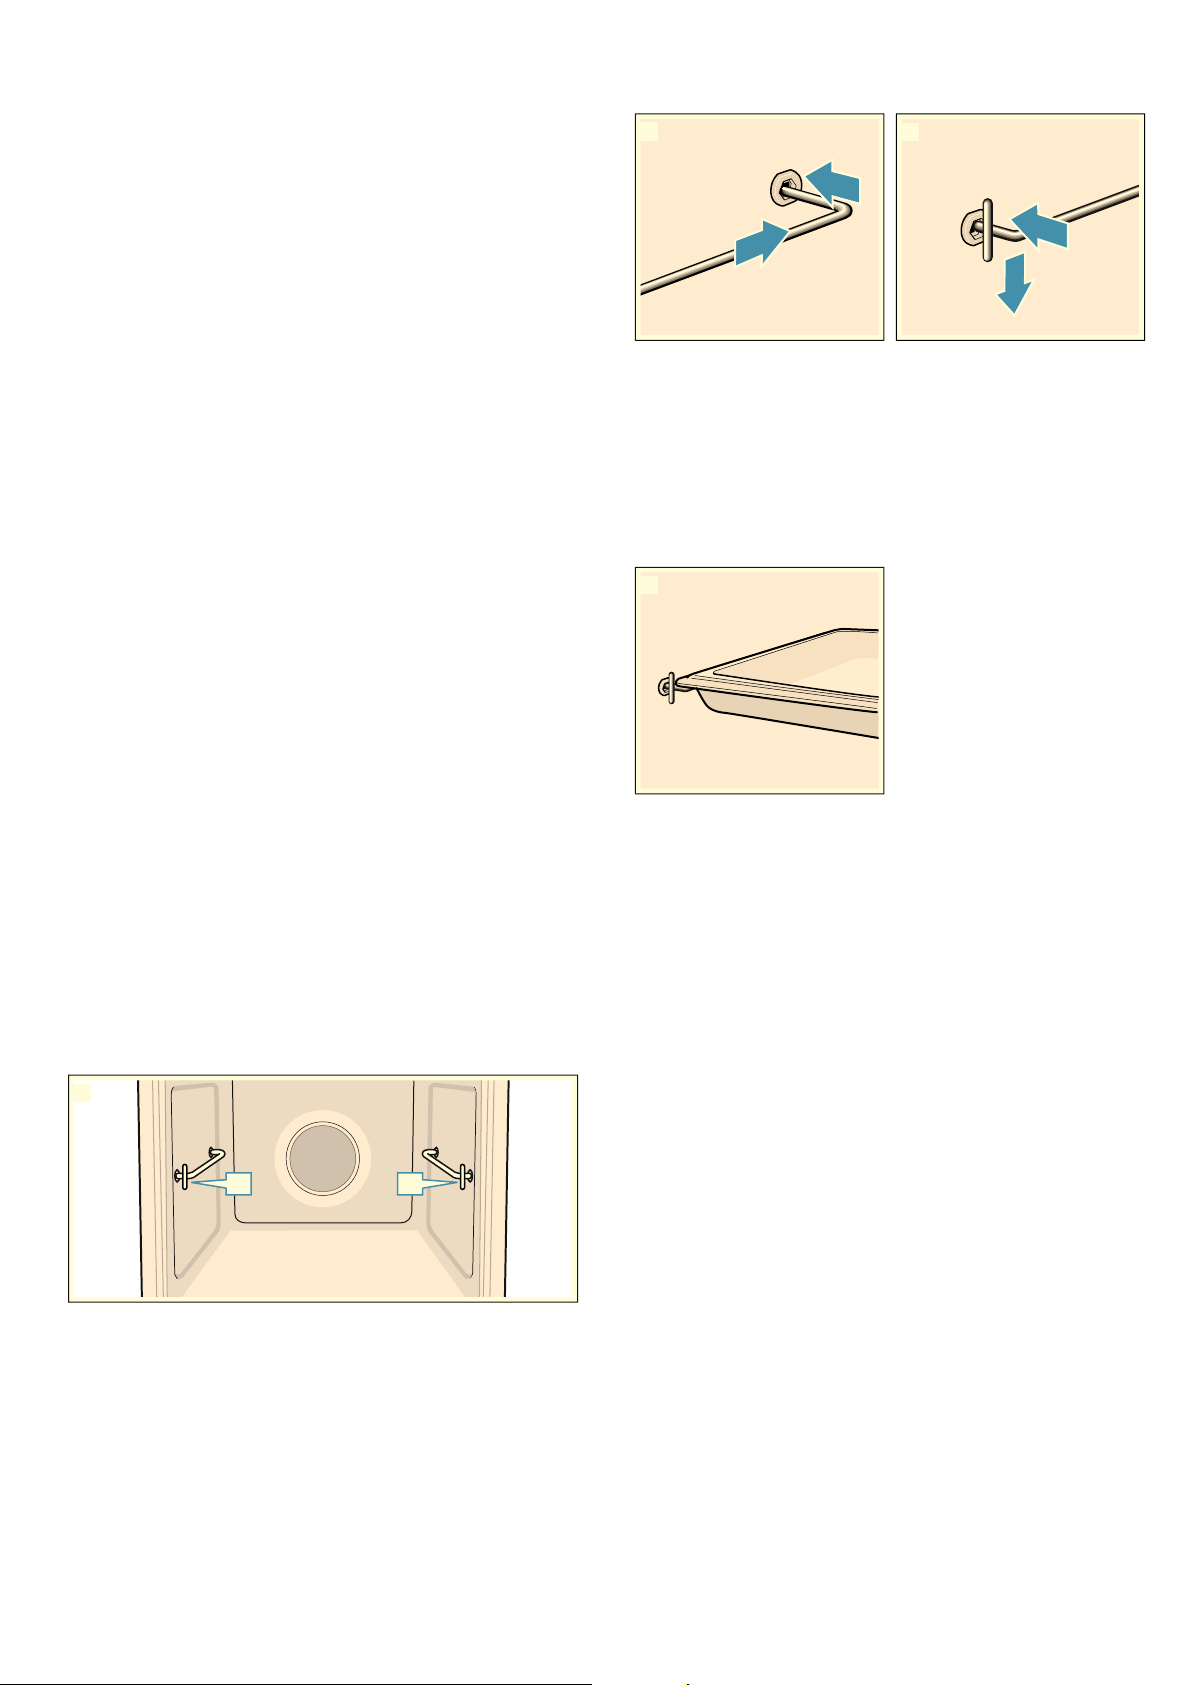
4. Insert the accessory supports if you wish to clean
accessories when the cooking compartment is being
cleaned. Make sure that the vertical bar ‚ on the
accessory support is facing the front (figure !).
5. Insert the rear end of the accessory support as far
as it will go into the rear socket ƒ, and push the
accessory support back „ (figure ").
6. Then insert the front end of the accessory support as
far as it will go into the front socket …, and push the
accessory support down † (figure #).
7. Whenever you wish to use the cleaning function,
make sure that you never leave anything other than
an enamelled accessory without anti-stick coating
(e.g. the universal pan) on the accessory supports
(figure $).
Caution!
The wire rack tends to discolour if it is left in the
cooking compartment when it is cleaned.Do not
attempt to clean the rack using the cleaning function.
Note: Further accessories that can be cleaned using
the cleaning function are listed in the table for
special accessories. ~ "Accessories" on page 11
Starting
1. Touch the # touch button.
2. Touch the 0 touch button.
3. Use the ( or ) button to select "Self-cleaning ˜".
4. Use the & button to navigate to the next line.
5. Use the ( or ) button to select the cleaning setting.
Note: Once it has started, the cleaning setting can
no longer be changed.
6. Use the & button to navigate to the next line.
7. Touch the # touch button.
The appliance starts self-cleaning.
Ventilate the kitchen when the cleaning function is
running.
During self-cleaning, the appliance door is locked
automatically. The 5 symbol appears on the display.
Note: If you would like to start self-cleaning later, set an
end time.
Cancelling
Touch the # touch button to cancel. The appliance
door cannot be opened until the 5 symbol goes out.
Finishing
As soon as self-cleaning has run through, a signal
sounds. The appliance door cannot be opened until the
5 symbol goes out.
DD
1
G
H
E
F
2
Loading ...
Loading ...
Loading ...