Loading ...
Loading ...
Loading ...
5
KEYPAD FEATURE INSTRUCTIONS
CLEAN
SELF CLEAN
(on some models)
Self-clean cycle
See the “Self-Clean Cycle” section.
TOOLS
(on some models)
Oven use function
The Tools keypad enables you to personalize the oven operation to suit
your needs. See the “Tools” section.
UPPER OVEN
LOWER OVEN
(on some models)
Oven selection
The Upper and Lower Oven keypads enable you to select which oven
you want to use.
Display
The display is for both the menu and oven function controls.
The touchscreen allows you to scroll through the oven menus.
The display is very sensitive and requires only a light touch
to activate and control.
When an oven is in use, the display will show the clock, mode,
oven temperature, kitchen timer, and oven timer, if set. If the
oven timer is not set, you can set it from this screen.
After approximately 2 minutes of inactivity, the display will
go into sleep mode and the display will dim. When the oven
is in operation, the display will remain bright.
During use, the display will show menus and the appropriate
selections for the options being chosen.
Display Navigation
If the oven is off, touch the Power keypad to activate the menu.
From the home screen, all automatic cooking programs can
be activated, all manual cooking programs can be set, options
can be adjusted, and instructions, preparation, and tips can
be accessed.
WARNING
In double oven models, touch the corresponding oven keypad
to show the cooking modes and temperatures for the desired
oven. NOTE: A line will appear above the corresponding oven.
In single oven models, the display will show cooking modes
and temperatures when the oven is turned on.
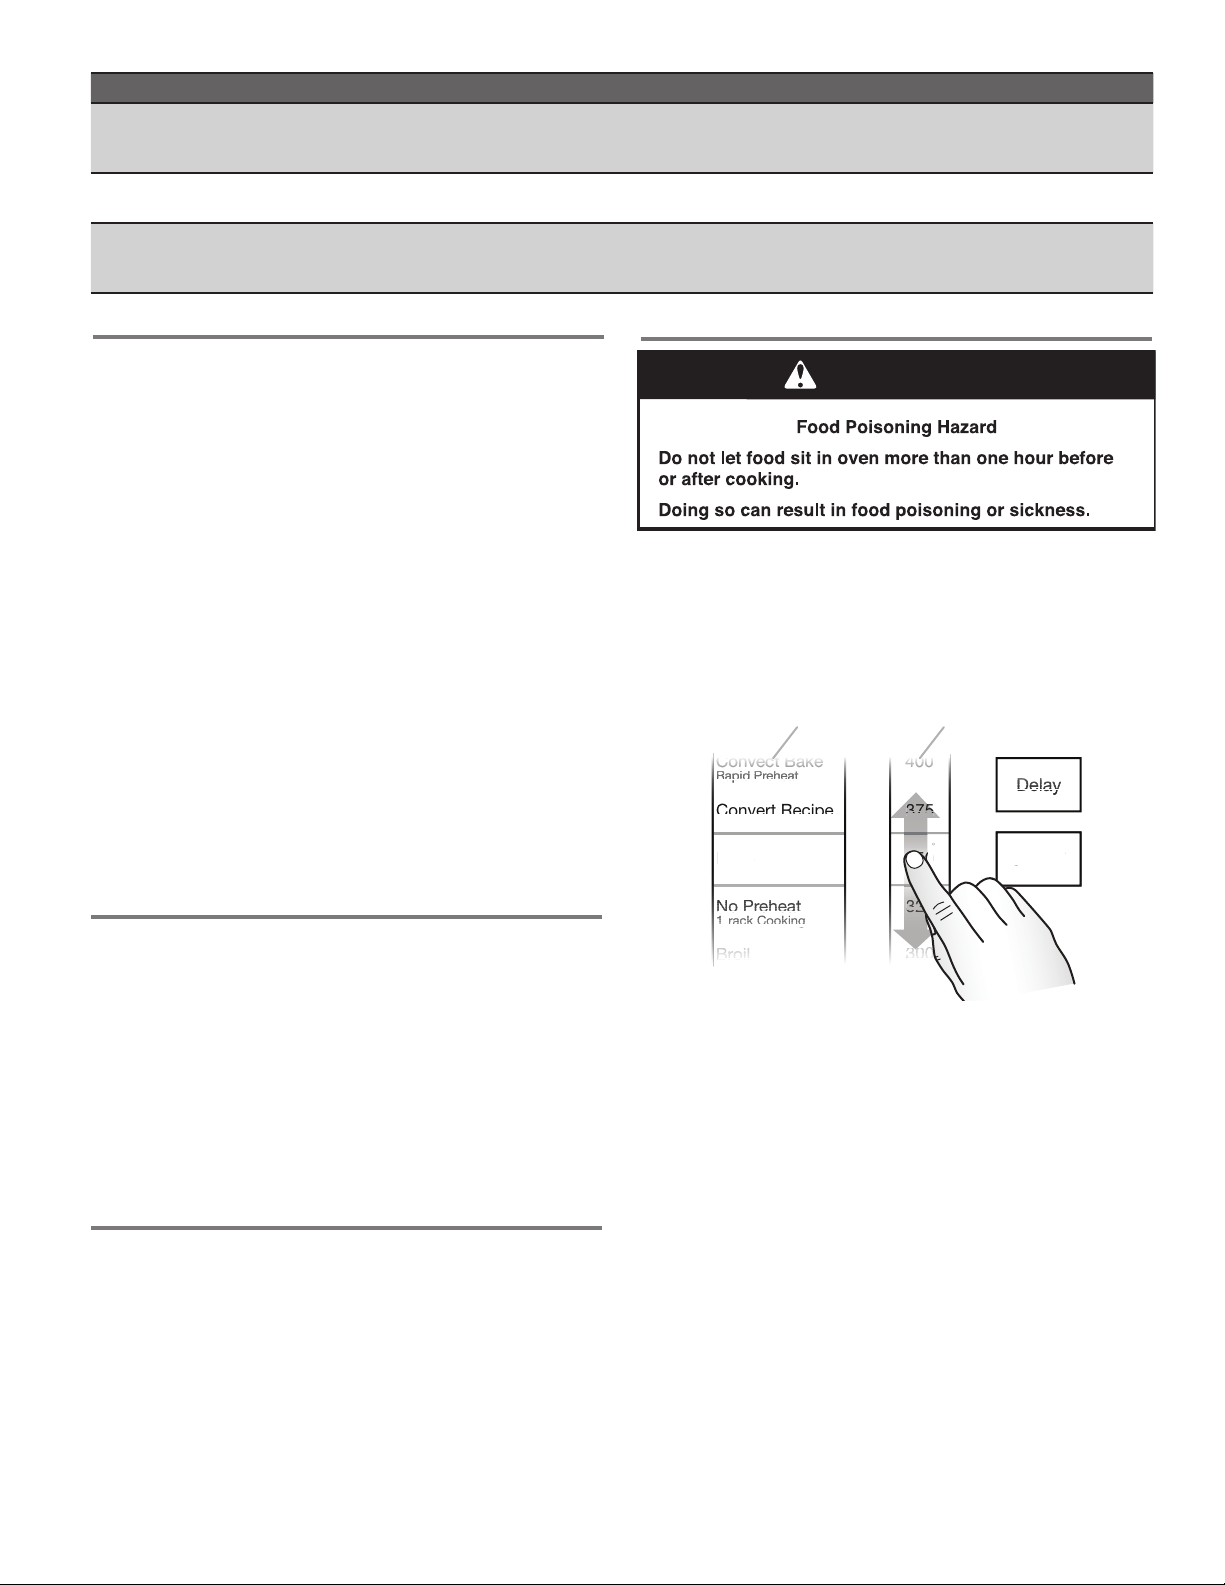
Bake Demonstration
A. Modes column
B. Temperature column
1. Confirm the Bake mode is selected.
2. In the temperature column, scroll to the desired temperature.
The temperature must be between 170°F and 550°F (77°C
and 288°C)
3. Touch START to begin preheating.
Delay
START
Bake
No Preheat
Convert Recipe
Convect Bake
Broil
For Convection
Rapid Preheat
1-rack Cooking
350
375
400
325
300
˚F
D
D
De
De
De
De
De
De
De
De
l
l
la
la
la
la
la
la
la
la
y
y
y
y
y
y
y
y
y
y
y
ST
ST
AR
AR
T
T
N
No
No
No
No
No
No
P
P
P
P
P
P
P
re
re
re
re
re
re
h
he
he
he
he
he
he
t
at
at
at
at
at
at
C
Co
Co
nv
nv
er
er
t
t
t
R
Re
Re
i
ci
ci
pe
pe
C
Co
Co
Co
Co
Co
Co
Co
Co
Co
Co
Co
nv
nv
nv
nv
nv
nv
nv
nv
nv
nv
ec
ec
ec
ec
ec
ec
ec
ec
ec
ec
ec
t
t
t
t
t
t
t
t
t
t
t
B
Ba
Ba
Ba
Ba
Ba
Ba
Ba
Ba
Ba
Ba
a
k
ke
ke
ke
ke
ke
ke
ke
ke
ke
ke
e
B
Br
Br
Br
Br
Br
Br
i
oi
oi
oi
oi
oi
oi
l
l
l
l
l
l
l
F
or
C
onvection
R
R
Rap
Rap
Rap
Rap
Rap
Rap
Rap
Rap
p
p
p
id
id
id
id
id
id
id
id
id
id
P
P
Pre
Pre
Pre
Pre
Pre
Pre
Pre
Pre
h
h
hea
hea
hea
hea
hea
hea
hea
hea
t
t
t
t
t
t
t
t
t
1
1
1r
1r
1
-
r
1r
k
k
ack
ack
ack
ack
C
C
Co
Co
Co
Co
ki
ki
oki
oki
oki
oki
ng
ng
ng
ng
g
5
5
0
B
a
ke
40
40
40
40
40
40
40
40
40
40
40
0
0
0
0
0
0
0
0
0
0
0
0
0
5
5
5
5
5
5
30
30
30
30
30
30
30
0
0
0
0
0
0
0
˚
F
35
35
35
35
0
0
0
0
37
37
37
37
5
5
5
5
32
32
32
32
32
5
5
5
5
30
AB
Touch Panel
The touch panel houses the control menu and function
controls. The touch pads are very sensitive and require only
a light touch to activate.
For more information about the individual controls, see their
respective sections in this manual.
Welcome Guide
This appears on your display the first time the oven is powered
up. The Welcome Guide allows you to set up your new oven.
After every selection, a tone will sound.
1. Select your language.
2. Select the clock by scrolling to the correct time in the hours
and minutes column. You can then select AM/PM or 24-hour
clock (military time).
3. Choose to have daylight savings time AUTO SYNC (turn on),
or DO NOT ADJUST (turn off).
4. Enter current date (MM/DD/YYYY) by scrolling to the column
to set the MONTH, DAY, and YEAR. Touch SAVE.
5. Select the units of temperature. You can choose Fahrenheit
or Celsius. Touch SAVE.
6. Select the Clock Theme by scrolling to the desired setting.
Touch SAVE.
NOTE: This is the background for the center touch display.
Menu Demonstrations
Loading ...
Loading ...
Loading ...