Loading ...
Loading ...
Loading ...
17
Important: The instrument should only be operated with the
original cuff. The cuff is suitable for an arm circumference of
22 to 36 cm.
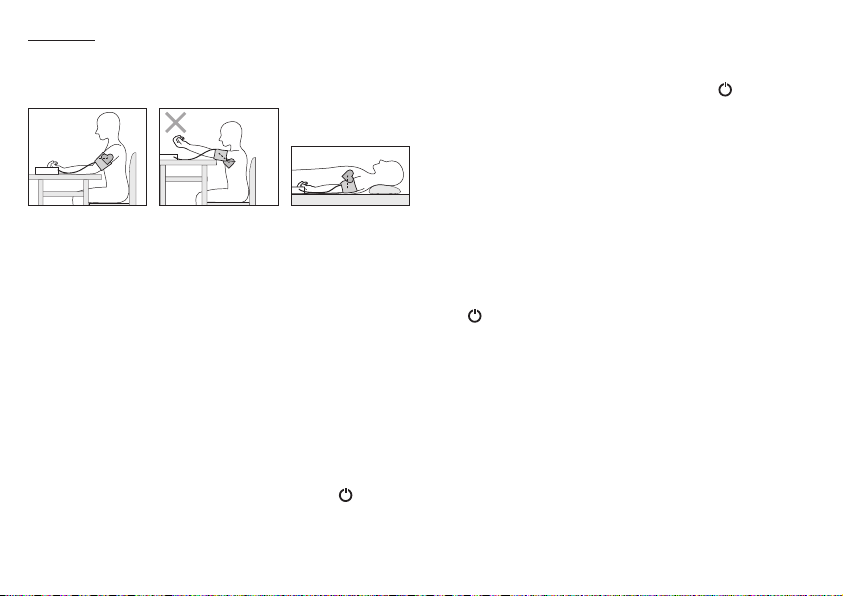
Correct posture
•
Rest for approx. 5 minutes before each measurement. Other-
wise there may be divergences.
•
You can perform the measurement either sitting or lying down.
Always make sure that the cuff is on a level with your heart.
•
To carry out a blood pressure measurement, make sure you
are sitting comfortably with your arms and back leaning on
something. Do not cross your legs. Place your feet flat on the
ground.
•
In order not to distort the result, it is important to keep still
during the measurement and not talk.
Select memory
Press the SET button. Select the desired storage space by
pressing the -/+ function buttons. You have 4 memories with 30
spaces each to store the measurements of 4 different people
separately or to separate measurements taken in the morning
and at night. Confirm your selection with the button
.
Measuring blood pressure
•
Put on the cuff as described previously and assume the
position in which you want to carry out the measurement.
•
Start the measurement by holding the button . After che-
cking the display, during which all numbers light up, the cuff
pumps up automatically. Whilst the cuff is pumping up, the
device already calculates measurements for estimating the
necessary pump pressure.
If this pressure is insufficient, the device automatically
pumps more pressure.
•
Then the pressure in the cuff is slowly released and the pulse
is measured.
•
When the measurement has been completed, the remain ing
air pressure is released very quickly. The pulse, the systolic
and the diastolic blood pressure are displayed.
•
Measuring can be cancelled at any time by pressing the but-
ton .
•
If a higher pump pressure is always required, you can bypass
the additional pumping process by holding the M+ button
shortly after the pumping process starts until the desired cuff
pressure is reached. This should be approx. 30 mmHg above
the systolic value.
•
The Err icon appears if it has not been possible to perform
the measurement properly. Observe the section in these in-
structions on error messages/troubleshooting and repeat the
measurement.
•
The device switches off automatically after 3 minutes.
Wait at least 5 minutes before taking another measurement!
Loading ...
Loading ...
Loading ...