Loading ...
Loading ...
Loading ...
8 9ICE & WATER INSTALLATIONICE & WATER INSTALLATION
Please read before beginning installation.
The water connection to your ice and water product can
be self installed. However, it is recommended that you
seek advice from a licensed plumber before commencing
the installation.
TIPS & INFORMATION
IMPORTANT
Check for water leaks at all water connection points in
the first 2 to 3 hours after installation, and correct it in
case of any water leak. Recheck after 24 hours; if leak
still occurs, it is recommended to contact a licensed
plumber for advice.
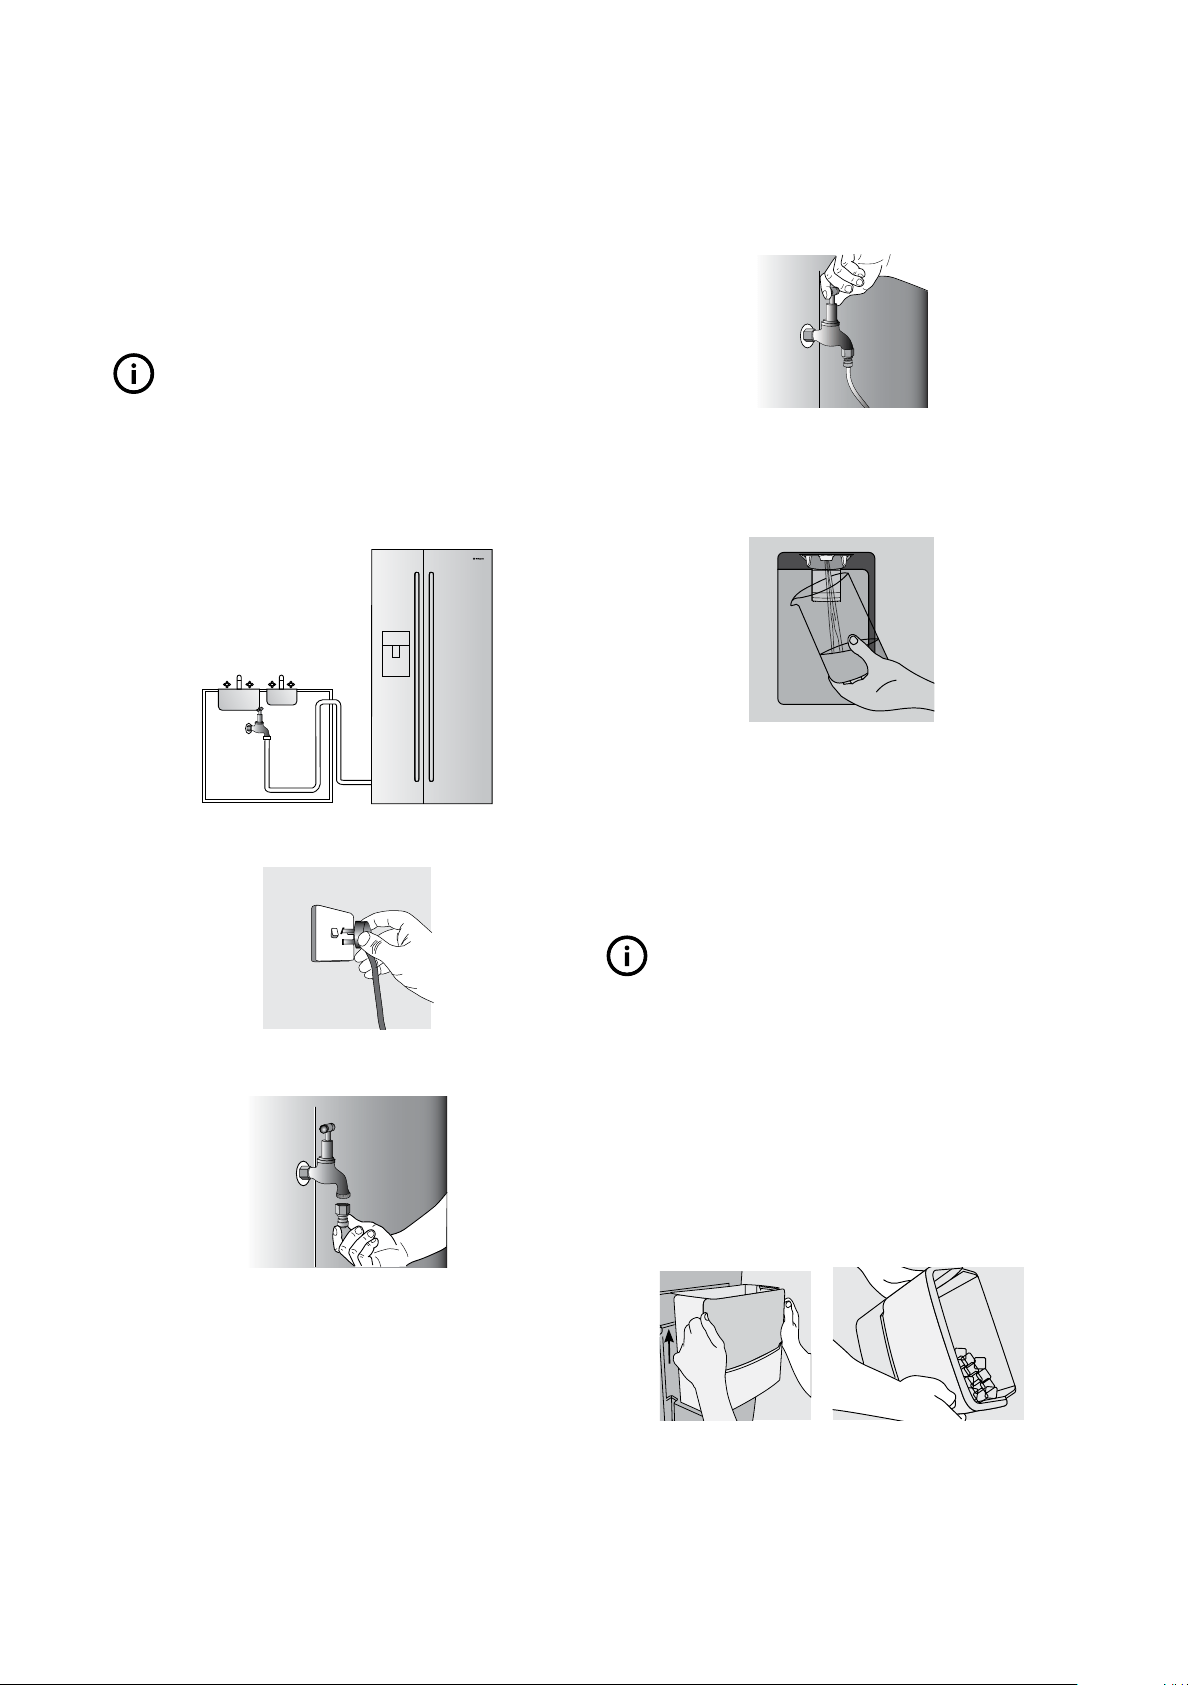
Water is to be connected as per diagram below.
1. Ensure that the refrigerator is disconnected from
power supply.
2. Connect tap fitting to water supply tap. Tap must be
close to the refrigerator.
3. Push the tube into tap fitting past insertion mark.
4. Connect other end of remaining tube length to inlet
on bottom right hand side of refrigerator.
5. Turn on water and check all joints and tubes for leaks.
6. Reconnect the power.
7. Move the refrigerator back into place being careful
not to kink or split the tubing.
8. Switch ON Water Dispenser.
Using a large container, run the water dispenser to clear
air from lines. This may take a few minutes. Purge and
dispense a minimum of 2 litres of water. Initial water
may be black in colour. This is residual carbon dust from
the filter and is non-toxic. If the water is slow to shut off
or the dispenser is dripping, air may still be in the lines.
Either purge more water through the system to remove
this air or allow some time for the air to be removed over
subsequent dispensing.
TIPS & INFORMATION
IMPORTANT
As the water cut off is not instant, leave glass under
dispenser briefly until water has stopped flowing to
avoid spills.
Clean and empty the dispenser drip tray regularly to
avoid overflow.
If you have not used the dispenser for some time, discard
the first seven or eight cups of water (contaminants
could have settled in the water pipes).
9. Switch ON Ice Maker. Once the refrigerator has been
running for at least 24 hours remove the ice bin and
dispose of the first few batches of ice to ensure that
impurities have been flushed from the system.
Always fit filter as per manufacturer’s instructions.
If you need to replace water tube, only use approved
water quality piping that meets the pressure
requirements.
DO NOT allow the water tubing to become kinked
or trapped under the refrigerator when moving the
refrigerator back into position.
Make sure your refrigerator is level to avoid uneven
or oversize cubes. Uneven ice cubes may lead to the
dispenser chute becoming blocked.
After installation, run the water dispenser for a few
minutes to ensure that all air bubbles have been
purged from the tubing. Dripping may occur if air
bubbles remain in the tube.
Replace filter at suggested intervals to avoid water/ice
reduction and irregularities in taste.
Remove and clean ice bin once a month, discarding
unused ice cubes. This will ensure fresh, clean ice and
smooth operation of your ice maker.
Clean and empty the dispenser drip tray regularly to
avoid overflow.
As the water/ice cut o is not instant, leave glass
under dispenser briefly until water or ice has stopped
flowing to avoid spills.
Always place ice in glass before filling with water to
avoid splashing.
When dispensing ice hold the container close to the
chute to avoid spray or spills.
If you are using your refrigerator for the first time, or if
you have not used the dispenser for some time:
• Discard the first seven or eight cups of water
• Discard any ice that the ice maker produces in the
first 24 hours (contaminants could have settled in the
water pipes).
WARNING
WARNING
Connect to potable water supply only. Do not put
fingers into the ice crusher. Surfaces there may be sharp.
X
X
X
TIPS AND USEFUL INFORMATION
Loading ...
Loading ...
Loading ...